
In this article, we will show you how to get started using Apple Photos to create projects with your photos. Whether you are creating a book, calendar or card, the process to get started is the same. If you take pictures using your iPhone or iPad your pictures are, by default, stored in Apple Photos, and one convenient feature of this program is the ability to create photo projects without having to open another program…once you’re all set up…Here’s how! Enjoy!
Set up Apple Photos to Create Projects
Did you know that you can create, design and purchase a photo project from a number of different companies (i.e. not Apple) within Apple Photos? It’s the best of both worlds really. You have the convenience of working within one program AND you have the flexibility to choose a company that meets your needs.
Apple no longer prints or produces photo books or calendars BUT still allows you to create and purchase these projects through printing companies all from within Apple Photos. You can still effortlessly jump between your photo library and your projects without ever leaving Apple Photos.
Before you can begin your photo project you need to add at least one “extension” to Apple Photos. We’re here to show you how. In this article, you will learn all you need to know to get started on your Apple Photos photo project, including how to:
- Install an extension
- Create a new photo project
- Find your new photo project
- Add more photos to your photo project
Let’s get started!

I’m a Perfect Pinnable!
What is an Extension?
An “extension” is an app that allows the printing company’s design program to be embedded within Apple Photos, giving you that seamless experience. Some people call them plugins, but it’s the same thing. These extensions are free and available in the App Store.
Depending on the type of project you want to create (e.g. photo book, calendar, or card), there are different companies you can choose to use. This means you can select the company that best suits your project: design features, print quality and price point.
How to Install an Extension
Before you can begin an Apple Photos photo project, you need to install an extension at least one printing company for the type of project you want to create. Extensions are available for free in the App Store.
The easiest way to install an extension is within Apple Photos:
In Apple Photos, click on the FILE menu (at the top of the window)
-
- Hover over CREATE to open the projects sub-menu
- Hover over one of the project options to open the sub-menu
- Click on the App Store (it will open an App Store window)
…but you can also do it in the App Store:
In the App Store, select the Program Extension
-
- Click on the name to learn more about each program extension
- Click the white button to the right of the name to add it to Apple Photos
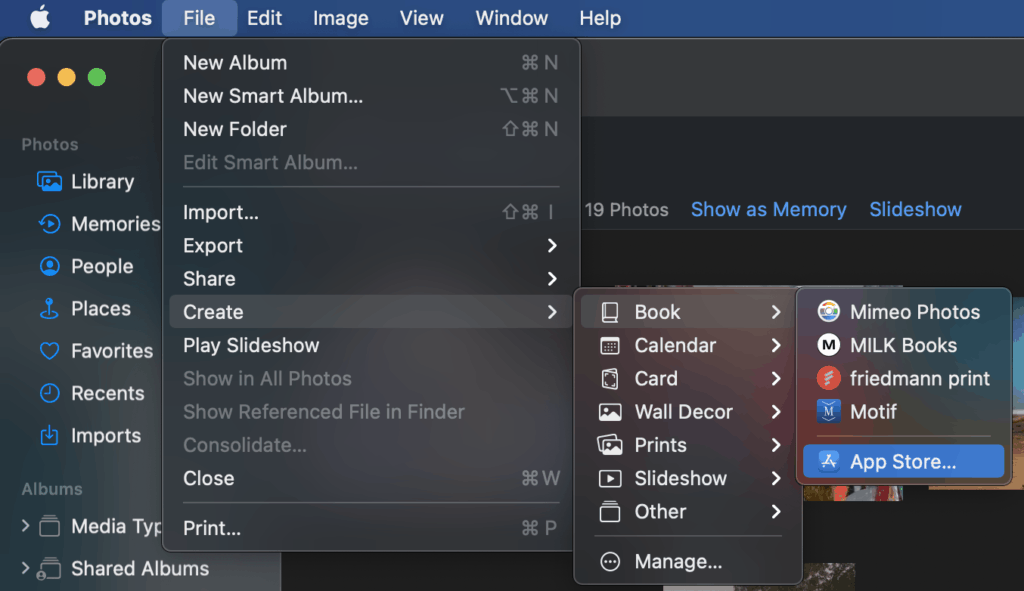
Apple Photos allows you to seamlessly create and purchase photo projects when you install an “extension.” Find the installed extensions or access the App Store from the CREATE menu.

In the App Store, you can choose one or more of the printing companies’ extensions to install in Apple Photos.
You may choose as many extensions as you wish. Each company has their advantages and disadvantages. You may choose a different company for each project if you wish. Depending on your internet and computer speed, it may take awhile for the program extensions to be installed.
Once you have installed an extension, you are ready to start creating your photo project. See the next section to learn how to create a new photo project in Apple Photos.
How to Create a New Photo Project
To create a new photo project use one of these three methods to access the CREATE menu:
- Click on FILE at the top of the window
- Right-click on a photo, album or memory
- Click on the little plus sign beside My Projects (left panel)
To access the CREATE menu, in the left-panel click the plus sign in the circle beside “My Projects.”
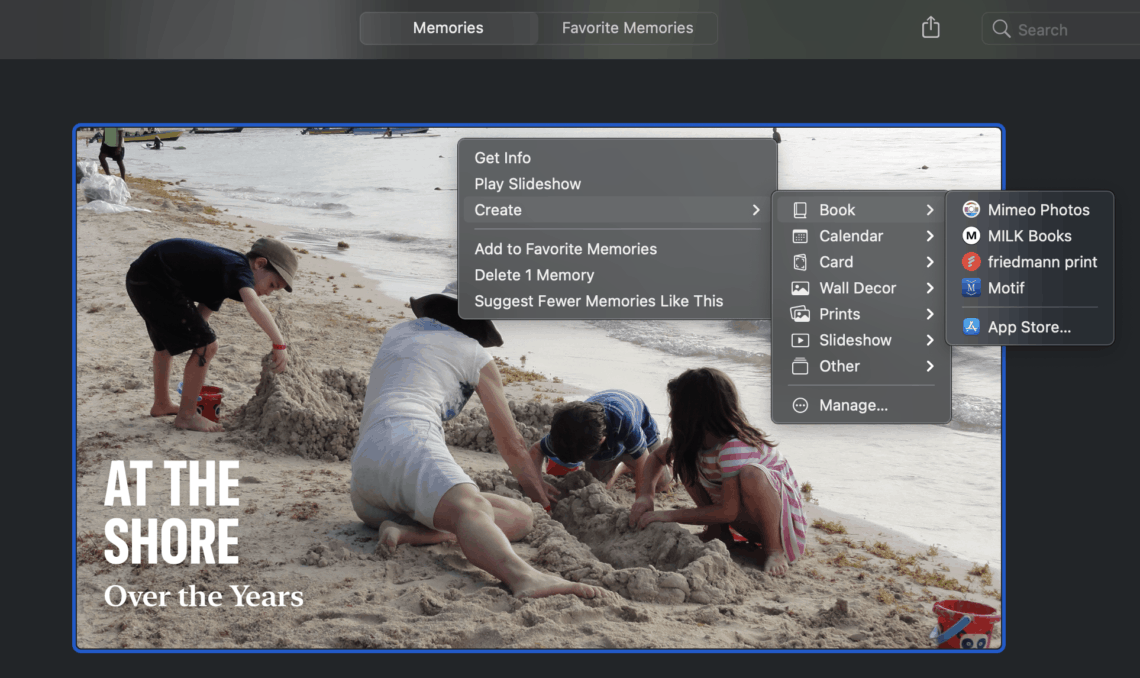
With the CREATE menu open:
-
- Hover over CREATE to open the projects sub-menu
- Hover over one of the project options to open the extension sub-menu
- Click on the company you want to use
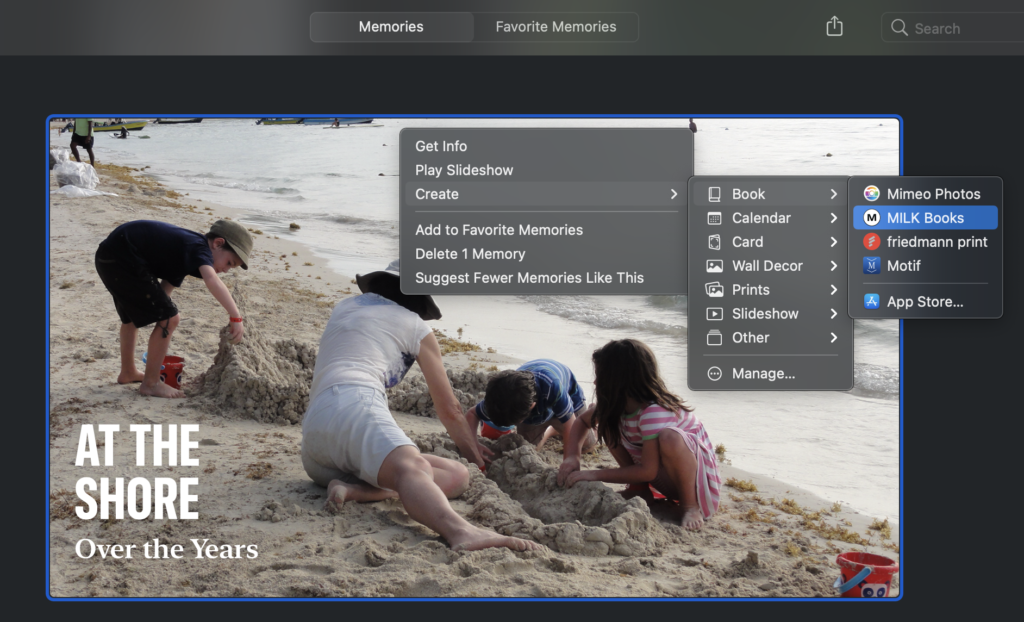
Start a new photo project by right-clicking on a memory to access the CREATE menu, and then select the company you want to use to design and print your photo project.
Once you click on the company, you will see a dialogue box appear prompting you to choose the size and style of your project. Choose wisely. You may not be able to alter your choice.
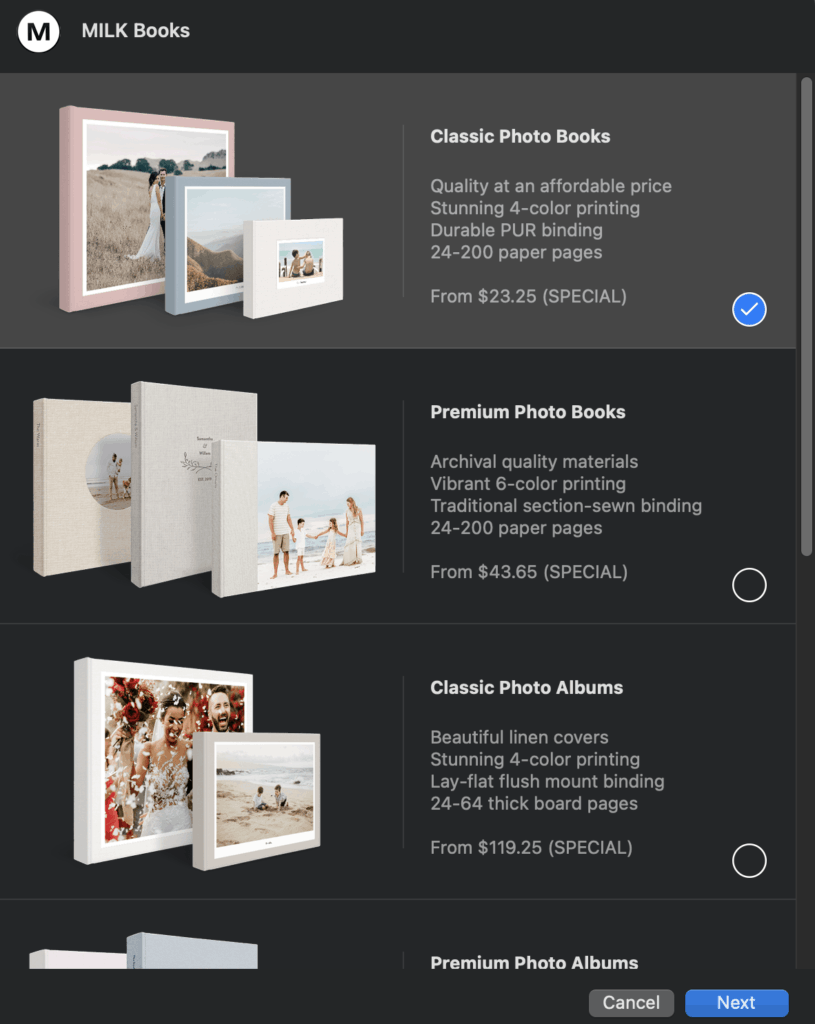
Before you can begin designing your project, you will need to make some decisions about your photo project.
Depending on the company and the project your design workspace will look slightly different, but in general you will see:
- project space in the middle
- thumbnails of project photos along the edge (often to the right or at the bottom)
- buttons to add text and change layouts
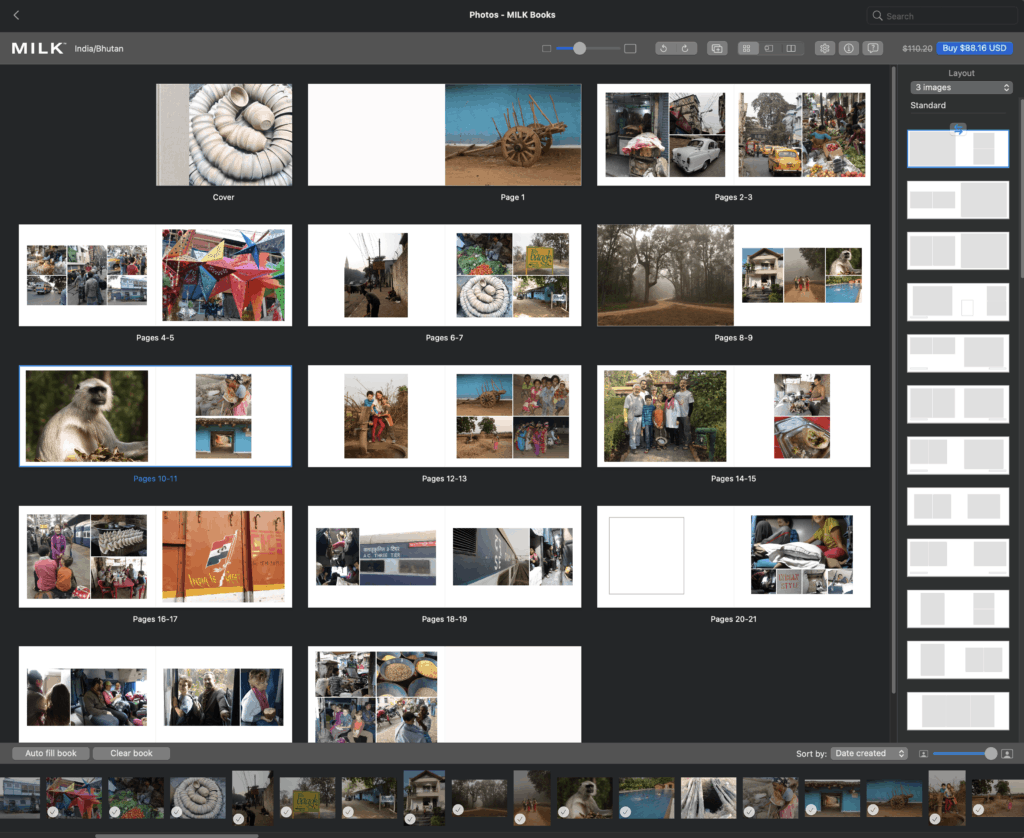
Example design workspace for a MILK photo book.
How to Find Your New Photo Project
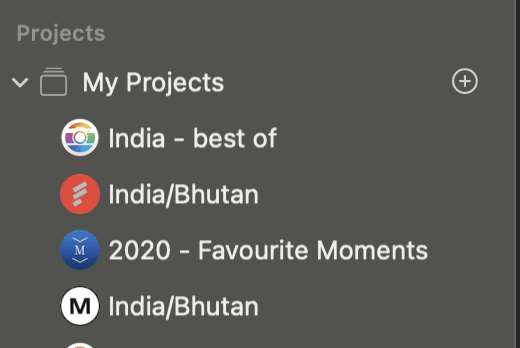
Once you have created your photo project, you can find it in Apple Photos on the left-side panel under Photos and Albums. When you click on the project title you will see the project in the main panel to the right.
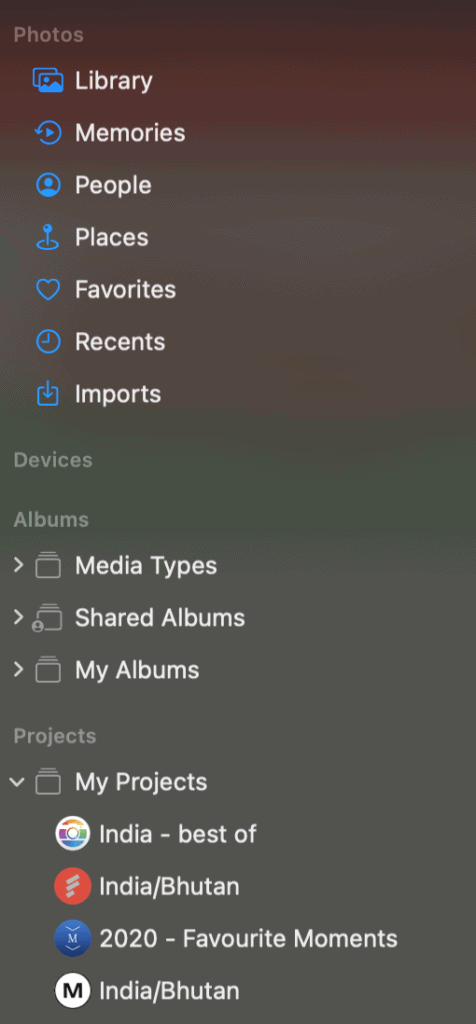
In the left panel, you can find all of your photo projects.
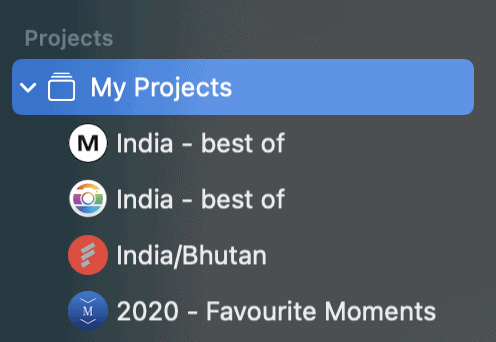
The icon to the left of your project name indicates the extension in which it is created.
How to Add More Photos to Your Photo Project
Once you have created your photo project, you may want to add more photos.
There are two different ways you can do this:
- Use ADD TO
- Drag and drop
Method One: Use ADD TO
- Select your photos, albums or memories you want to add to your photo project.
- Right-click one of the selected photos
- Hover over “ADD TO” on the menu
- Click on the desired Project
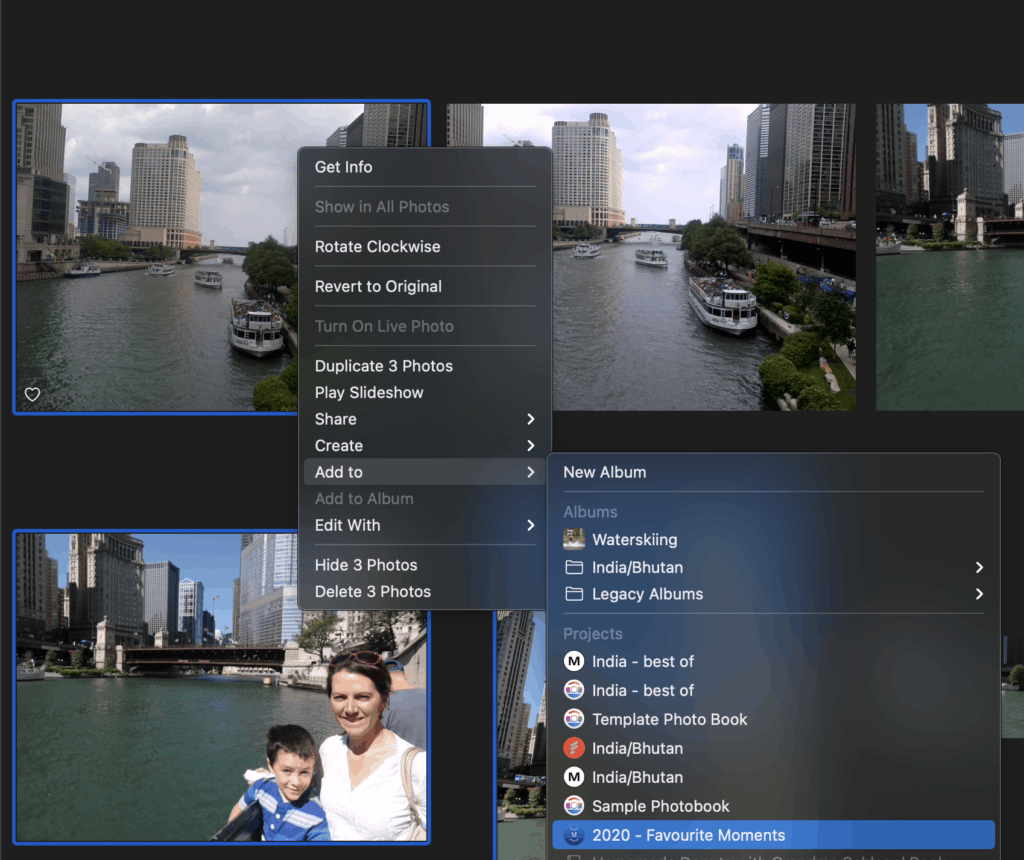
Add more photos to your photo project by right-clicking on the selected images and choosing your project from the “Add to” menu
Method Two: Drag & Drop
- Select your photos, albums or memories you want to add to your photo project.
- Left-click one of the selected items (keep it clicked!)
- Drag your selection to the desired project in the left panel (you will see a small red circle showing the number of selected items being dragged)
- Release when the desired project is shown in blue
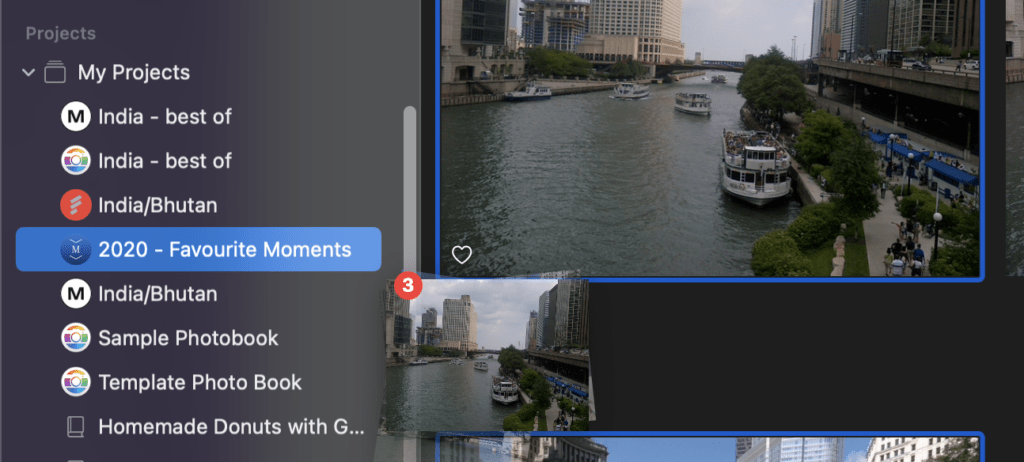
Add more photos to your photo project by dragging and dropping your selected photos onto your desired project
Once you have successfully added the photos, you can open the project and find your photos there ready to be included in your photo project
Now you are all set to get creative and start designing your photo project in Apple Photos!
Stay tuned. We will soon be sharing step-by-step guides to creating photo books using Apple Photos extensions: Mimeo and MILK.
Do you have any questions you want to make sure we cover in our photo book tutorials?
Want more photo book ideas and inspiration from Leanne? Sign up below:


bjmascara
March 27, 2021 at 10:32 amWe will soon be sharing step-by-step guides to creating photo books using Apple Photos extensions: Mimeo and MILK. Where can I view these 2 tutorials. I love your easy steps and instructions. I have been watching your site for years. thank you so much
Leanne Lobe
March 29, 2021 at 8:15 amThank you so much for your kind words and interest in this topic. The Mimeo and MILK tutorials are coming soon (scheduled for April 2021). If you want to be notified when they’re published please subscribe for updates. Let us know if you have specific questions so we can address them in our tutorial.