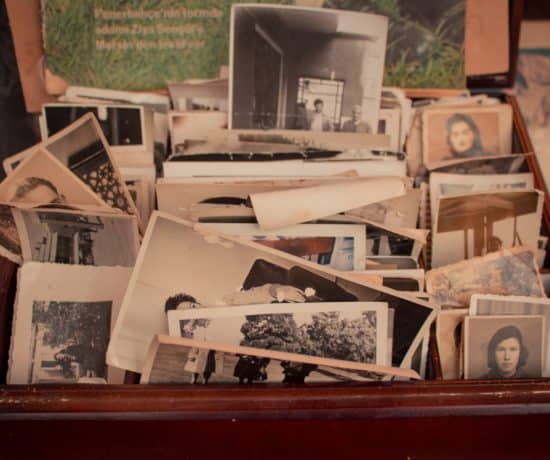
Though Google Photos is not generally a photo system we recommend here on the blog (for various reasons), we also know that many people use and love this system, so in this new article, our regular contributor Selin Tagmat covers everything you need to know about how to optimize this system to work for you. Take it away, Selin!
Is Google Photos for you?
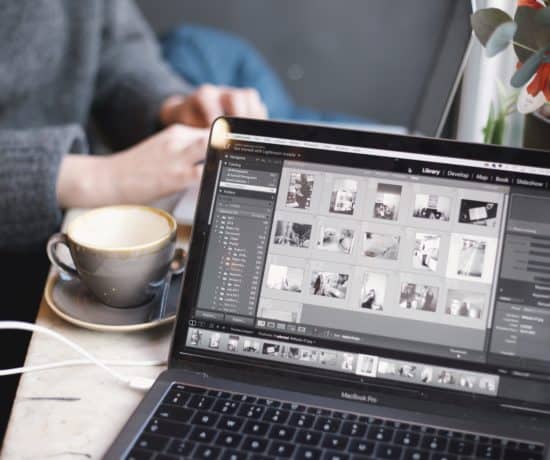
Google Photos is a photo storage and sharing service that offers plenty of possibilities to enjoy memories, organize and edit photos, create videos, collages and photo books, and interact with friends and family members over shared photo albums. Let’s discover Google Photos together step-by-step to see how to make the best use of its features for photo organizing and what aspects to keep in mind! Here we go!
Step #1 – Install Google Photos
Google Photos has an easy-to-use and simple interface that can be accessed on a variety of devices. This means, you can feel free to switch between your phone, tablet and computer. Your online photo collection will be available in any of them as long as they are connected to the internet. To use it on a smartphone or tablet, you just need to install the app for iOS or Android. On the other hand, if you want to organize your photos on a wider screen, upload photos from your computer archive or back up photos from your external drive, then you can use it on the web browser of your computer. You will be asked to sign in with your Google user account to use this service.
I’m a Perfect Pinnable!
Step #2 – Back Up & Sync
Once you install the app on your mobile device, it will ask you right away whether you want to back up and sync your photos to Google Photos. If you don’t want to do this right away, you can always set this up later too by simply clicking on your account settings on the top right corner of the main window.
The backup and sync feature of Google Photos is very handy to ensure that the photos that you take with your phone are instantly backed up online, so that in case you lose your phone or it is broken, you can still access them from another device.
One of the most frequently asked questions is whether deleting a photo on your phone will also delete it from Google Photos. If you delete a photo on your device from the gallery app of your phone and not from the Google Photos app, it will be still saved online. Having said that, you should be cautious to use this platform as your single backup. Once you delete the photo on your device, the copy on Google Photos will become the only copy you have. Since the system involves syncing, which is quite different from only backing up, there is always a chance of losing photos by mistake as you work across devices.
It’s always wise to have a complete copy of your photo collection set aside elsewhere. If you want to be sure what kind of backup system will work best for you, you can refresh your knowledge by taking a look at our previous blog post on backup basics.
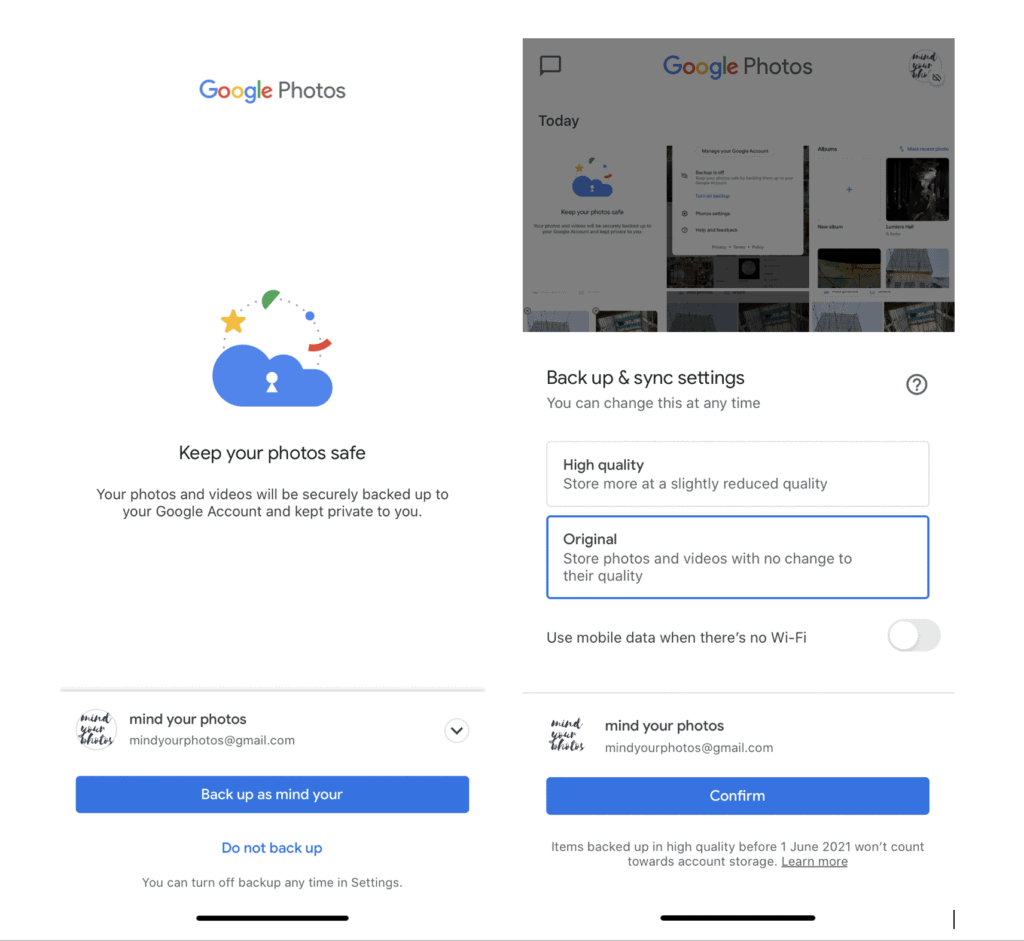
If you decide to back up and sync, Google Photos will keep a copy of all photos and videos you have on your device so far, as well as the ones that you will capture beginning from that moment, as long as this feature is on. For only a one-time backup, you can simply turn it on, wait until the backup is done and then turn it off.
Consider the Quality
There are two options in terms of the quality. One is to keep the “original quality.” As this will count against your Google One cloud storage, make sure that you have enough space for the days to come. Otherwise, you can opt for backing up your photos and videos as “high quality,” which is reduced in size, but still pretty good quality (16 megapixels for photos and 1080p resolution for videos).
Google Photos has been a winner for many users since it offered unlimited storage for those who felt it was enough to keep their photos and videos in “high quality.” However, it was announced not too long ago that a new storage policy will go into effect starting June 1st, 2021, and there will be no more free unlimited storage for any type of photos. As a new Google user, you will still get 15 GB storage with each new account, but if you need more storage, you will have to upgrade for extra cloud storage.
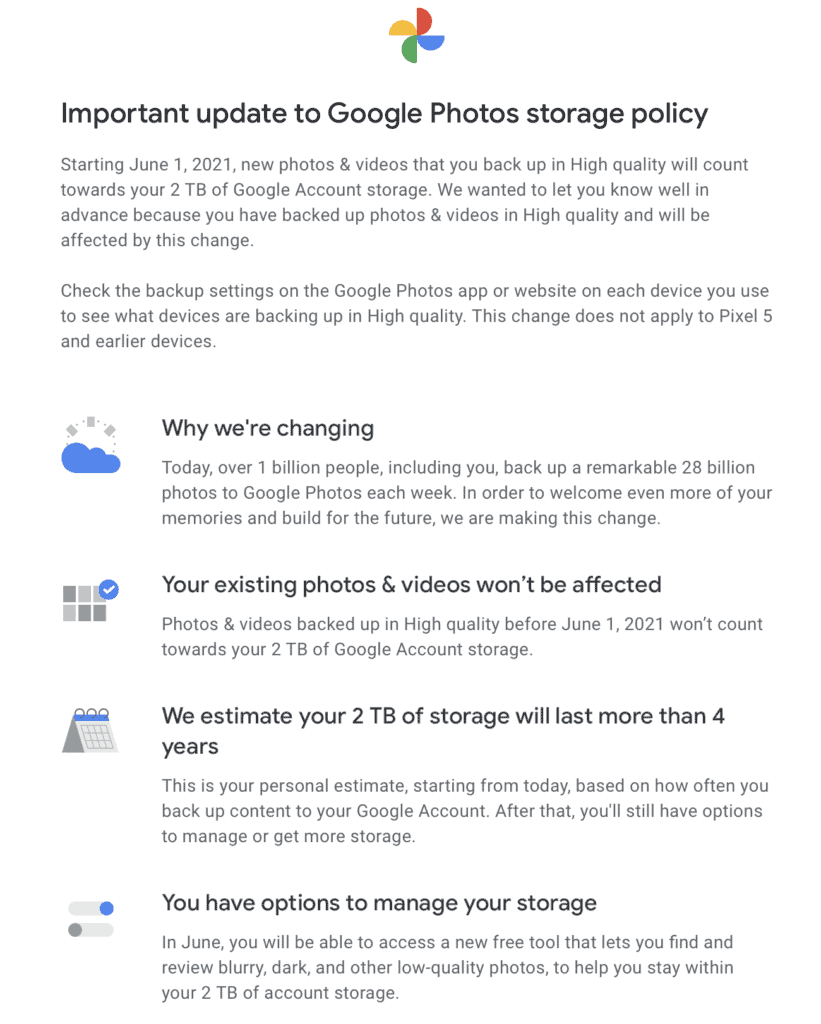
You can benefit from unlimited storage for “High quality” backups until June 2021. And from then on, they will count as a part of your cloud storage space.
Step #3 – Choose an Upload Method
With Google Photos, it’s possible to select and upload individual photos, or backup and sync an entire photo collection. Here is a quick tutorial about different ways to upload your photos:
A. Uploading a Selection of Photos from Your Phone
To upload new photos from your phone on the Google Photos app, click on Library and create a new album.
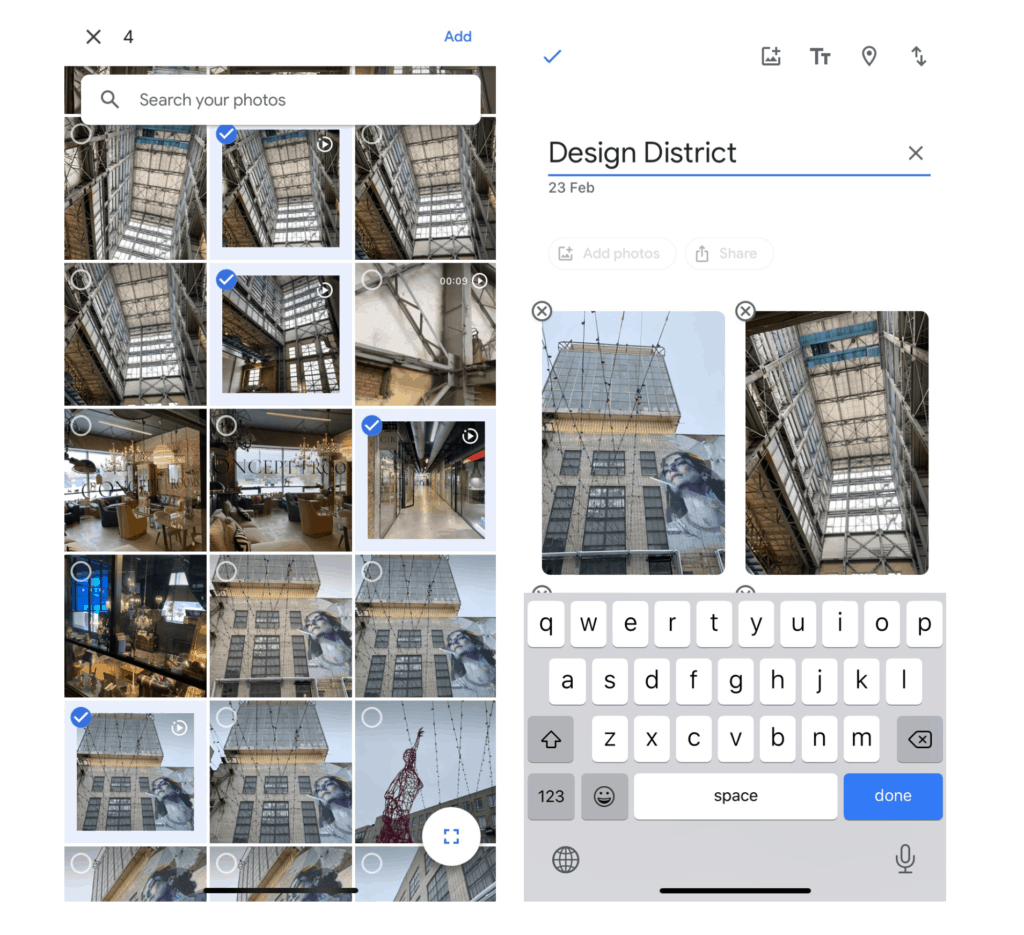
Select the photos to be uploaded and click Add. Then, type the name of the album and click on the arrow at the top left corner. Your photos will be uploaded both on the new album and photo gallery on Google Photos.
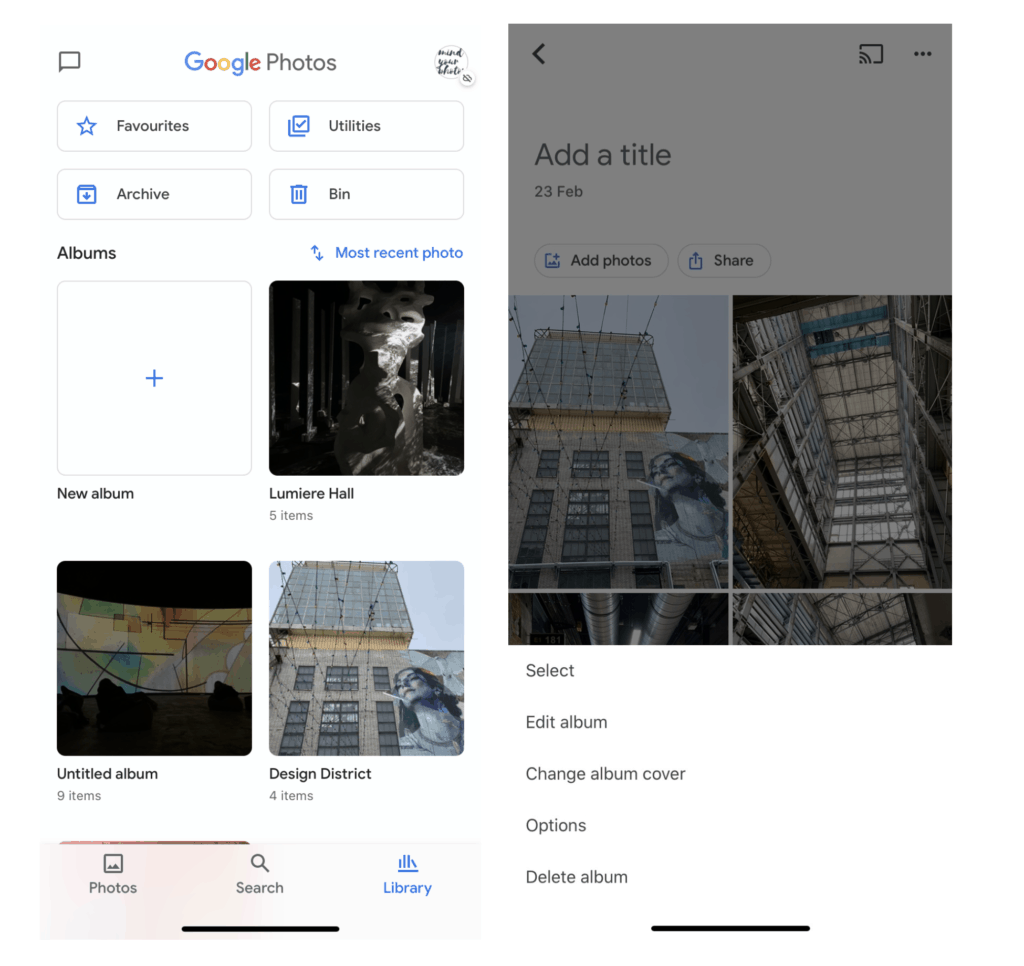
Your new album should appear on the Library view. To set a cover photo for your album, tap on the album and click on the three dots on the top right.
B. Back up and Sync Photos from Your Phone
If you did not set the backup and sync at the time of installing and launching the Google Photos app on your phone for the first time, then you can still do it later on.
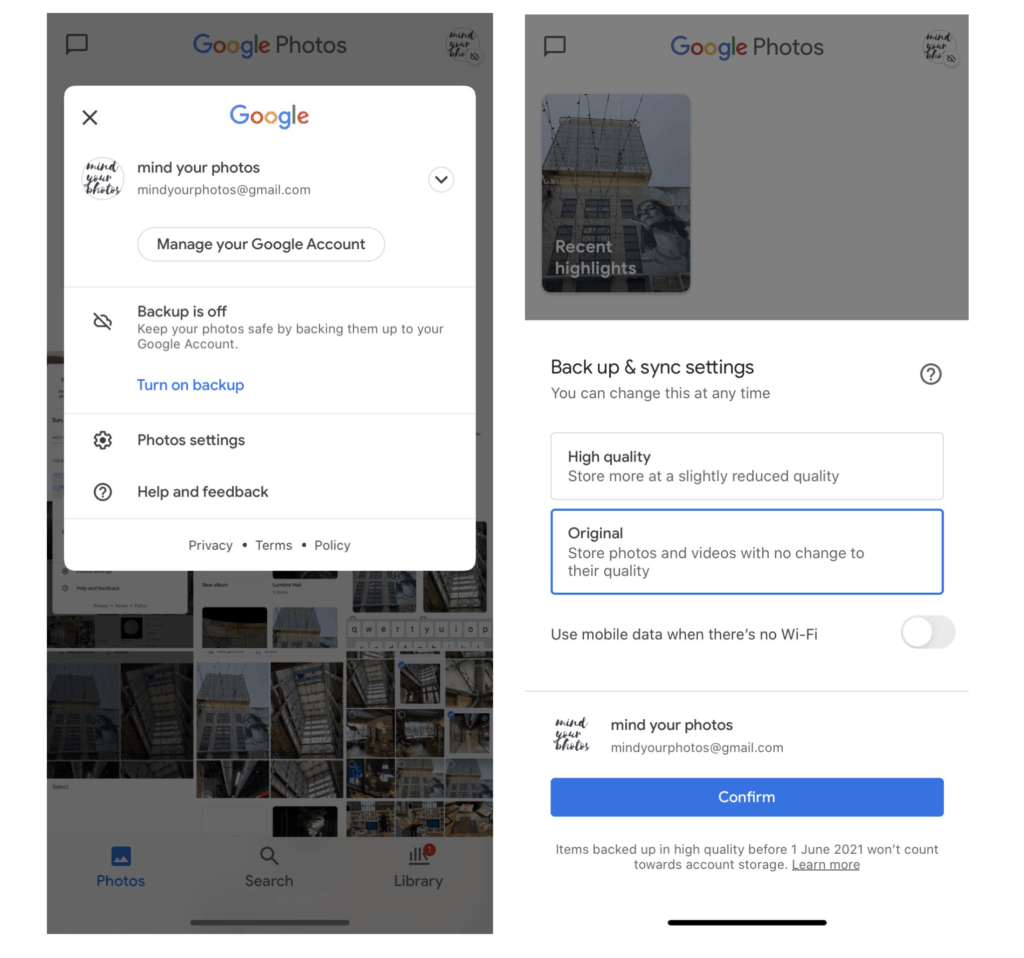
Open the app and click on your account at the top right. Then you can turn on the backup and select the quality you desire for your photos to be stored.
C. Upload a Selection of Photos from Your Computer
You might have some photos on your computer or external hard drive that you want to upload on Google Photos. You can use the web browser version to select and upload these photos manually. One way to do it is to simply drag and drop your photos on the Google Photos window on your browser. But it is also possible to view and select your photos from the folder structure of your computer.
On the web browser version, just tap on the Upload button on the top right and select the photos that you want to upload.
D. Back Up and Sync Photos from Your Computer
What if you want to set up an automatic photo backup from your Mac or PC? You can do this by downloading the Backup and Sync app. Once you set it up based on your preferences, it will keep on working in the background.
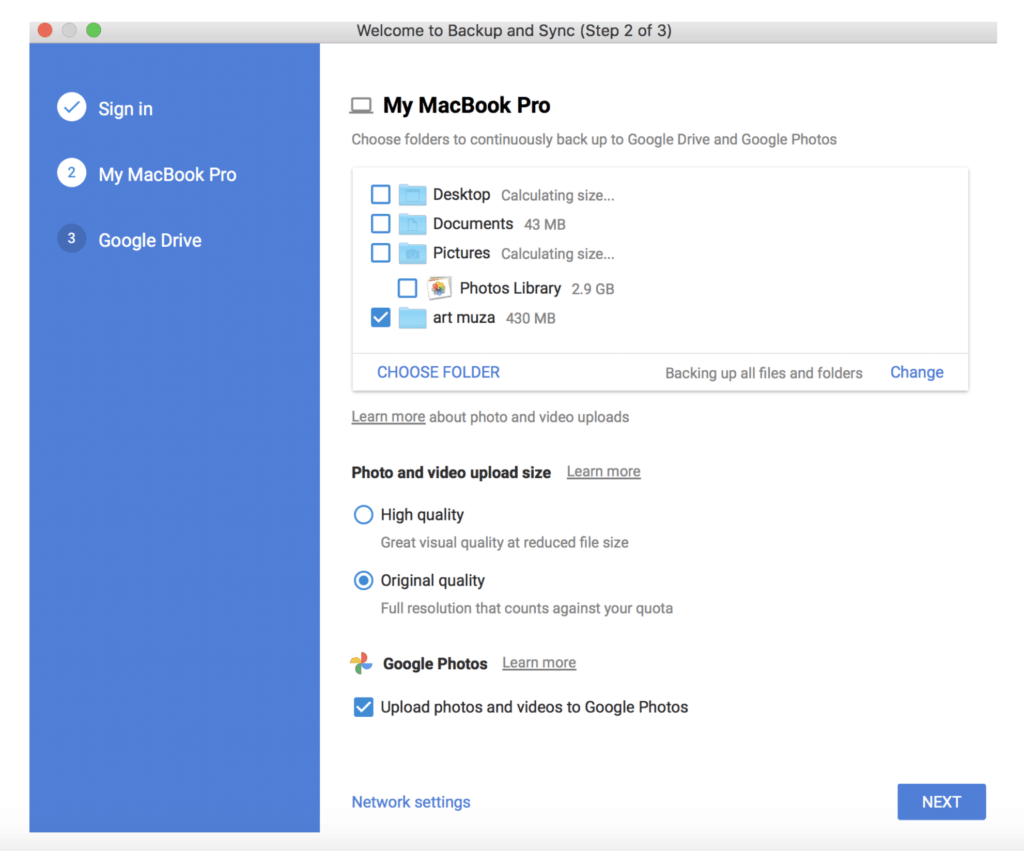
On the phones, the backup and sync service is turned on and off directly from the Google Photos app and it only backs up and syncs photos on Google Photos. The one on computers backs up and syncs the selected folders to Google Drive and if selected, also to Google Photos.
Note that the backup and sync system for computers works in a different way than the one for phones. Therefore, it is very important to be aware that as soon as this backup and sync service is on, it will keep on syncing the folders on your computer with its target folder on Google Drive. Therefore just be sure that you understand well what syncing means: if you delete a photo on your computer, it will be also synced with Google Drive and might be deleted there. However it will stay on Google Photos.
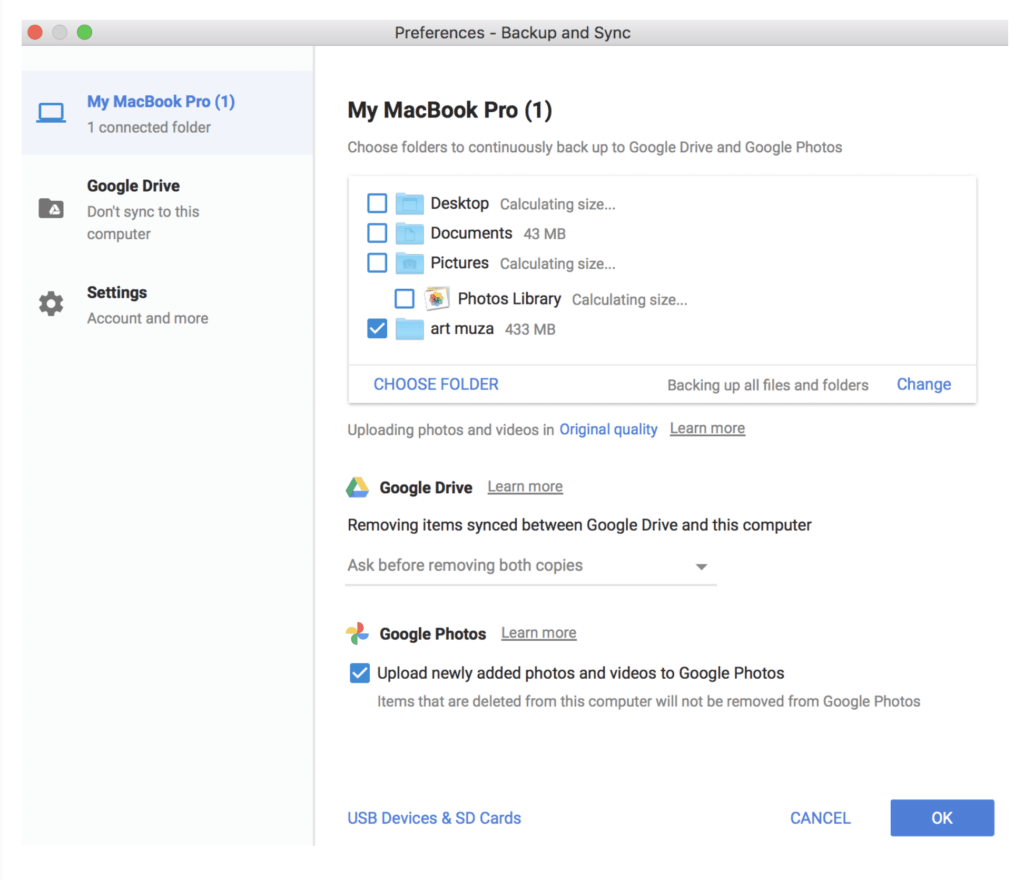
Go to Preferences on Backup and Sync on your computer to read and select the options well! Under Google Drive, you can select what should happen if you delete a synced item on your computer. As you see under Google Photos, synced items deleted from the computer will not be removed from Google Photos.
Step #4 – Organize your Memories
Google Photos offers a variety of interesting features that can help you to organize your photos such as the automatic grouping based on people, places and things. Note that not all features might be available in all countries due to privacy regulations; however, most of them work well in the US and Europe. On another note, the system needs a certain amount of uploaded photos in order to be able to group them, so don’t get surprised if you don’t see these features as soon as you start using the system.
In order to benefit from the automatic grouping of people and places, you should give the necessary permissions on your device and Google account. If your camera was not allowed access to your location, then your photos do not have this information embedded and as a result, Google Photos cannot offer you to view and organize by location, for example.
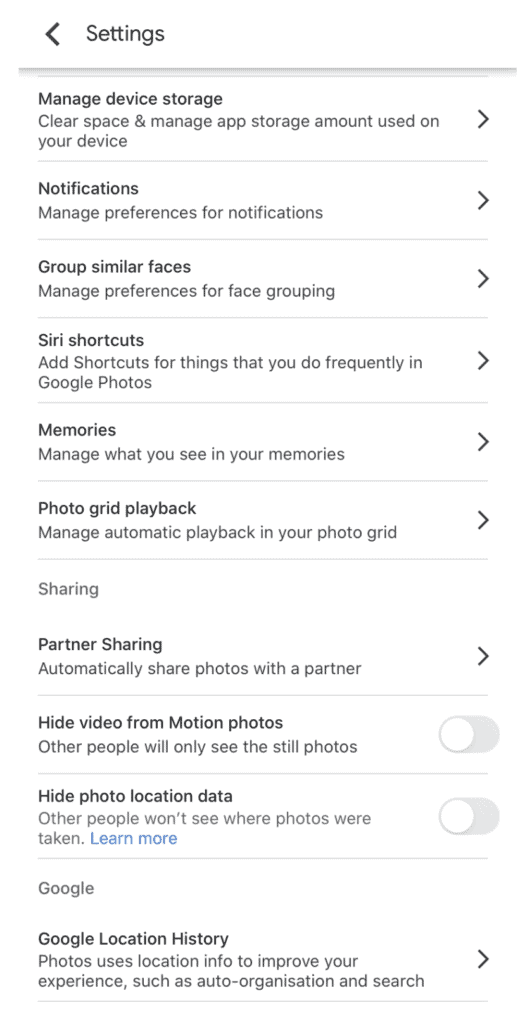
Go to your account by tapping on your thumbnail at the top right of the Google Photos app or web browser version. Click on Settings. If you want to use face recognition and location features, make sure to turn on two settings: Group similar faces and Google Location History.
Organizing by People
One of the strongest features of Google Photos in terms of photo organization is its face recognition capability, which allows users to search for the photos and videos of a specific person without needing to tag photos manually. It works also to identify the photos of your pets. You can add names to each face if you like to do so.
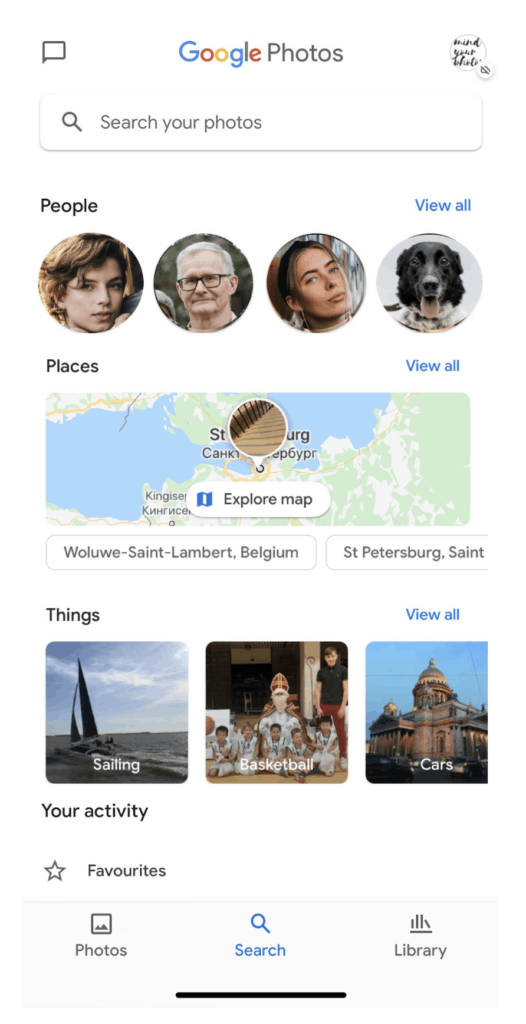
Search feature allows to view and organize photos by people. On mobile devices, you can do this either by clicking on the photos of people that are already displayed on the Search window or by simply typing People in the search field.
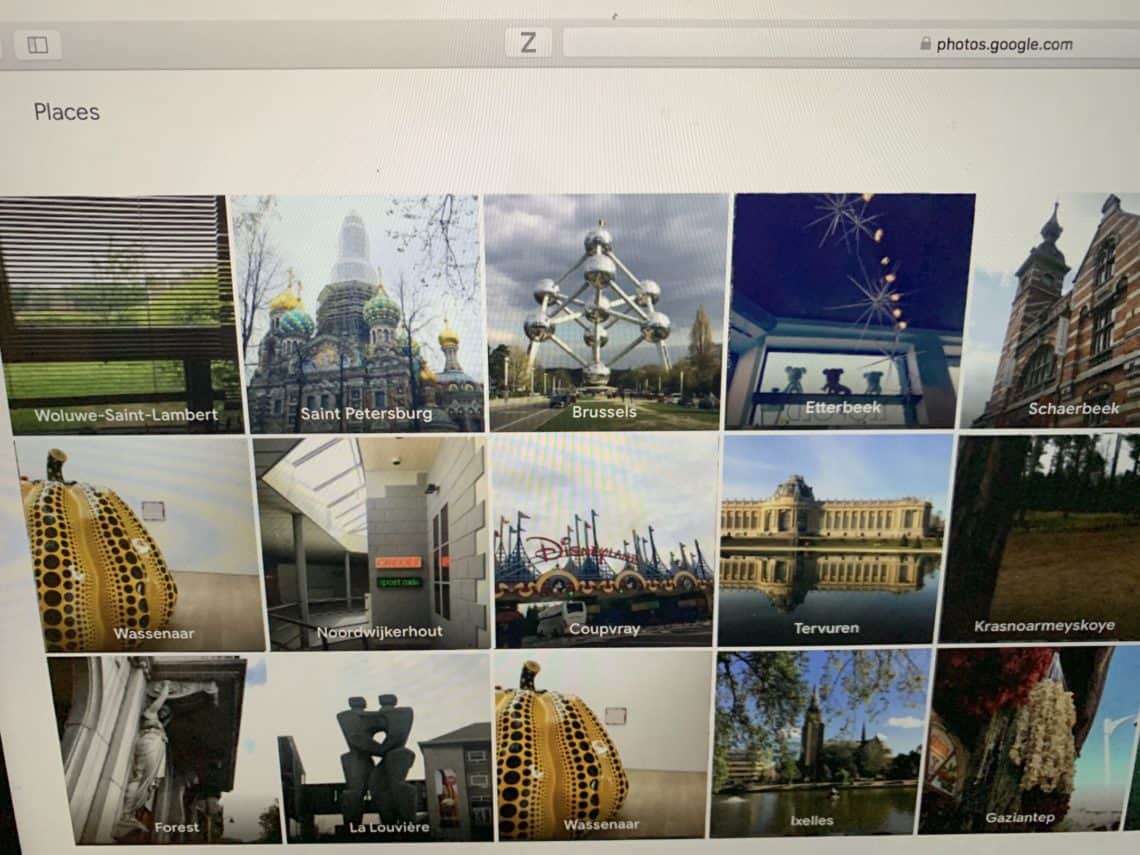
Organizing by Places
Based on location history, Google Photos automatically groups photos for each location that you visited.
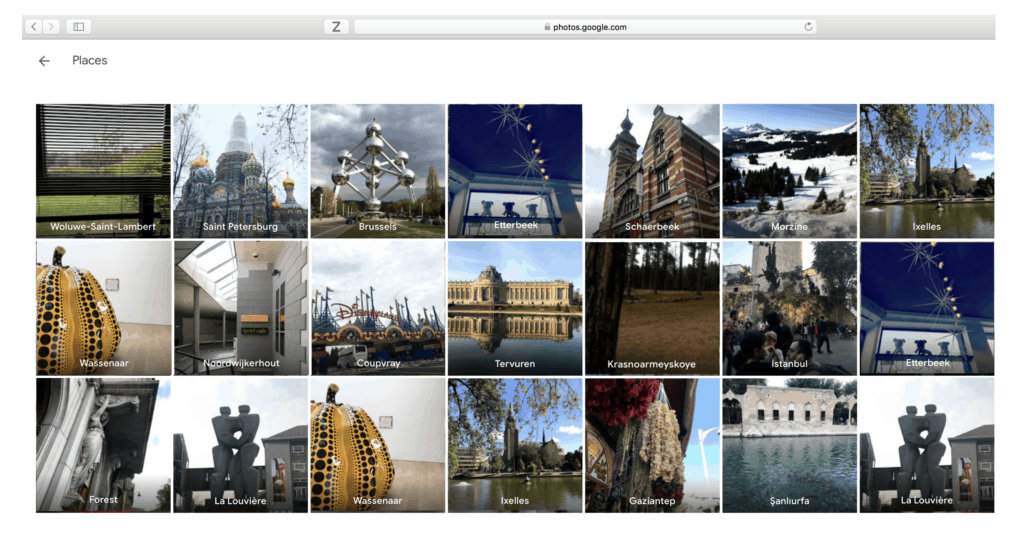
On the web browser version, you can find automatically grouped photos such as Places, People and Things under the Albums. There is a separate album for each location.
Organizing By Things
Under Things, photos are grouped based on keywords. This is actually like a summary of your lifestyle. For example in my case, I have albums organized with the keywords such as museums, sailing, baking, parks that really represent the things that I like and take frequent photos of, but also other things like legos and lattes that are also indispensable parts of my life.
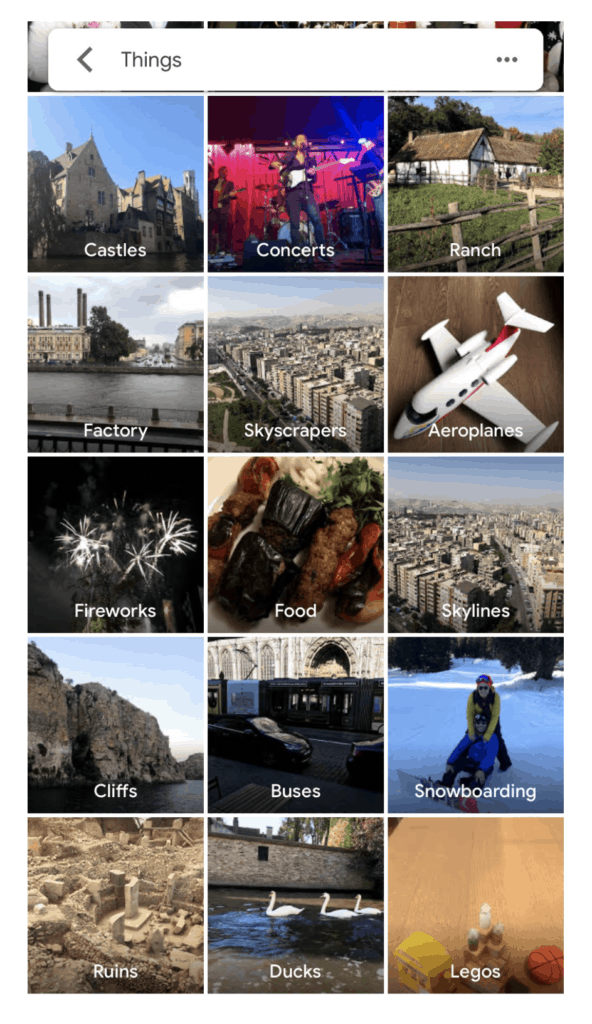
Here you see the automatic grouping of photos in terms of their content based on any kind of keyword you can imagine!
Organizing with Albums
When it comes to creating albums, you can either gather the photos of your choice or use the photos automatically grouped by people, location and things.
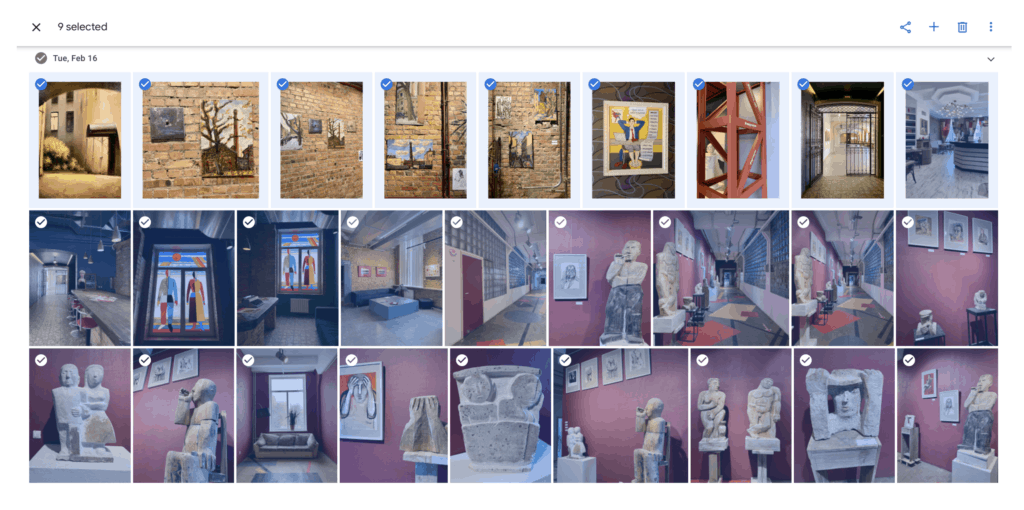
On the web browser version, you can select multiple photos and videos by simply clicking on their top left corner. Then you will see some options appear on the top right of the Google Photos window. Click on the three dots to mark them as favorite, edit their date and time, edit location, download or archive them. Click on Create button (+) to create a new album, shared album, animation or collage with them.
On the mobile app version, click on the three dots at the top right to select the photos and create an album with them.
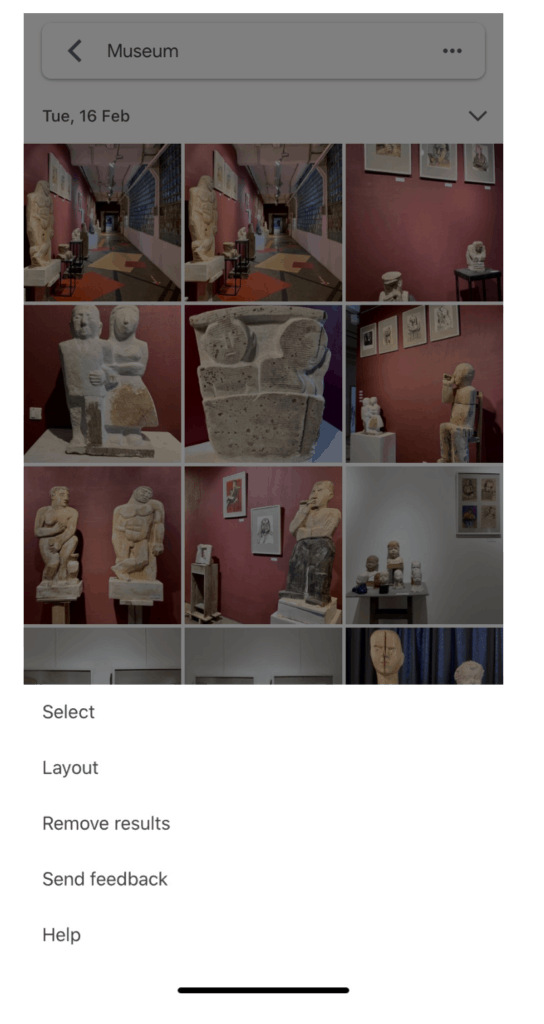
Here you can also remove the results that you don’t find relevant in an automatic grouping. This will only remove it from this grouping, but not from your photo collection on Google Photos.
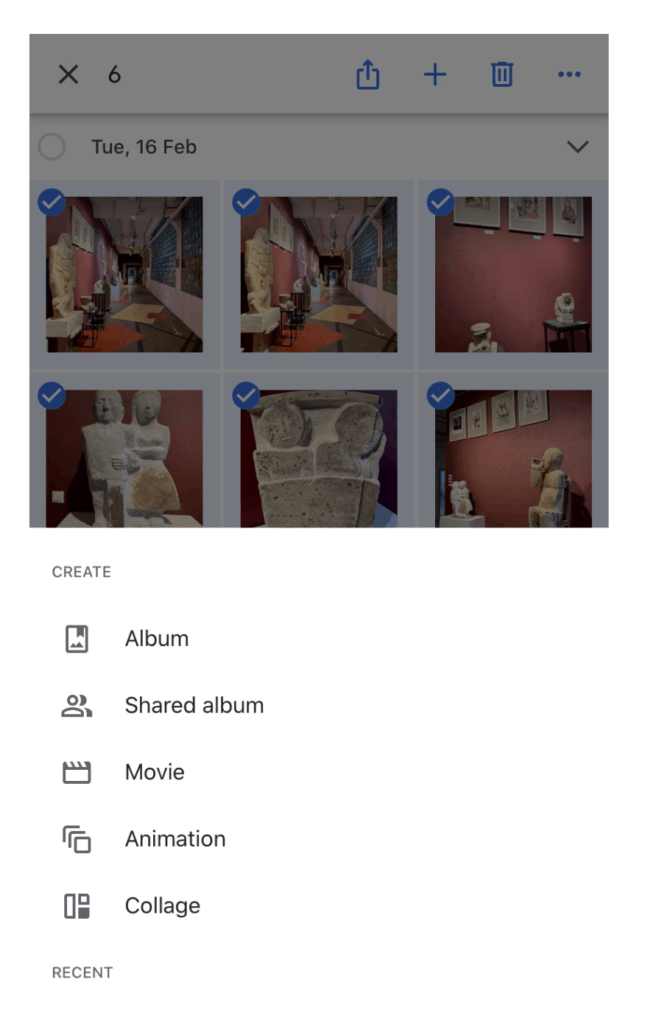
Once you select the photos, click on the Create (+) button to create a new album or a shared album where you can give access permission to others. You can then find all your albums under the Album view of your app.
Photo sharing with Private Chats
Did you know that you can interact with your family and friends on the albums you share with them on Google Photos? This is an interesting feature for those who would like to share their photos privately, yet still like to exchange comments on them with their loved ones, just like on social media.
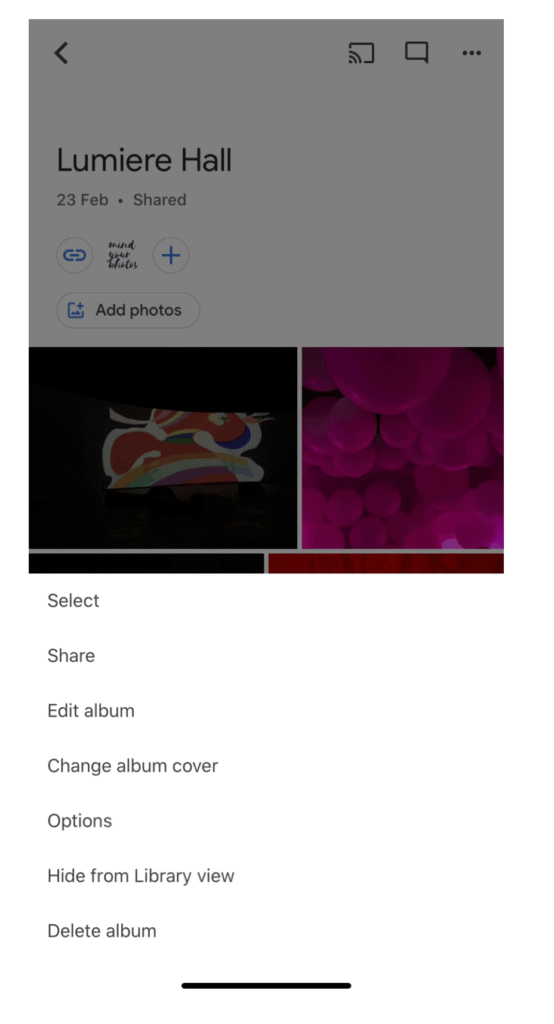
Click on the three dots at the top right of an album to share your album with your family and friends by email, message, social media channels or online chat apps, such as WhatsApp.
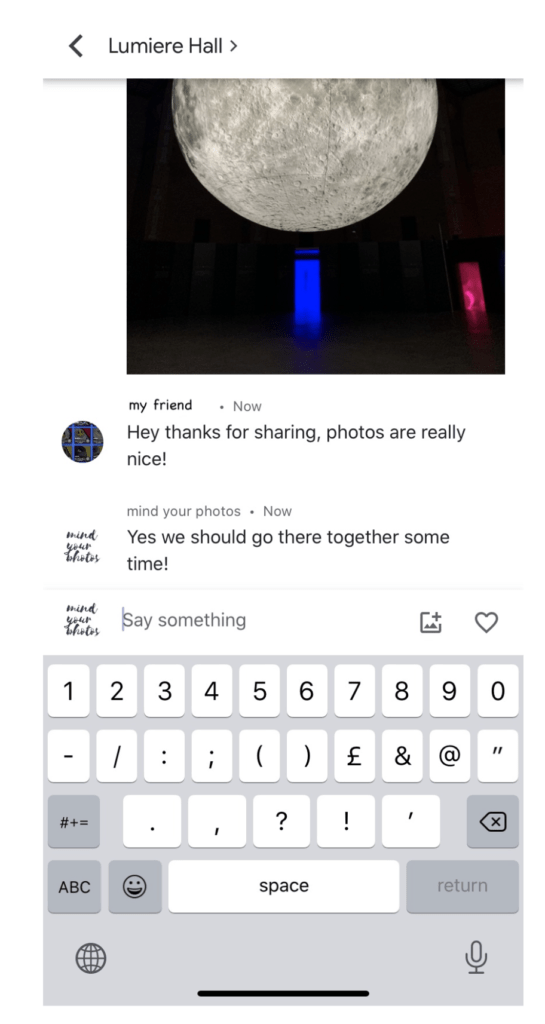
Once you create a link to invite someone to take a look at your album, they will be able to comment on a private chat that will be available only for those who have access to that album.
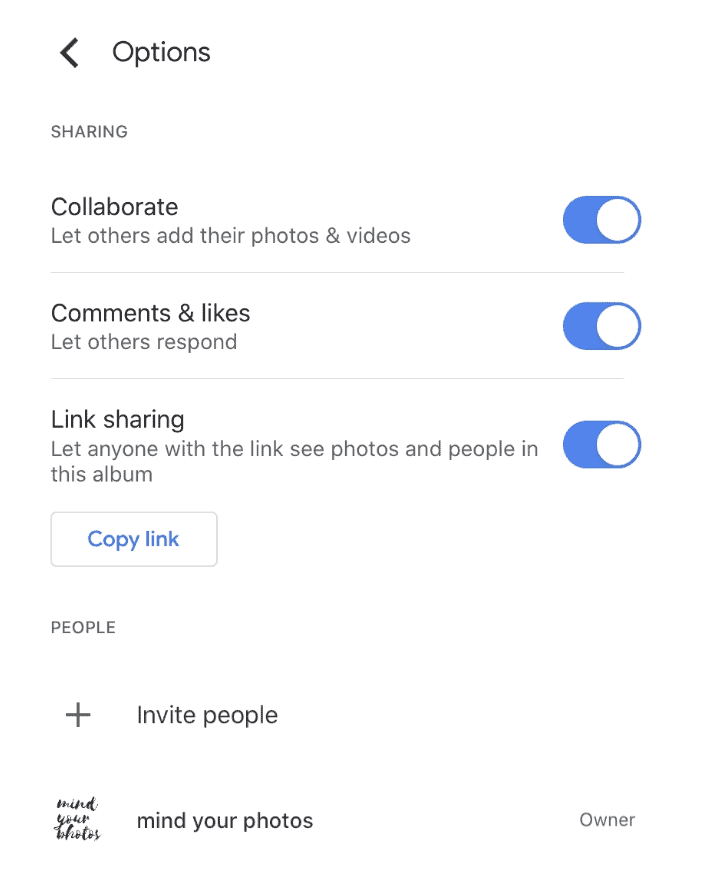
From the same menu where you find the Share button, you can access your album settings by clicking on Options.
How to Free Up Space
If you want to free up some space on your phone and want to delete the photos and videos that are already uploaded on Google Photos, then there is an easy way to identify them and delete them from your device at once.

Go to your account by tapping on your thumbnail at the top right of the Google Photos app or web browser version. Click on Settings and Manage device storage. Once you tap on Free up space, Google Photos will inform you about the amount of photos that were already uploaded online and will give you the possibility to delete them from your device.
However, remember to make sure you have an extra backup of your photo collection on another platform, such as another device, external hard drive, Google Drive or any other cloud system as having only one copy in Google Photos is not enough to keep your memories safe.
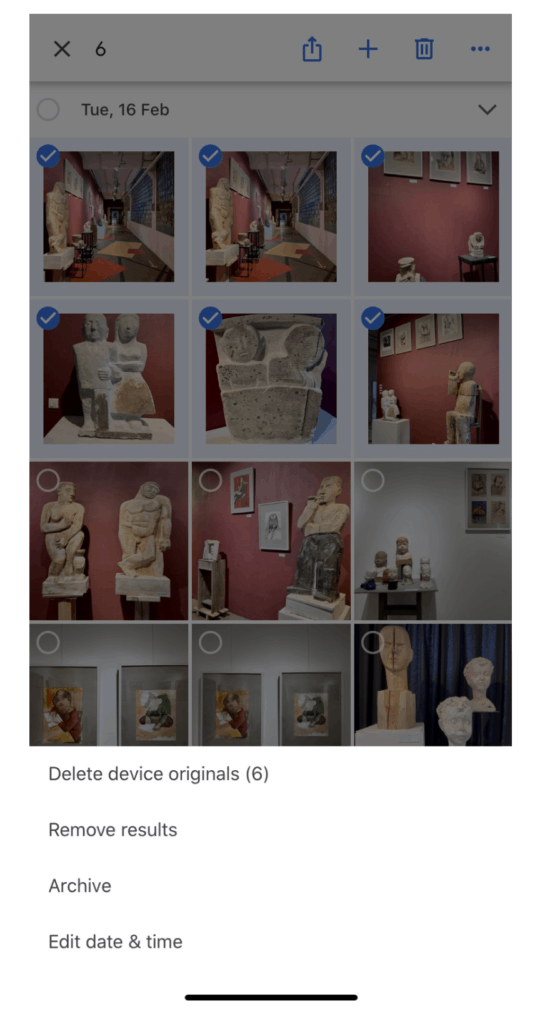
You can also delete your device originals for the photos of your choice by simply selecting them on Google Photos app or web browser version, clicking on three dots at the top right and clicking on Delete device originals. This will delete the photos on your device, but keep them on Google Photos.
You want to tidy up your online photo gallery? For photos of minor importance that you want to keep on Google Photos, but not necessarily on the main photo gallery, just click on Archive. You can find them later on the Archive tab.
Copy Photos between Google Photos to Google Drive
Google once had an integration between its two platforms, which made it easy to make them work together. However, following a change in the Google services, moving photos and videos between the two now requires some manual work.
To copy photos from Google Photos to Google Drive, you will need to use the app on your mobile device. Select photos, click on Share and tap Google Drive. To do this you need to have the Google Drive app installed on your mobile device.
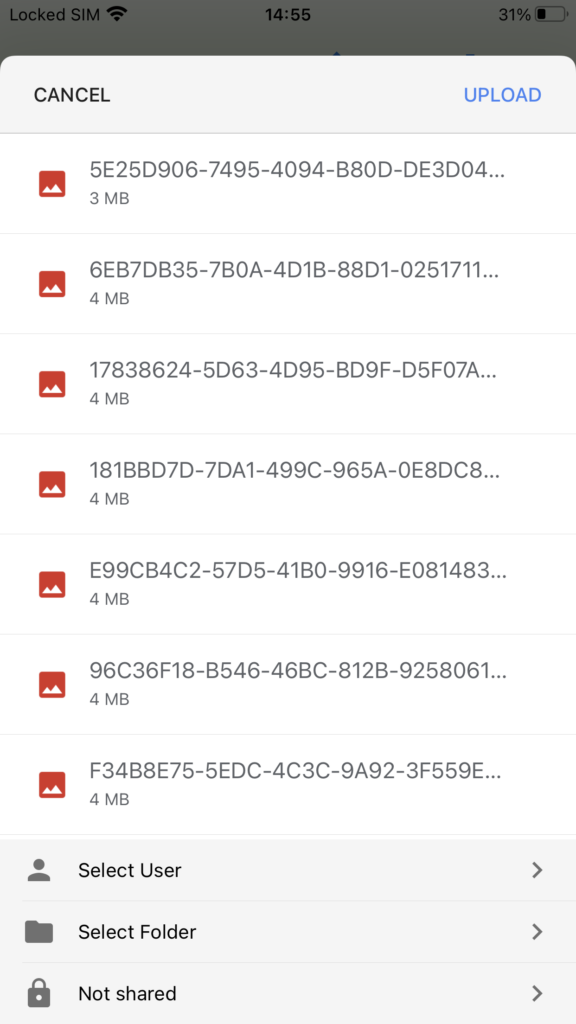
If you have multiple Google user accounts, here you need to select the user and then the folder in the Google Drive of that user for your photos to be copied.
To copy photos from Google Drive to Google Photos, use the web browser version on your computer. Without any selection, click the Upload button at the top right and select Google Drive.
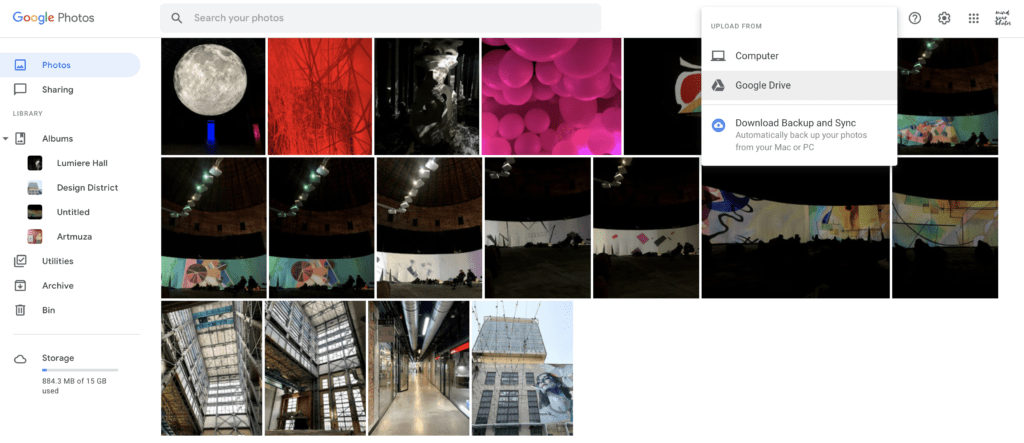
From the same tab, you can upload photos both from your computer and Google Drive.
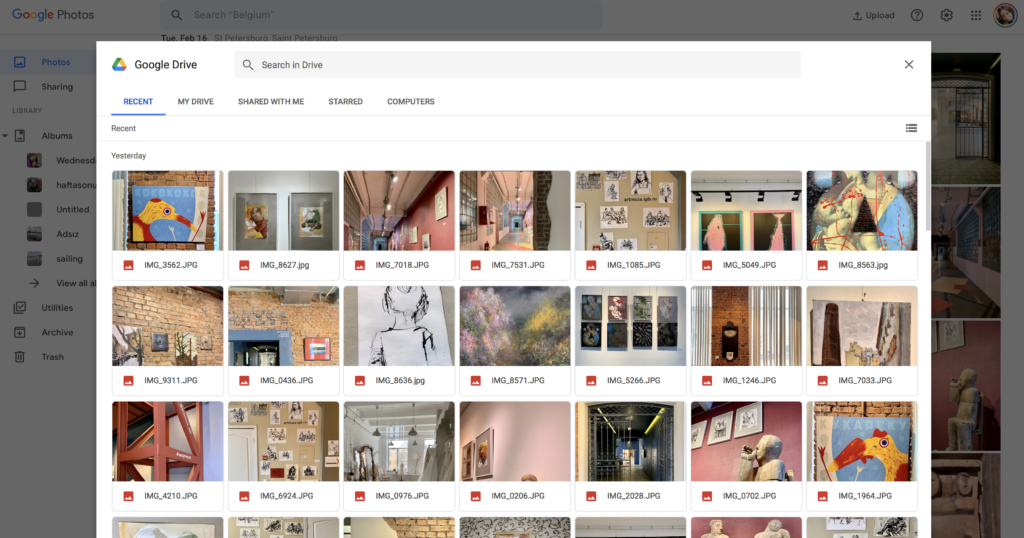
When you select Google Drive, you will be able to view the recently uploaded photos, as well as drive folders. Here you can simply select the photos or folders that you want to copy to Google Photos.
As there is no direct backup and sync function between Google Photos and Google Drive, and that you simply create copies of photos between the two, your changes or deleted photos in one of them will not affect the other.
If you want to export out of Google Photos completely, you can extract from Google Drive, but you can also use Google Takeout – do whatever is the easiest for you!
Step #5 – Enjoy Editing & Sharing
Google Photos offers some fancy features for editing, sharing and working with your photos to enjoy your memories to the fullest. When you click on one of your photos to view it, a wide range of interesting features are hidden all around.
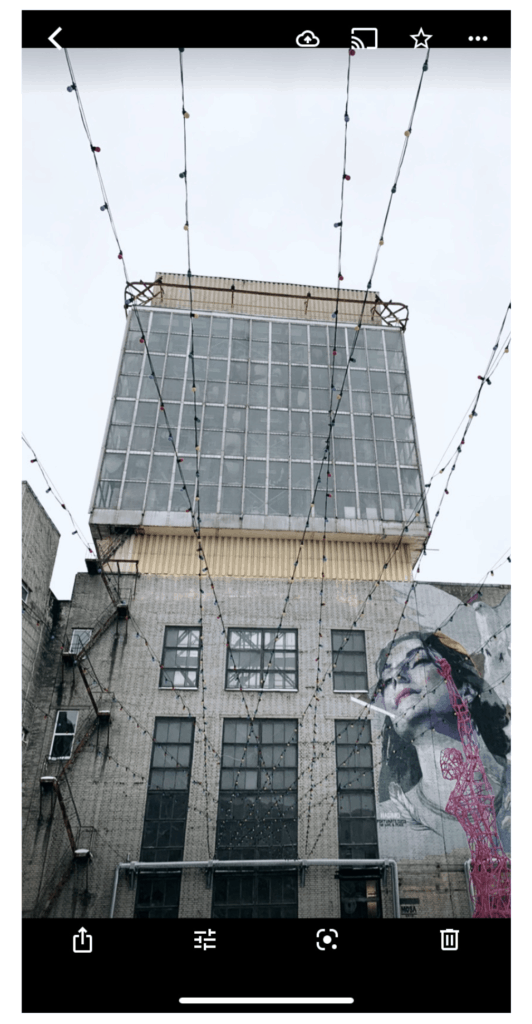
At the bottom, there are sharing, editing, Google searching and deleting features. While by clicking the tabs at the top, you can upload your photo to cloud, project on your screen, mark as favourite, add to album, archive and save as PDF.
I will let you discover these interesting features as they are quite easy to use, but here are the highlights of what you will find there:
- There are some filters and color/light adjustment features that you can use to edit your photos.
- You can easily create movies, animations and collages by simply selecting the photos you want and Google Photos will do the work for you.
- You can check here what possibilities are offered in your region by Google Photos for creating photo books, printing photos and ordering canvas prints.
- If you have a Google ecosystem at your home, you can consider integrating your Google Photos with your smart display or smart clock.
- Thanks to Google Lens integration, you can do an online search for similar results with your photos, as well as transcribing, copying and translating the texts from your photos. My favorite feature!
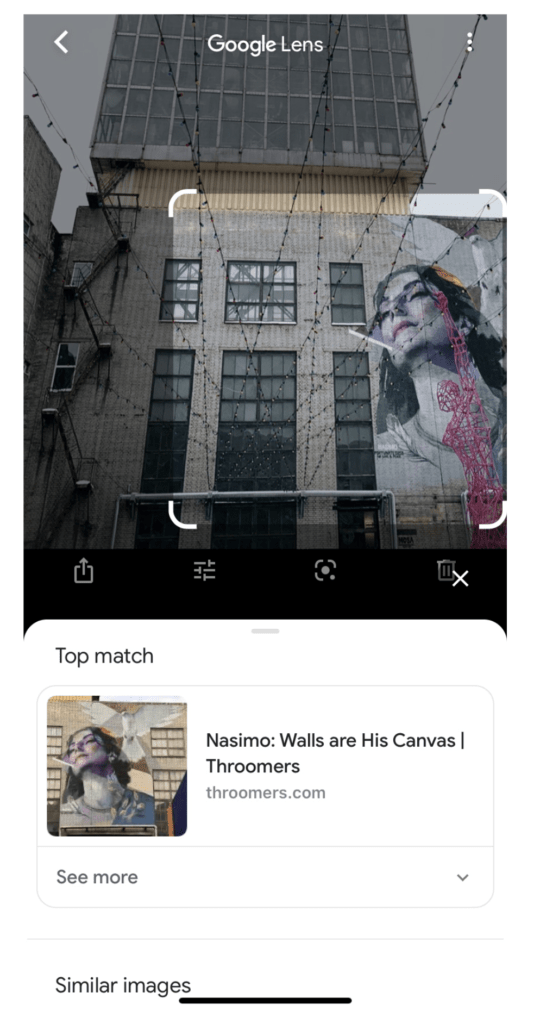
Are you curious about the artist who created that wall painting on a photo that you took? Just tap the third button at the bottom and use the Google Lens feature to make a visual Google search for it. Isn’t it amazing?
So What Do You Think?
I hope this overview and tips helped you understand whether or not Google Photos fit your needs!
Are you a current user? Let us know in the comments below! We’d love to hear your thoughts about it!