Did you know that you can create, design, and purchase a photo project from different companies (i.e. not Apple) within Apple Photos? Each company has their own design program and printing options. In this tutorial series, we spotlight one company and demonstrate how to create a photo book project using their unique program.Today we’re showing you how to use Mimeo Photos to create your photo book project, courtesy of our good friend Leanne Lobe of Liv Mondo Book Design Studio! We think you’ll really enjoy giving this a try if you’re into creating photo books with your digital photos! Enjoy!
How to Create Photo Books with Mimeo inside of Apple Photos
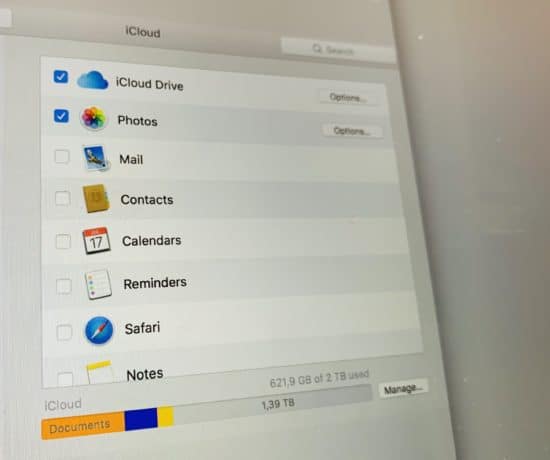
Apple no longer prints or produces photo books or calendars, BUT still allows you to create and purchase third-party projects through printing companies all from within Apple Photos. You can still effortlessly jump between your photo library and your projects without ever leaving Apple Photos. It’s truly seamless and makes the design process way more efficient.
Today we’re creating a photo book project using Mimeo Photos.
Let’s get started!
This tutorial walks you through the key elements of creating a photo book using Mimeo Photos:
- Installing the Mimeo Photos extension in Apple Photos
- Creating a new photo book project
- Exploring Mimeo Photos
- Customizing your layouts
- Modifying your text
- Ordering your photo book
Step 1: Confirm that Mimeo is installed in Apple Photos
Before you can begin your photo project, you need to have Mimeo Photos installed in Apple Photos. Not sure if you do? It’s easy to check by accessing the Create menu.
Use one of these three methods to access the Create menu:
- Click on File at the top of the window, OR
- Right-click on a photo, album, or memory, OR
- Click on the little plus sign beside My Projects (left panel)
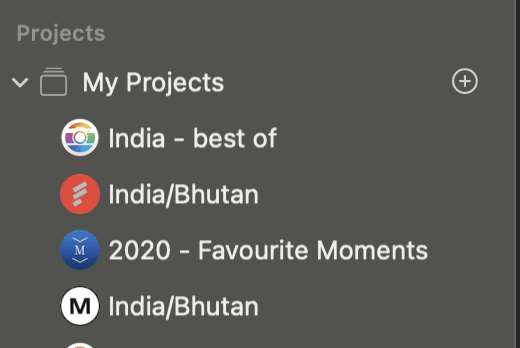
One way to access the CREATE menu is to click the plus sign in the circle beside “My Projects” in the left panel.
Use the Create menu to check if you have Mimeo Photos installed:
-
- Hover over Create to open the projects sub-menu
- Hover over one of the project options to open the extension sub-menu
- If you don’t see Mimeo on the list and need help installing it, read our detailed tutorial to learn how to install the Mimeo extension in Apple Photos.
- If you see Mimeo on the list, you’re ready to begin!
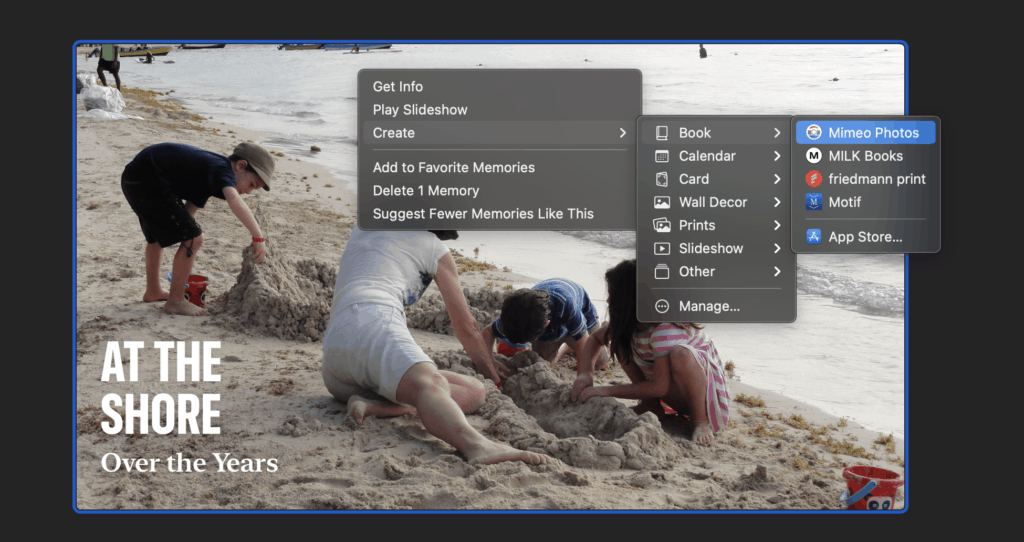
Not sure if you have Mimeo Photos installed? Check the CREATE menu to confirm. When you see it in the list (above) then you’re ready to start! If you don’t see it on the list, read our tutorial to learn how.
Step 2: Create a New Photo Book Project
Now that you have Mimeo Photos installed, you are ready to create a new photo book project. Open the Create menu, using one of the three methods mentioned above.
To start a new Mimeo Photos photo book project:
-
- Hover over Create to open the projects menu
- Hover over Book to open the extension menu
- Click on Mimeo Photos
Choose your photo book cover and size
When you click on Mimeo Photos in the Create menu, you will see a dialogue box appear prompting you to choose the size and cover type of your photo book. There is no right answer; it will depend on the subject and audience of your photo book.
You can choose from these Mimeo Photos photo book options:
- Hardcover
- Square – large or small
- Landscape – large or small
- Softcover
- Landscape – large or small
It’s worth taking some time to look at the options and make a deliberate decision. Although you can change the dimensions of your photo book at any time, it may affect the pages you have already designed.
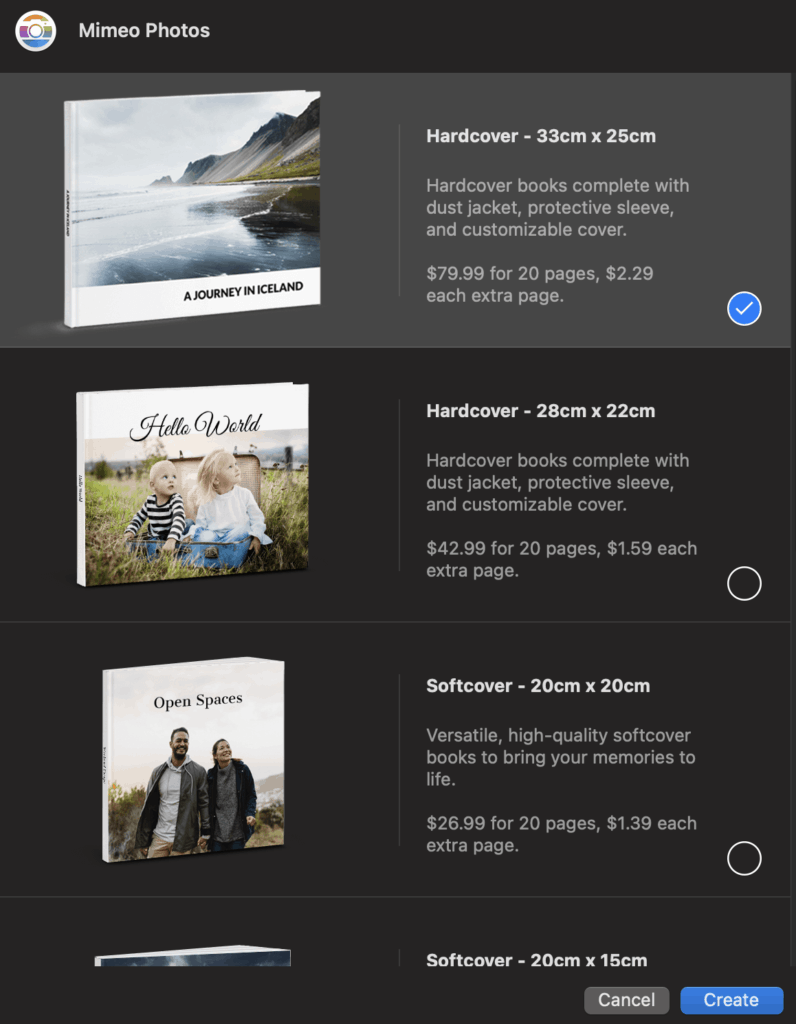
Choose the cover style and size of your photo book. You can change them at any time, but it may affect pages you have already designed.
Choose your photo book theme
After you select your photo book cover and size, click Create. Another window (below) will open asking you to choose a theme for your book. Each theme offers a specially-curated selection of layouts, design details and color options. Even if you choose a theme you will still be able to customize each page.
You can spend a lot of time looking through the themes and quickly feel overwhelmed by all the options. You can keep it simple with the “Blank” theme and create your own design. No matter what option you choose you will create fully custom designs and you can always change your theme. Just note that it will affect the pages you have already designed.
Do this before you select your theme: look in the top right corner at the Autofill My Photos checkbox. If you want Mimeo Photos to automatically place your photos in the book, then ensure this box is checked. If you prefer to have more control and place the photos yourself, then ensure this box is empty (as in the photo below).
Now you’re ready to start. To choose your theme, click on the sample pages or press the Select button.
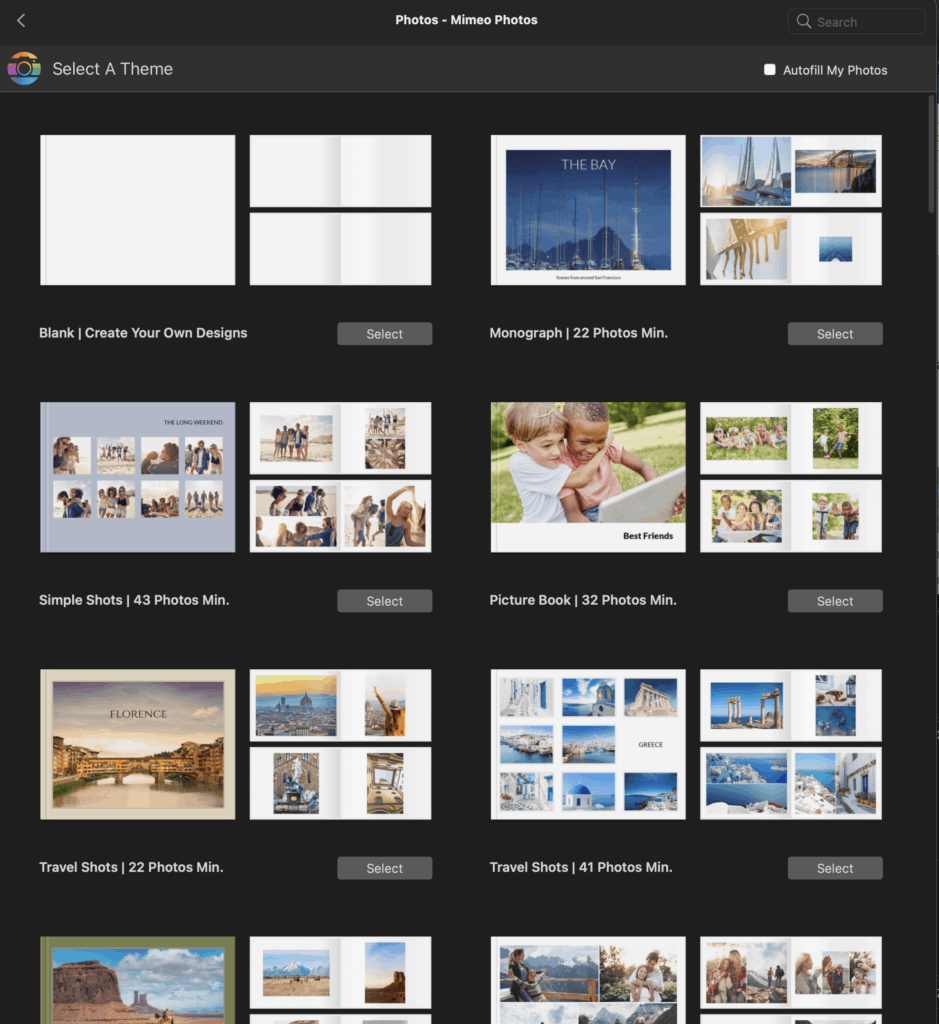
Choose a theme to get started. You can create your own design with the “Blank” theme.
Step 3: Explore Mimeo Photos
Your new photo book will open in the Apple Photos main window where you normally see your photos. If you chose a theme, your book will be shown with the theme template layouts (with your photos if you chose auto layout). However, if you chose the blank theme, your book will be a clean slate (pictured below), ready for you to start designing.
Mimeo Photos has many tools so you can customize your design whether you’re starting with a theme or a blank book. Let’s take a tour so you know where to find everything.
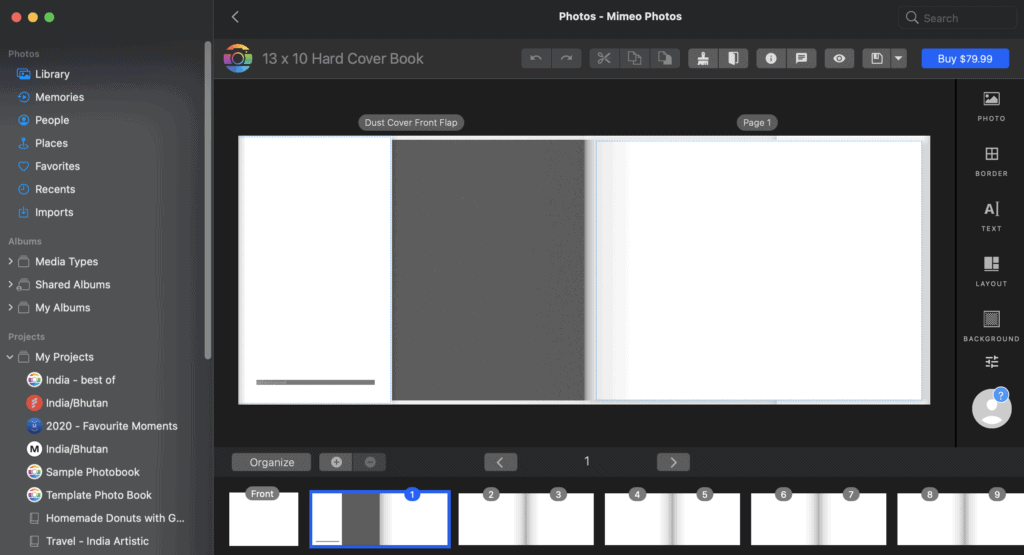
Your Mimeo Photos tools are organized in three panels. At the top are your project tools (e.g. change theme, undo, copy), at the right are your design tools (e.g. borders, layout and text) and navigation and organization tools are at the bottom.
Find your tools in Mimeo Photos
Project tools are in the top panel (pictured below): This is where you will find some important tools from left to right. Each bullet is one of the button groups.
- Undo & Redo
- Cut & Copy & Paste
- Change Theme & Change Book (Cover and Size)
- Quick Start & Support
- Preview
- Save/Export as PDF
- Purchase

Top panel of Mimeo Photos design program
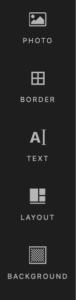
Design tools are in the right panel (pictured below):
This where you will find your design tools, such as:
- Photos
- Border
- Text
- Layout
- Background
Click on each design icon (shown below top left) to reveal more options and details.
-
- Design tools in the right panel
-
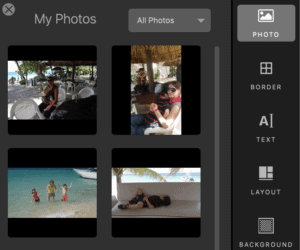
- Drag and drop photos
-

- Add a border
-
- Edit your text
-
- Choose a layout
-
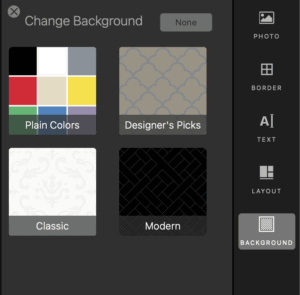
- Add backgrounds
Navigation tools are in the bottom panel
Flip through the pages using the arrow buttons OR click on the page thumbnail to see it in the main window. Add or delete pages by pressing the plus or minus buttons

The bottom panel is the home of your book navigation and organization tools in Mimeo Photos.
Organization tools are also in the bottom panel
Click on the Organize button in the bottom panel to change the order of your spreads (two-facing pages). You are not able to move individual pages.
To move a spread:
- Click on the spread you want to move (it will be framed in blue)
- Click and hold as you move the spread to the new location
- Release the spread when a blue line is visible in the correct location
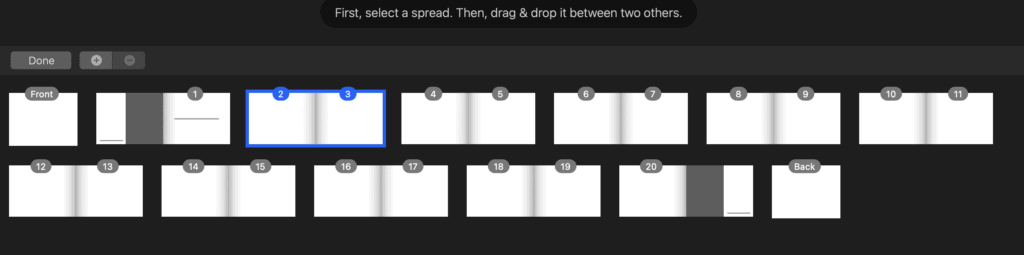
Change the order of your spreads when you click the “ORGANIZE” button on the bottom panel.
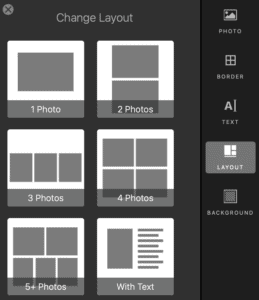
Step 4: Customize Your Layouts
Designing custom layouts is straightforward using the tools in the right panel and you’re in luck because Mimeo Photos has additional design tools available that are only accessible when you click on specific elements of the page.
The easiest way to start is with the Layout button and choosing from the options but you can also drag and drop the photos you want to add. In both cases, you can move and resize all photos and text on each page. Here we show you how to use these extra tools to customize your layouts.
Access Mimeo Photos’ secret design tools to customize the photos and text in your layouts
When you click on a photo or text box in your photo book, two things appear:
- A blue border around the active element (photo or text box)
- A small toolbar with additional tools will appear on your page.
Use the Transform button to resize, rotate or move a photo box
You know you are in Transform mode when the Transform button is greyed out. You are, by default, in transform mode. You also know because there is a multi-arrow icon in the centre of the photo.
- Resize the photo box by clicking and dragging a corner or side handle
- Move the photo box by clicking the multi-arrow icon in the middle of the photo and drag the photo box to your desired location
- Rotate the photo box by clicking the round-arrow icon at the top of the photo and moving it. You can also use the rotate button on the toolbar
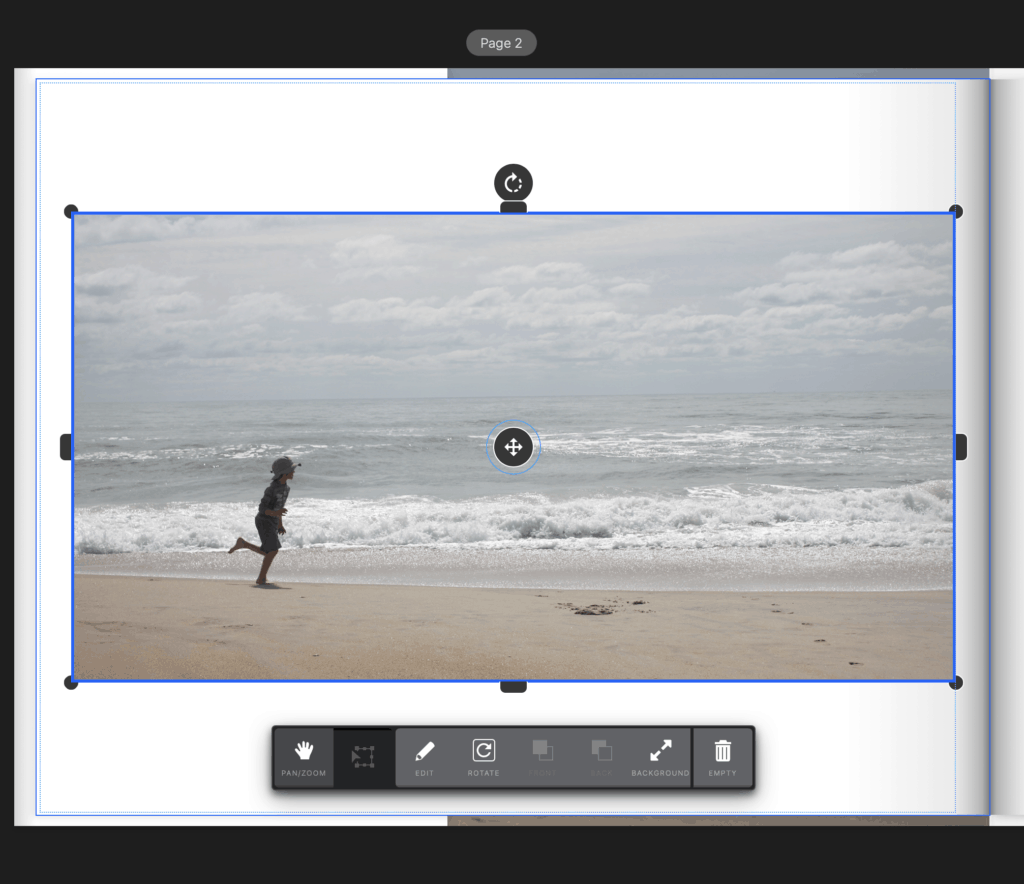
When you click on a photo you are in Transform mode and can access tools resize, rotate, and move your photos on the page.
Use the Pan/Zoom button to adjust the photo within the photo box
You know you are in Pan/Zoom mode when the Pan/Zoom button is greyed out. You also know because there is a little hand in the centre of the photo and a slider above the toolbar.
- Zoom in or out on the photo (and easy, non-permanent way to “crop” an image) by clicking the white circle in the slider and moving it back and forth.
- Reposition the photo within the photo box by clicking anywhere on the photo and dragging it around. It will stay contained within the frame.
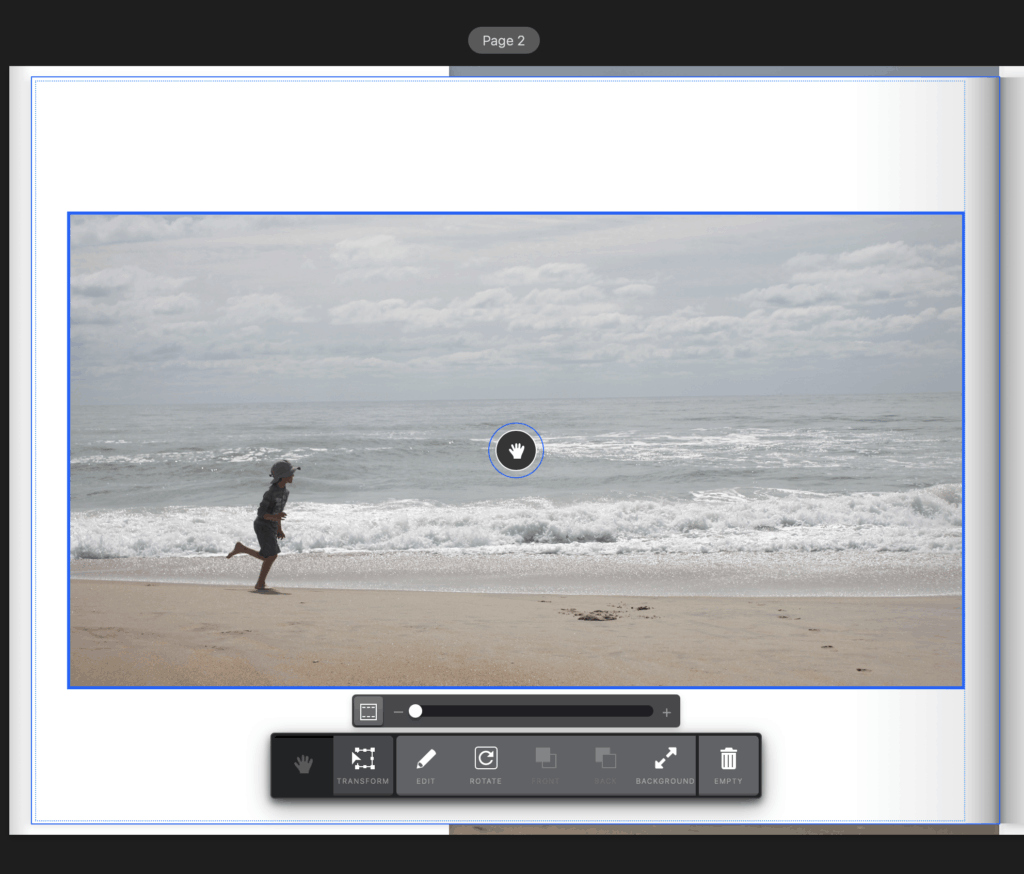
Use the Pan/Zoom mode to move the photo within the photo box.
Use the Edit mode to enhance your photos
You can edit your photos without having to leave your photo book. Click on the Edit button to open a new window (below) so you can enhance your photos with all the editing power of Apple Photos:
- Adjust lighting and color
- Retouch blemishes and remove red eyes
- Add filters or vignettes
When you’re done, click the yellow Done button to save your changes and return to your photo book.
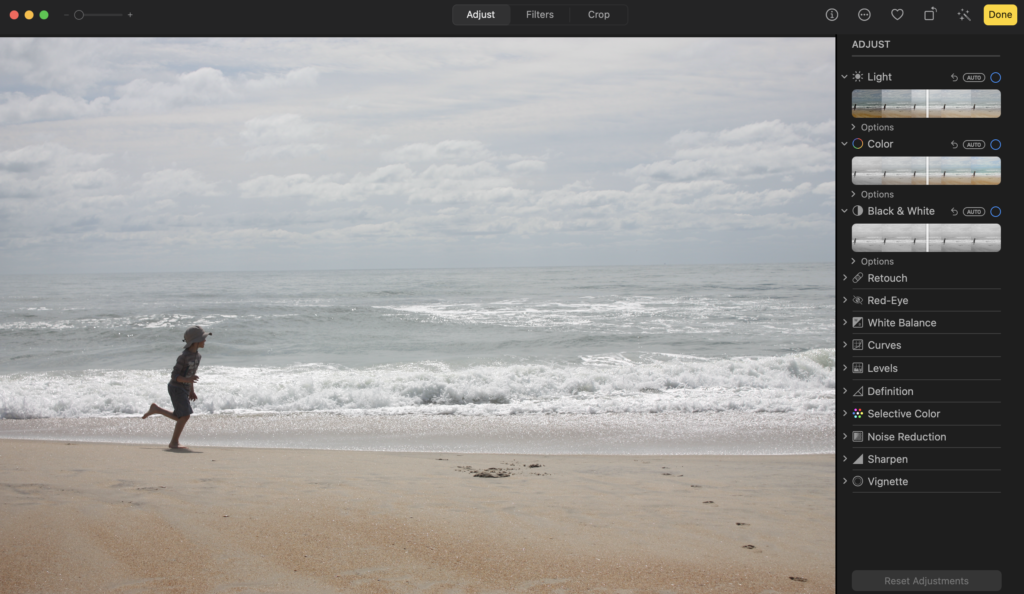
Enhance your photos without leaving your photo book!
Step 5: Modify Your Text
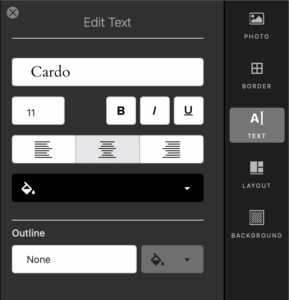
Access the text toolbar
Click on a text box or add one using the Text tool in the right panel to access the hidden toolbar.
Change the font, color and alignment of your text
Add your text to the white box and it will appear in the blue box on your page in the default font. Click the Text button (on the toolbar or the right panel) to open the Edit Text panel.
Use the Edit Text panel to:
- Select a different font
- Change the size, alignment or color
- Make the text bold, italicized or underlined
- Add an outline
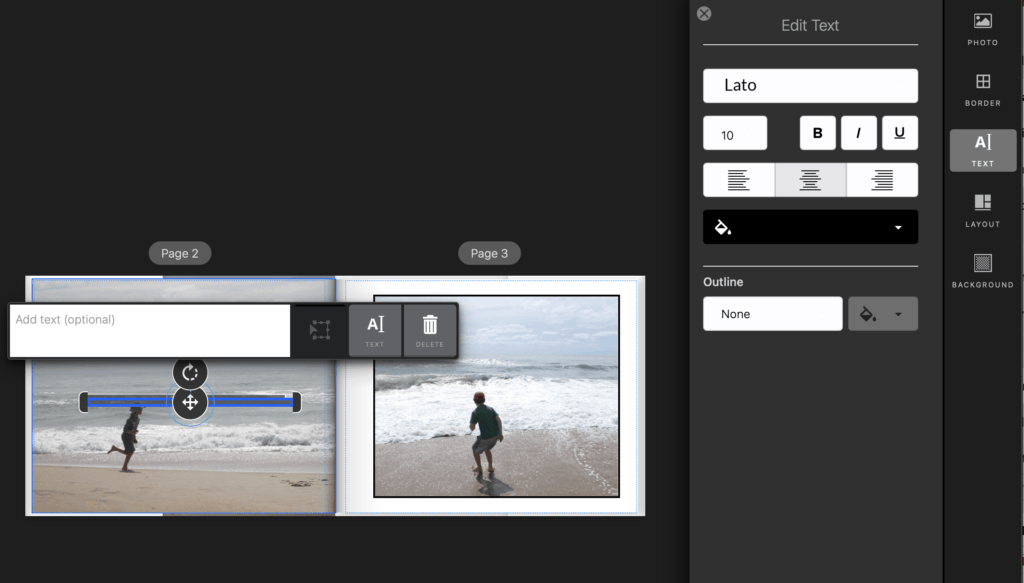
Add extra depth to your design and your memories with headings, captions and other notes.
Use the Transform button to resize, rotate or move a text box
You know you are in Transform mode when the Transform button is greyed out and a multi-arrow icon is in the centre of the text box as shown above.
- Resize the text box by clicking on Transform and then clicking and dragging the side handles to adjust the size
- Move the text box by clicking the multi-arrow icon in the middle of the text box and dragging
- Rotate the text box by clicking the round-arrow icon at the top of the text box and moving it
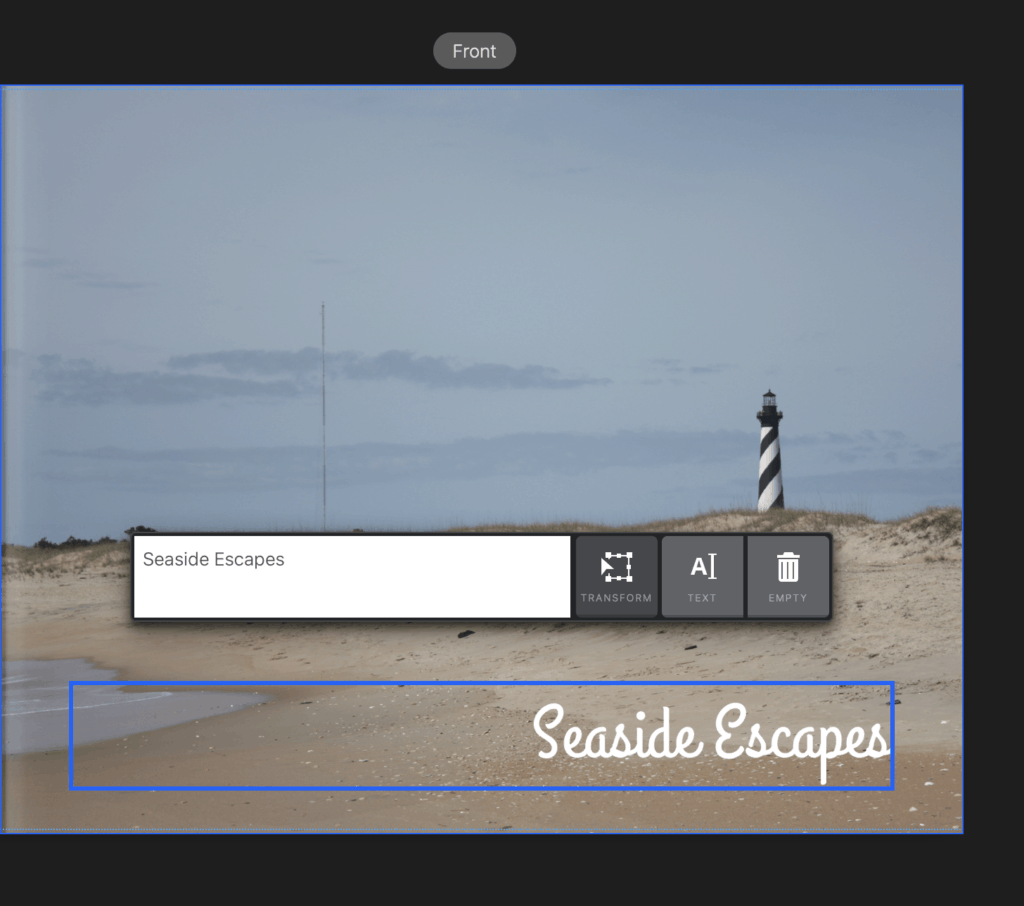
Customize your text to enhance your design and your memories!
Step 6: Order Your Photo Book
Review your book
You may be tired of your book at this point and just want to have it done, but before you press that inviting blue BUY button, look at your book one more time on the screen AND off.
In your top panel, click the eye icon to preview your book without the distractions of the design tools. When you are satisfied or want to make some additional changes, click the edit button (visible only in preview mode). If you have a lot of text, you will want to review the PDF version to catch some mistakes that we miss when reviewing on screen. Click on the triangle between the disk icon and the blue Buy button to reveal the “Export as PDF” option.
Order your book
When you have designed your layouts and edited your text, it’s time to order! Very exciting. Luckily Mimeo Photos makes this step easy. As you add or remove pages from your book you will notice these changes reflected in the price, so there are no surprises.
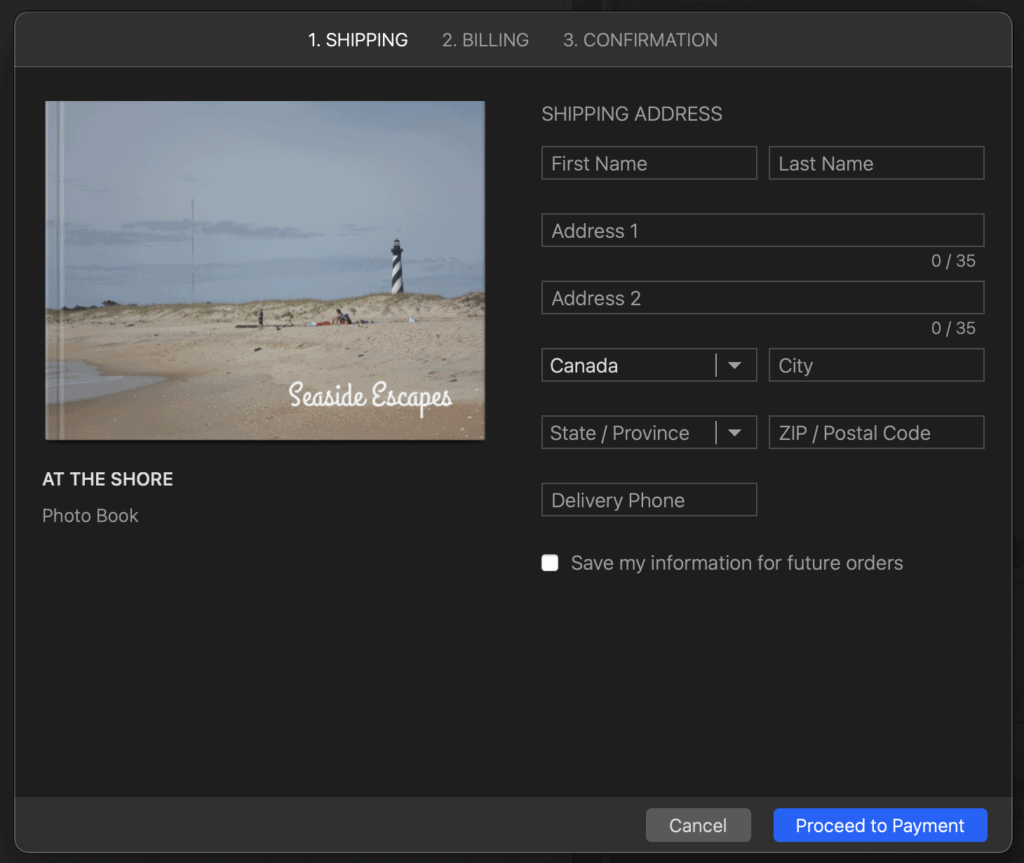
Mimeo Photos will also warn you of any issues which may affect the quality of your book, including poor resolution, empty image boxes, and blank pages. You can return to your book and fix them or acknowledge these warnings before you can proceed to purchasing the book. If you have no warnings or you have accepted them, you will see a pop-up box (pictured below) with the cover of your photo book and spaces to collect your shipping and billing information. From this point on just follow the steps and prompts.
Ordering is easy!
You’re almost there! Soon you will be able to enjoy your memories from the comfort of your favorite chair and easily flip through the pages reliving those treasured moments. Enjoy that moment!
I’m a Perfect Pinnable!
Ready to get started? Do you use Mimeo to create your photo books?
Let us know in the comments below!
Want more photo book ideas and inspiration from Leanne? Sign up below:
Photos Courtesy of Leanne Lobe