Adobe Photoshop is a favorite tool of ours here at The Swedish Organizer, and it’s a fan favorite throughout the world as well. What other program is as powerful when you need to bring those old faded photos back to life? Yep, that’s a pretty short list. But if you’re not a photo restoration & retouching aficionado, it can be quite the learning curve to tackle it, so we decided to put together a little tutorial for you. Is this the full and complete answer to all your retouching needs? No, of course not, but it’s not meant to be. Instead, we hope encourage you enough that you try it out for yourself! Here with a few Photoshop tips and tricks is Ann Young, photo retoucher over at FixThePhoto.com! Enjoy!
Old Photo Restoration in Photoshop
Got some faded print photos in your collection? You’re not alone. Every year, lots of photos get damaged by water, fire, sunlight, dust, and let’s not forget – by time itself. You obviously want to store your photos in a safe environment, but for some it may already be too late. Fortunately, technology can fix a lot of things, if you just know how to leverage it. In this article, you will find a few beginner steps on how to restore old photos in Adobe Photoshop. I know that sounds like an intimidating task, but trust me, you can do it – with a little practice!
First, Digitize the Photo!
Before you can retouch anything, the first step there is to digitize the photo you want to restore. You’ll need to scan your image with a photo scanner, a mobile scanning app, or by re-photographing it with a DSLR camera. Whatever technique you use, make sure that the quality is good enough to work with in terms of resolution and clarity. Keep in mind that your photo must be large enough to zoom in on, otherwise you’ll have lots of difficulties restoring it. [Editor’s Note: Be sure to read this blog post on image resolution to get the full picture. Pun intended!]
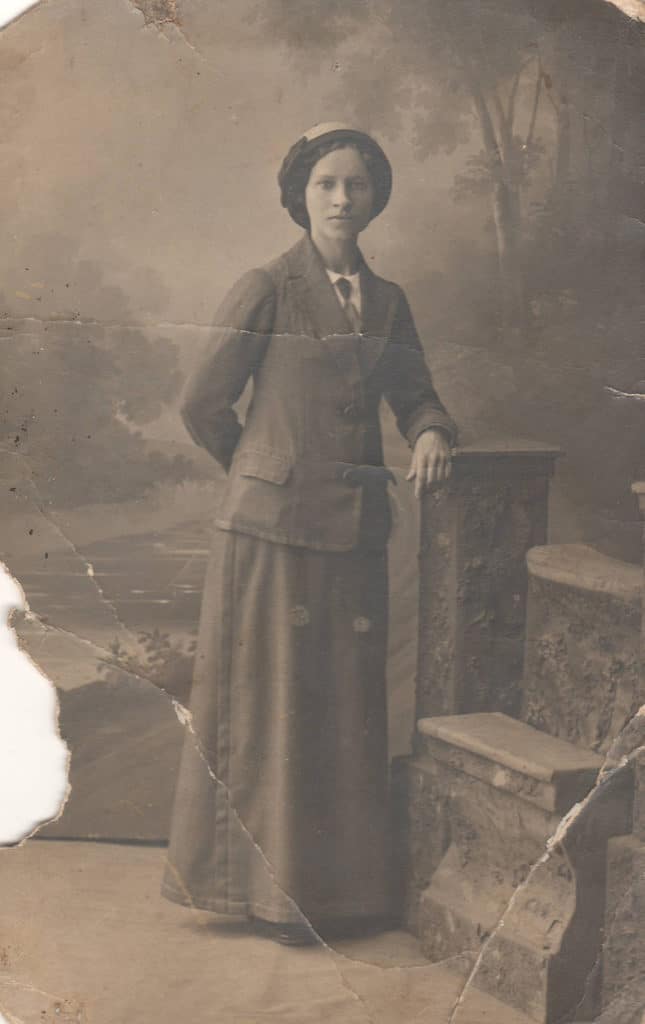
The typical “ancestor” photo has scratches, tears, and lots of fading.
How to Make Basic Adjustments in Photoshop
Photoshop may look intimidating, but it’s actually quite easy to make simple adjustments. Below are a few of them. Be sure to always work on a duplicate (either a copy of your photo, or in a different layer), so you don’t make a mistake with your original scan. Before you start, make sure that the copy you’re going to improve is clean and has no additional elements. If you see any unwanted borders or unnecessary elements around the photo edges, you can remove those by cropping your photo first.
How to Duplicate a Photo in Photoshop:
- Find the taskbar and click “Image”
- Select “Duplicate”
- Name your new files something different from your original and save it.
How to Duplicate a Layer in Photoshop:
- Find the taskbar and click “Layer”
- Select “Duplicate Layer”
- Rename it to something distinctive (each layer should have a different name). You can now work on the duplicate layer.
How to Crop a Photo in Photoshop:
- Click on the “Crop” icon on the left side of the toolbox
- Adjust the edges of the crop box by dragging them to the right positions
- Click on the photo or press “Enter/Return” and choose “Crop”
How to Quickly Straighten a Photo in Photoshop:
If your scanned photo is slightly bent or rotated, the “Crop” tool can also be used to straighten it. This makes your photos a tiny bit smaller, but it’s a quick way to fix the alignment.
- Activate the “Crop” tool by clicking on the icon
- Put the cursor near the image’s edge – a curved, double-ended arrow should appear
- Click and drag the arrow to the right or left depending on your cropping preferences
- Click on the picture or press “Enter/Return” and choose “Crop”
How to Rotate a Photo in Photoshop:
- Click “Image” in the taskbar
- Choose “Image Rotation”
- Select the rotation you like between presets or an arbitrary number
- Apply and save
Noise Reduction Using a Filter
Wouldn’t it be if you could remove scratches with a single button click? Well, unfortunately we’re not quite there yet. In fact, it is quite a long process, which requires a lot of manual adjustments. But there is one way to quickly reduce noise in a photo, and that is to make use of a Photoshop filter. Try this and you’ll see what I mean.
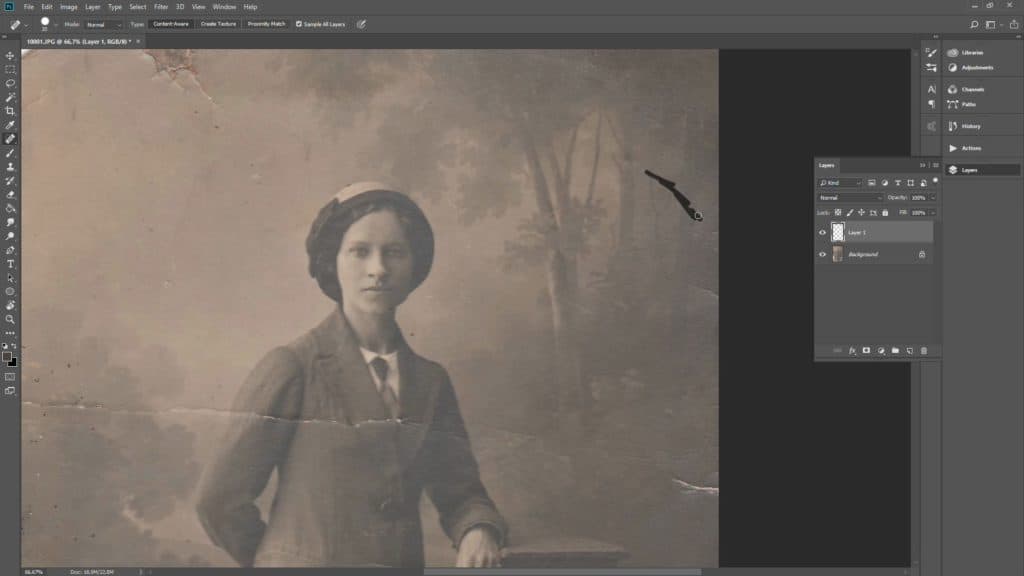
Try Noise Reduction with a filter!
Noise Reduction in Photoshop:
- Click “Filter” in the taskbar
- Click “Noise” then “Dust & Scratches”
- Slightly increase the Radius pixels and Threshold rates in the pop-up window until you like the image. Do it very slowly to not lose too many details.
- Return to “Filter”, click “Noise” & “Reduce Noise”
- Adjust the parameters in the pop-up window accordingly. You can monitor all the changes in the Preview box. Save.
I’m a Perfect Pinnable!
Improving Damaged Areas
Patience is a virtue, especially in Photoshop. Imperfections can be hard to spot and stubborn to fix, but where there’s a will, there’s a way. The most effective way to attack this type of damage is to use a combination of the Clone Stamp, the Patch Tool, and the Spot Healing Brush.
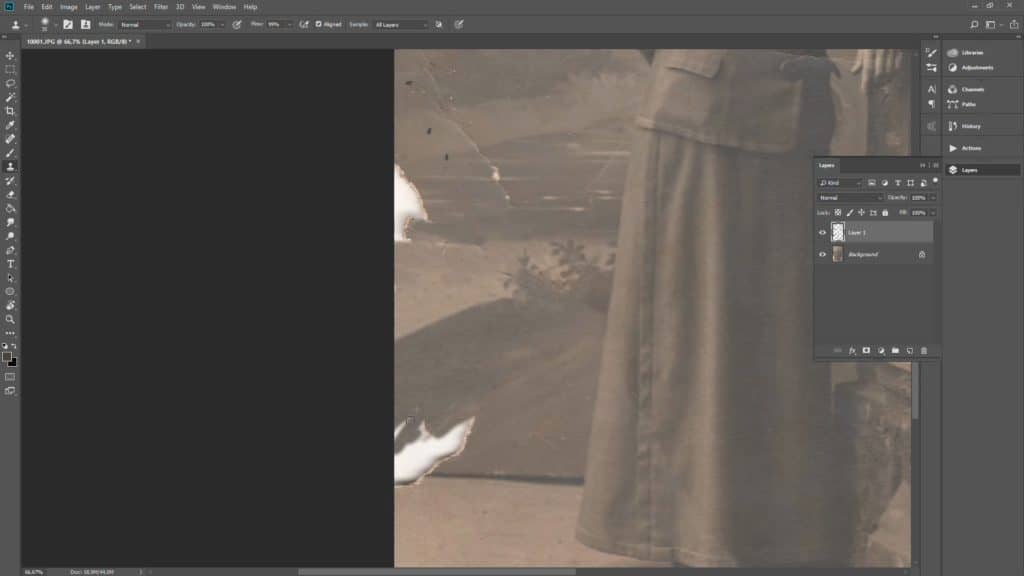
Clone, Patch, and Heal!
How to Use the Clone Stamp:
- Find the Clone Stamp in the toolbox and click on the icon
- Choose the size of the brush you need
- Activate the spot you want to clone and press “Alt” simultaneously
- Adjust opacity (if needed)
- Click/ drag the cursor around the damaged spot to paint it with the cloned pixels.
How to Use the Patch Tool:
- Click on the Spot Healing Brush
- Choose the Patch Tool
- Choose “Source”
- Encircle the damaged area with a cursor
- Create a selection and drag it to the clean area similar in color to the damaged one.
How to Use the Spot Healing Brush:
- Find the Spot Healing Brush in the toolbox and click on the icon
- Select the size of the brush you need (the drop-down menu in the upper right corner)
- Select the type (Proximity Match or Content-Aware)
- Click on the damaged area to fix it
Quick Color Corrections in Photoshop
Old photos tend to be faded, and this too, can be fixed in Photoshop. There are lots more things you can do in terms of color correction, but here is one of the easier fixes:
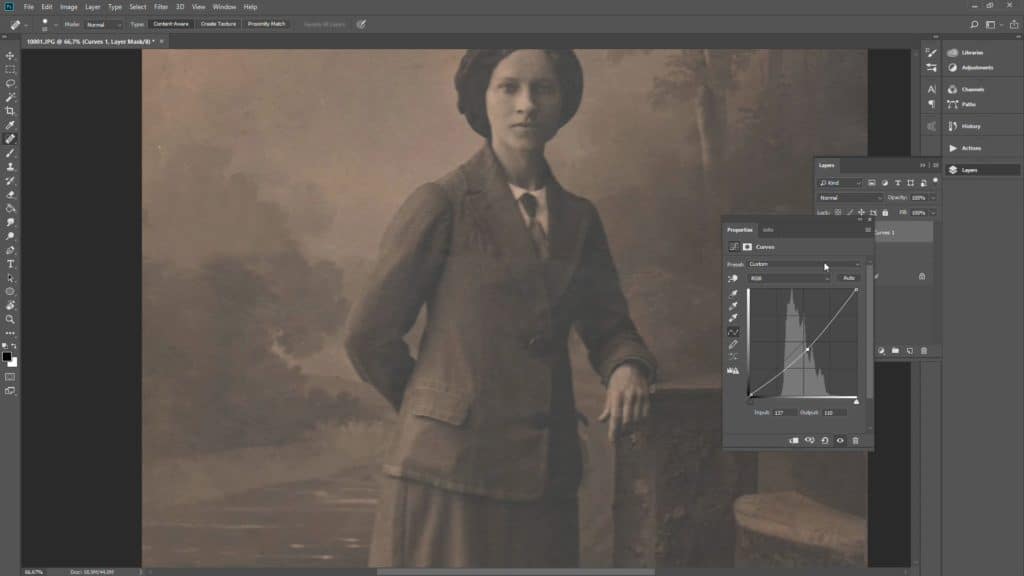
Color correction is one of the most helpful fixes you can do on an old photo!
How to Improve Tone and Vibrancy in Photoshop:
Selecting the image in the taskbar, you get a drop-down menu with the basic features of color correction. In the Adjustments tab, you’ll see 3 main options:
- Auto Tone
- Auto Contrast
- Auto Color
Try these automatic settings (they may give you the needed effect without doing anything more complicated). If you think that your photo still needs some adjustments, do them manually. Read the histogram to see what needs to be fixed. There are lots of videos and tutorials on how to do this, but you can try adjusting the different parameters (Curves, Exposure, Brightness, Levels, etc.) until you get a result you like. When you’re done, delete the original layer. If you’ve done this correctly, you won’t have touched it (you would have just adjusted the edited layer). Make sure it’s selected as the top layer and then click “Flatten Image.”
Next, do the following:
- Click “File” on the taskbar
- Choose “Save as”
- Select the file format you need
- Press “Enter” to save the new file. Voilà!
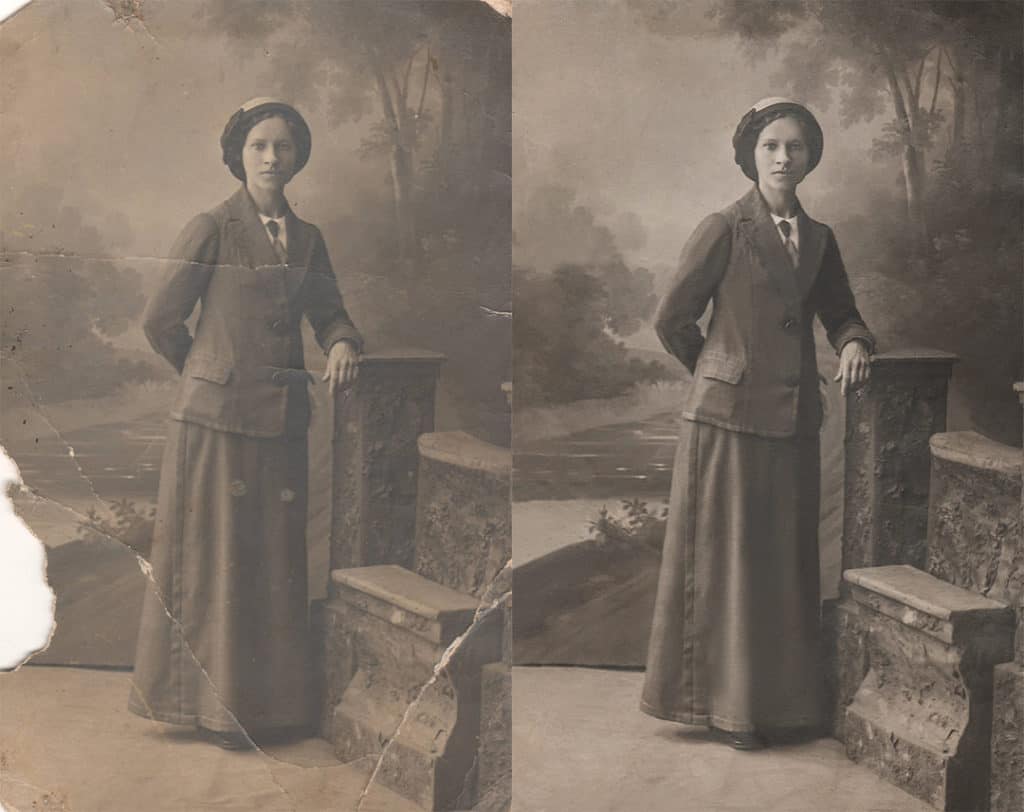
Before & After! Better, isn’t it?
Now It’s Your Turn!
We hope this wasn’t too much tech directions in one blog post! We encourage you to try out fixing some of your old photos. If you don’t have the time, you can always outsource the task to a Pro, but it’s quite fun to do on your own! If Photoshop seems a little to difficult still, there are many other programs on the market you can try instead, for example PhotoGlory.
Let us know how you do!



Billie Meyers, The Photo Nurse
November 13, 2018 at 7:18 pmI’ve just started learning Photoshop – and having a simple, step-by-step guide showing me how to tackle this one skill is GREAT! By the time I look all this stuff up individually, I’m out of time and patience. Thanks so much!!! More, more, more!
Caroline Guntur
November 28, 2018 at 8:55 amGlad you found it helpful, Billie! More is on the way!