One of our most popular posts on this blog is The Organized Yearbook: How to Save Time and Still Tell Your Stories, which is a post all about how to plan out your photo books to be more consistent. In the same spirit, we thought we share another great concept with you for those end of year projects: storyboarding! Enjoy this new post by our contributing writer Leanne Lobe!
Do You Plan Out Your Photo Books?
Maybe you’ve heard of storyboarding or maybe it’s a completely new term. Either way, in this post you’ll discover some new ideas about how to use this approach to create your next photo book in less time with less stress.
We all know that planning is important and that we SHOULD do it, but the reality is we often jump into our projects with only a vague idea of what we want to accomplish.
Planning is B.O.R.I.N.G. And it feels like you’re not making any tangible progress. So you jump into your project with excitement and energy only to get distracted and overwhelmed.
Raise your hand if this sounds familiar?
Storyboarding is a fun way to plan (yes, fun!) and will help make your big project less intimidating so you can actually finish.
What is Storyboarding?
Before we talk about how to storyboard and all the reasons why you should do it, let’s first clarify what we’re talking about.
Essentially a storyboard can be described as:
- A logical flow of ideas
- An outline
- A roadmap to guide the project creation
Storyboarding is useful for many large creative visual projects including movies and films, children’s books and, of course, photo books.
The term storyboarding is most often associated with film-making, where creatives work together to visually create and edit movie sequences. It’s much easier to make changes at this stage than once production has begun.
And it’s true for creating photo books too. Spending time on your book’s flow and organization before you create layouts will save you time and frustration. This is an essential step.
Typically a storyboard is a sequence of rectangular boxes with illustrations or sketches of the scene (film-making) or page spread (book-making).
Why it’s worth Storyboarding
Storyboarding for photo books can look different. There is no one right way to do it. What is most important though is taking the time to plan your project…
I know, I know… you’d rather have your teeth pulled out than create a plan. You’re not alone, but I promise you it will be worth it even for the smaller projects. You can thank me later.
When you take the time to create a storyboard for your photo book, you will:
- Save time. It is much easier to change the groupings of your photos BEFORE you start creating layouts. You won’t waste time redoing pages and text.
- Reduce overwhelm. When you have a plan for each page, you will find it easier to choose which photos to include. You will feel in control because you can track your progress. You will know what to focus on each time you sit down at your computer.
- Break your project into manageable bits. Your storyboard will allow you to create mini-projects within your big project. So even if you have only a few minutes you can tackle a specific mini-project (e.g. choosing photos for one spread) and move yourself closer to finishing.
- Control price and size of the book. If your budget or the number of pages is a priority, then storyboarding is especially important. Set your budget and/or desired pages and then create your storyboard to fit. Eliminate cost overruns and expanding projects.
You can stay focused while you’re creating your page spreads knowing your overall book flow and organization has been well designed. With a storyboard you can sit down at your computer with confidence, because you know what needs your attention and that each small effort is moving you in the right direction.
When you create a storyboard you will find your photo book project no longer feels like a chore you want to avoid. Instead you can enjoy the creative process of curating your memories.
Methods for Storyboarding
Creating a storyboard doesn’t have to be complicated. Here we outline some of the methods and tools you can use from paper and pencil to software solutions. You may find a combination of these tools works best for you:
- Outline
- Storyboard Templates
- Storyboard Software
Outline
An outline is not a true storyboard because it’s not a visual flow, but it is a great foundation and companion to a storyboard. You may find this is enough to guide your project.
In the same way you might outline an essay the value of this approach is to create a hierarchy of organization. Functionally you are creating a table of contents.
You can use pen and paper, a document or spreadsheet to create your outline. There are no right answers. Choose whatever tool you feel most comfortable with. Start by identifying your primary groupings and then create bullets for the focus for each individual page.
Below are some examples which demonstrate what this could look like, remembering that each bullet represents a page. Some activities or events are so significant they may warrant multiple pages, so be sure to add an extra bullet.
If you are creating a travel photo book, then you may choose to group it by location and then focus on specific days or events (see example below).
- LOCATION ONE
- Summary with map
- Activity A
- Activity B
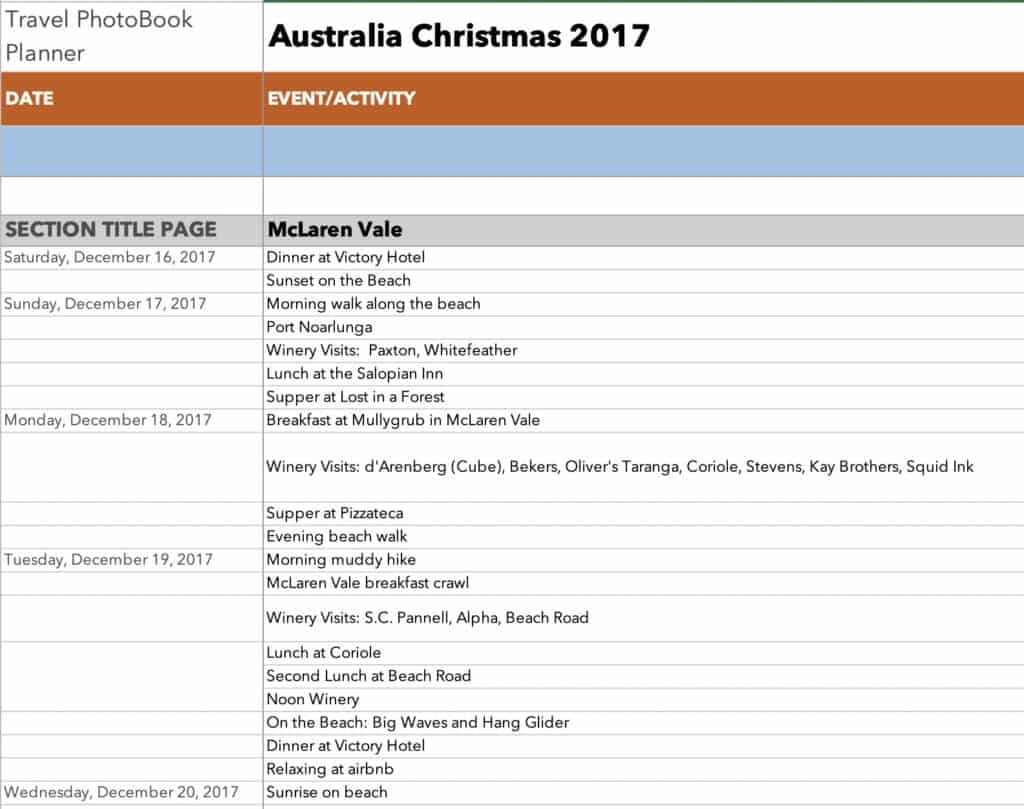
Create an outline of your photo book to streamline your page layouts and design process.
Storyboard Templates
Storyboards are typically created using rectangular templates. You can create your own, download the one attached, or buy a dedicated storyboard notebook.
If you’re just getting started, consider these hot tips:
- Use sticky notes (instead of pencil and eraser) to easily move your pages around, especially if you haven’t already created an outline.
- Use different colored sticky notes for each section of your book so you can quickly see the overall organization.
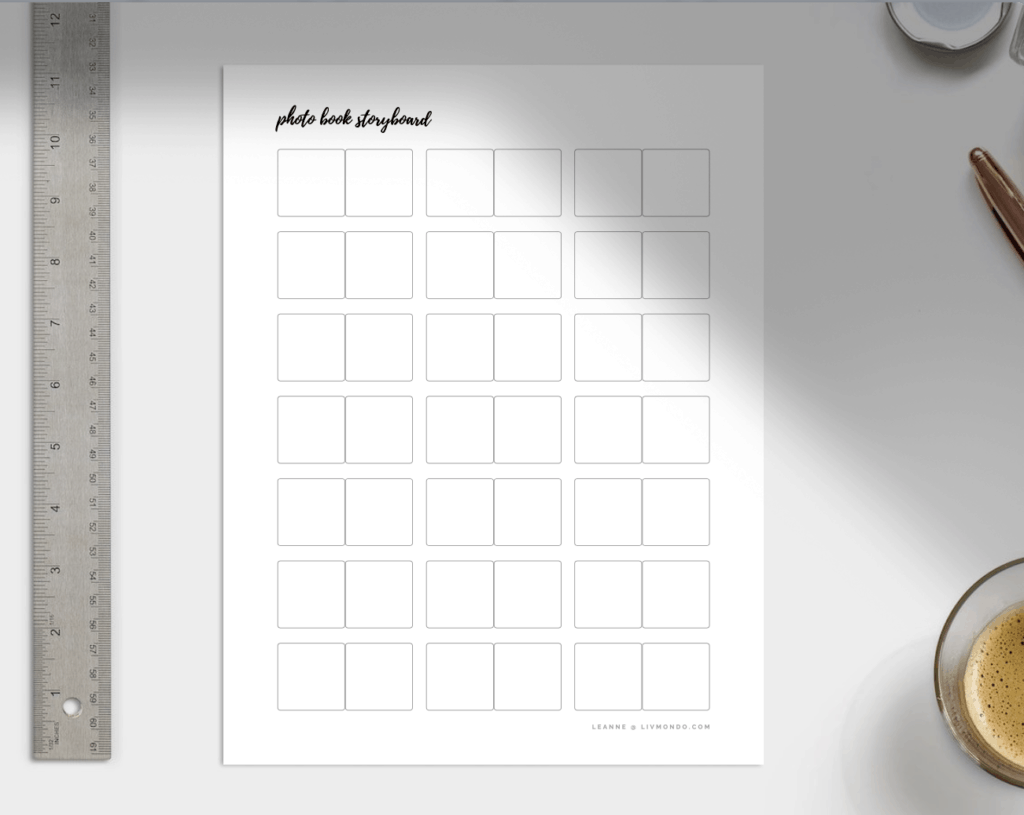
Use a blank storyboard template to organize your photo book. Sticky notes will make changes easier to make.
Storyboard Software
You may prefer to create your storyboard within your photo book software. This is a great option because most photo book companies allow you to move the pages and change their order, but there are also stand-along storyboarding tools on the market that you might consider using, for example Milanote.
Use an Embedded Storyboarding Tool
Some photo book companies offer a storyboard tool within their programs, for example Shutterfly. This is a helpful feature which allows you choose the photos for each spread without having to think about the design and layout. I love anything that helps to keep me focused! You can easily switch back and forth between the storyboard mode and edit mode.
While this is helpful, you will still want to create an outline for your book, so you don’t get overwhelmed, and use that as a guide as you build your storyboard.
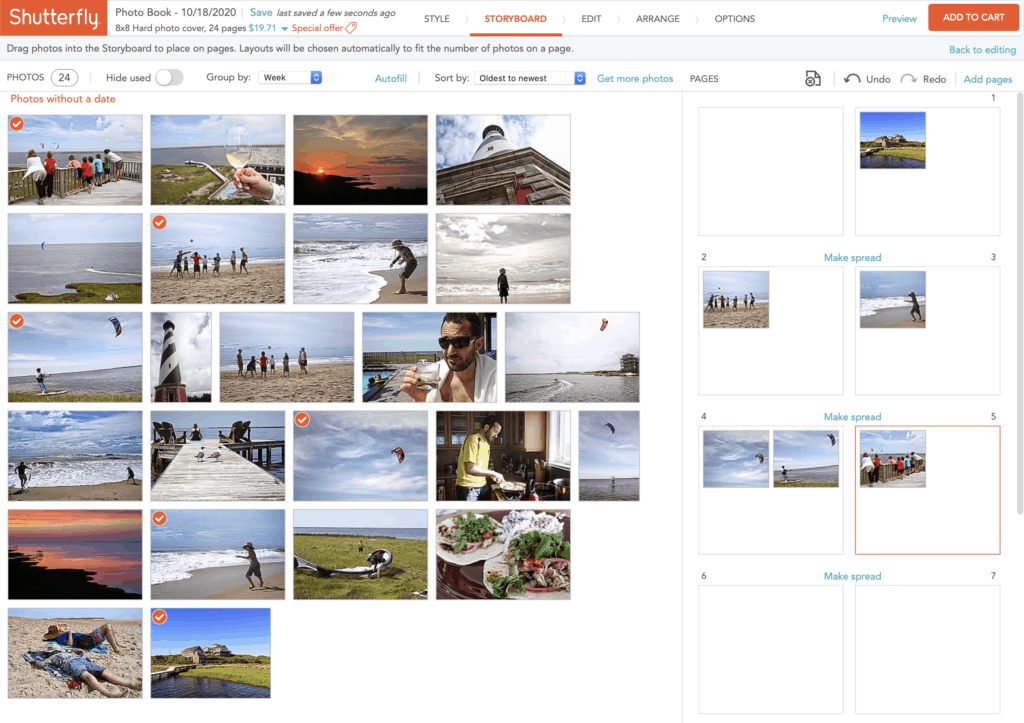
Shutterfly’s Storyboard Tool allows you to choose the photos for each spread without having to worry about layout and design. It reduces time and overwhelm!
Storyboarding within Your Photo Book Software
Not all companies offer storyboarding as an option, so how can you create your own storyboard within the software you use? Easy.
- Create a blank book.
- Before you start adding photos, create the book outline using text and colors.
- Identify the different book sections with colors and large titles. Then add titles to the sub-pages identifying the content and focus for each spread.
- Move the pages around until you’re satisfied.
- Start adding photos one spread at a time and design your layout.
- You can see your progress as your storyboard transforms from a text-based outline to a photo-filled treasure.
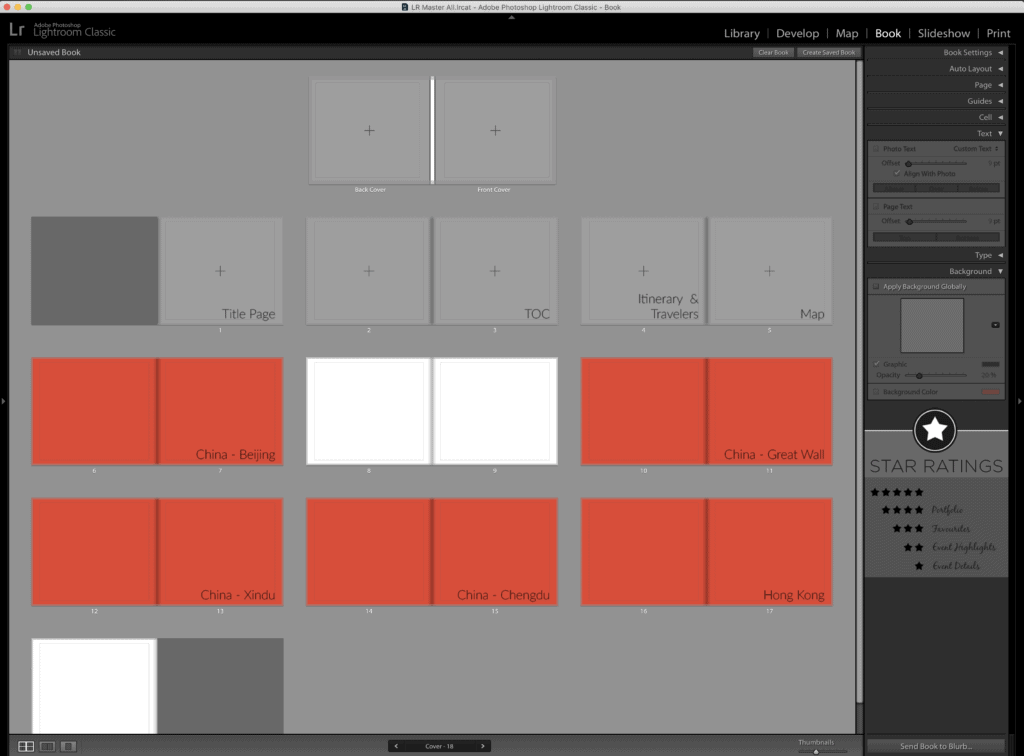
Create a storyboard within your photo book software by labeling each spread before you add photos. Start with the main sections (shown above as travel locations) and then add the event pages.
Time to Get Started
We hope this was helpful information for you. Remember – how you storyboard or organize your photo book is personal, so just choose the method (or combination) that works best for you! Just be sure to take the time to do this. You will thank us!
What say you, readers? How do you plan your photo book projects? What method(s) do you use? We’d love to hear from you, so let us know in the comments below!
Wanna Get Leanne’s Templates for Storyboarding? Request the here!

