Let’s talk keywords! Love ’em or hate ’em, they’re a staple of the photo organizing business. They’re indispensable! In the last post I wrote, I showed you how to leverage the system tags on your Mac computer to sort your photos natively, and in today’s post, I’ll show you how to use a similar process in Windows. It works a little bit differently, even though the basic concept is the same. If you haven’t yet read part 1 in this series, KISS Your Photo Workflow System, I recommend you do that before you jump into this – just to get a little bit of background on why I’m not using a software. On y va!
What’s the Difference between Tags and Keywords?
Tags and keywords, keywords and tags…The words get tossed around quite a bit, and a common question I get is: what’s the difference?
I tend to be a little finicky with semantics (I used to be a grammar tutor), so I prefer to think of the word “Tag” as a verb (i.e. to tag something), and “keyword” as the noun (i.e. I’m tagging a file with a keyword), but since Windows calls them tags anyway, most people know that they’re basically the same thing. I’ll be using the words interchangeably in this blog post, so don’t get too hung up on the difference. The more important thing to understand is how to actually get them to stick to your files. In this post, I’ll be covering just that, plus the type of workflow you can implement if you’re not using a software.
Using Keywords
Organizing your files has never been more important, but it’s not enough anymore to just rename your files. You need to keyword them too. All indications point to a future where the search function plays more of a central role. In fact, that reality is already here. I know because I was just tagging files for a client this morning, and my guess is that the requests are going to get bigger and more substantial as time passes.
Most clients believe that you need a software to tag your digital files. You don’t. It will make you waaaay more productive, that’s true, but if you’re a beginner who doesn’t want to tackle the learning curve of yet another program, it’s important for you to realize that you can tag files directly in your operating system. And with the right workflow, you too can be efficient. Maybe you won’t end up with a complete IPTC set, but you’ll get the basics done.
The Two Types of Tags
One source of confusion on the topic is the type of tags you can work with in your OS, so let’s clear that up first. There are two types of keywords you can use to sort your photos: IPTC keywords, and proprietary system tags.
IPTC Keywords
IPTC (International Press & Communications Council) tags are keywords that follow your photos around, no matter where they go (as long as they’re embedded into the images). They follow international standards, and travel cross-platform. You can apply these types of keywords to your files on both Macs and PCs, and these are the ones we’ll be covering in this tutorial.
Proprietary System Tags
Proprietary system tags are keywords that display only within your operating system. Windows don’t have system tags, but Macs do, and that’s what I covered in my previous blog post. These tags are great, but they don’t transfer between systems, so if you use them on your Mac, and then move the files to Windows, you won’t see them there. Think of them as being local vs. being international.
Which Ones to Use?
Which tags you want to use will depend largely on what operating system you have, but if you love both (as I do), it’s a decision you have to make based on your goals.
The MacOS system tags are awesome; they’re color-coded, easy to find, and easy to edit. But they have limitations in that they only work system-wide. IPTC keywords (the kind Windows uses) aren’t as user-friendly, but since they’re the actual stick-to-your-file metadata tags, they have the advantage. It comes down to you deciding on the purpose of the tags you’re embedding. Will your files move between platforms? Will they be used in software programs? Perhaps you want to use system tags first (just to sort), and add proper metadata at a later stage? If you just want to sort photos quickly and easily, use system tags (requires a Mac). If you want something that sticks to the file, so they can be found elsewhere, go with the IPTC ones (if you have a Mac, get a software).

I’m a Perfect Pinnable!
Beware of the Tag Monster
Before we get into the actual tutorial, I’ll offer a word of caution. It’s easy to create tags in Windows. In fact, it’s so easy that it’s downright dangerous. Most people who use tags end up with so many that they can’t remember which ones to search for…was it “work” or “job”? Hrmm…
Somehow, the limited color choices in the Mac system makes you think twice about how many tags you create because instinctively you don’t want to double up. But that’s not the case in Windows. There are no colorful visual reminders to rein you in, and there’s no great way to see the full list of tags you have, so you’re more likely to end up with a large number of keywords that you can’t remember. It can get out of control fast if you just make up keywords as you go, so the best thing to do is to plan out a controlled keyword vocabulary.
Creating a Controlled Vocabulary
So how you pick what keywords to include? I have found the best way to go about it is by deciding up front what to use – just like when planning short codes. This may not always be possible…I mean, it’s impossible to account for every potential scenario, but you can at least try to standardize as much as possible. More on this in another post. Your vocabulary doesn’t have to be fancy – it just has to work, and you can create one however you feel most comfortable – perhaps in a spreadsheet? As long as you plan ahead just a little bit, you’ll be fine. Just beware of the tag monster. It’s lurking out there. =0
Working with Keywords
System tags and IPTC keywords have a many similarities, especially in the way they are created. You can add tags as you are saving a file, or you can add it after the fact. Both tag systems let you have multiple tags added to one file, which makes them extremely useful if you have photos that belong to a few different categories.
In this tutorial, we’ll be using them from the File Explorer (previously known as the Windows Explorer) inside of your PC operating system. You can get to your File Explorer by clicking the shortcut in the middle of your dock (looks like a folder).
Open your File Explorer by clicking the folder in your dock!
Creating Tags
To tag a file, select it, right click to view the options menu, select Properties, and when the box pops open, go to the Details tab. You can add as many tags as you want to the file by simply typing them in the text box next to Tags (separate them by colons). When done, click Apply and OK.
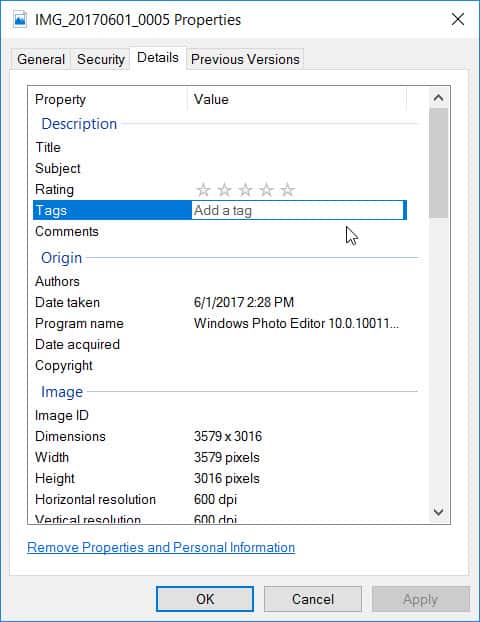
Find the IPTC keywords in the tags category under the Details tab in the file preferences! You can get to it by clicking right on any selected file and choosing Properties.
If you want to batch this process and be a little more productive, just select a few more photos at a time. Anytime you have more than one photo selected, you will add the same keywords to all those files. The only difference is that you will only see two tabs, and the Details pane will not show individual values for each image; it’ll say Multiple Values instead.
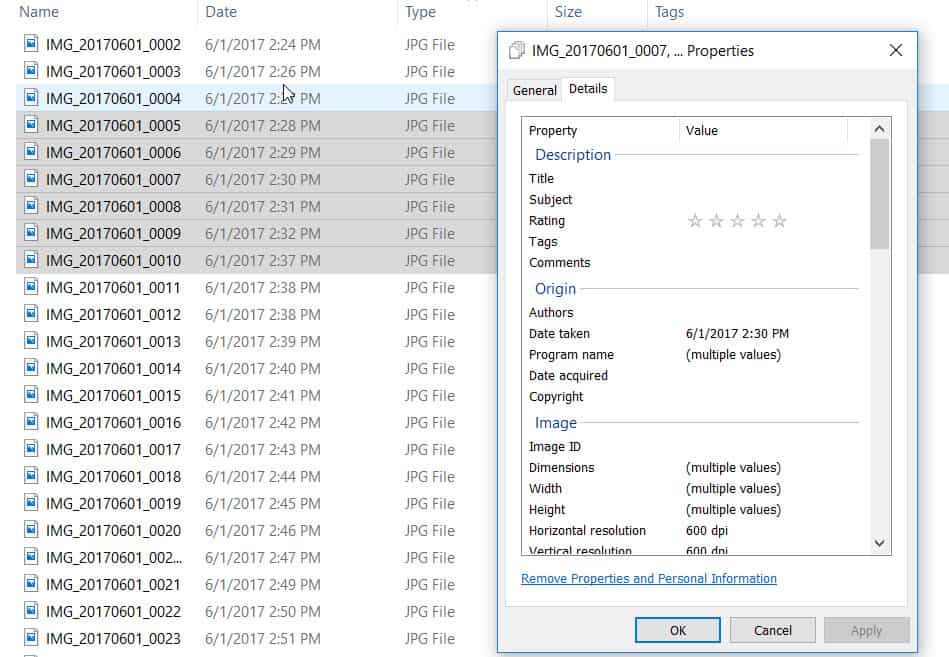
To add the same keywords to more than one photo, select multiple files!
Renaming & Deleting Tags
Renaming and deleting tags in Windows is tricky, and this is why it’s so great to have a controlled vocabulary done upfront. If you tag as you go and spell something wrong, you may need to replace a tag or two. In that case, you have to first delete that tag from all of your files, and then replace it with a new tag. There isn’t any editing of one particular tag, like you have with the MacOS system tags. Inconvenient? Yes, but it’s because the two types of data resides in different places.
The same conundrum happens when you want to delete a tag. It’s not enough to just delete it from one file; you have to delete it from all files for it to go away. To avoid this, I make sure everything is spelled correctly from the get-go. If you tag as you go, just know that it can become a little messy. The best way either replace or delete a tag is to do a filter search for the tag you want to change, add a new one (the correct one), and then delete the one that needs to go.
This is one of those areas where a professional program like Photo Mechanic or Lightroom have the edge – because they have a Find and Replace function, which makes it easier to correct mistakes.
Finding Your Files
You have a multitude of options for finding your files in your File Explorer under Search Tools. You can search by a lot of different properties, not only tags, so it’s a very powerful filtering tool. Another simple way to find a file is to use the search box on the right hand side of the File Explorer navigation bar. Additionally, you can group your files by tags, which is what I will show you in the sorting process.

Take advantage of all the search tools in your File Explorer!
A Windows Sorting Workflow to Get You Started
Let’s take a look at how you can use tags in Windows to sort your photos and files. This is a basic workflow, but feel free to adapt it to whatever way you like to work!
Step 1: Set Up a Dummy File & Attach Tags
If you read my previous blog post on how to sort on a Mac, you know that this step is where (in your MacOS), you would go into the preferences and set up all your tags. Unfortunately, there’s no great way to do that in Windows because they IPTC keywords are connected to the files themselves (not to the system). You can view a list of your tags after the fact, but you can’t set them up beforehand. That is a big limitation in my opinion, but I get around it by creating a dummy file and attaching all of my new tags to it. Why not create them as you go? Because it’s important that you have all your tags in front of you before you start, so you keep them in check – or the tag monster will get you.
Before you get started, make sure that you have your File Explorer open, and that you’re in the Details view, so you can see all of the information that’s available for each file.

Start by selecting the Details view, so you can see all the file information!
If you’re not seeing the tags column in your outline, click Add Columns in the view panel, and make sure you have the option for tags turned on. When you’re sorting files, it’s nice to see all of your options in front of you, so I tend to make sure they’re all selected, like this:
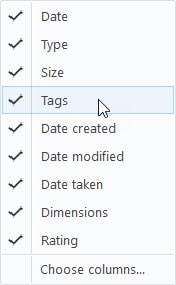
Check your preferences!
For your dummy file, you can pick any file that’s virtually lying around, but I like to have a blank Jpeg on my computer for testing purposes. I call it my Tag Guide. Ironically, as I was typing this tutorial from a different computer than I normally use, I had to create a new one… but you get the idea. You can pick any file, but you just have to remember which one it is (hint – tag it!).
Once it’s together with the rest of you photos, you can begin tagging it with all the keywords you have decided to use in your collection.
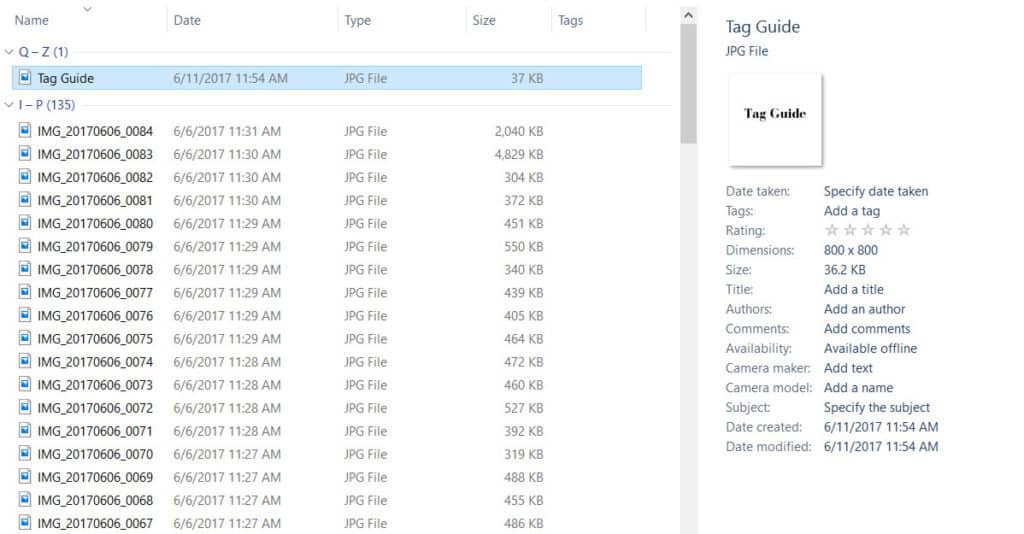
Use a blank Jpeg file to help you set keywords upfront!
Let’s say you will be sorting photos thematically by location. Attach all the location tags to the dummy file (separate them with colons). In this case, I’ve added United States, Canada, Mexico, Florida, Ohio, and Illinois in the tags category because those are the ones I anticipate using in this tutorial.
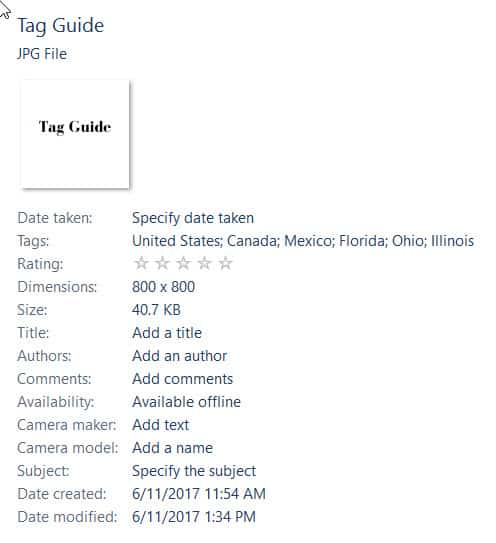
Use a blank Jpeg as Tag Guide for your keywords!
When all of your tags are attached to the Tag Guide file, they’re now available to choose from, and you don’t have to make them up as you go. Three is obviously a small enough number of tags that you could remember them all, so if you only have a few files to sort, you can skip this step. This is a strategy that comes in handy when you have a very large unsorted photo collection with lots and lots of keywords to remember.
Step 2: Assign Tags to All Files based on Category
Now that your keyword strategy has been established, switch your File Explorer layout. Instead of sorting files by name, sort by tags. You can find this option in your View panel under the Group by option. I also like to keep the sorting Ascending (in this case, alphabetically starting with A), because it’s a little more straightforward that way.
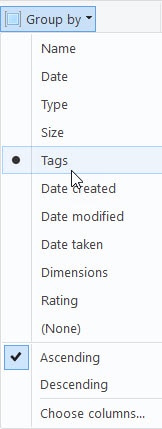
Switch your view!
Now that your layout has changed, all of your tag names will be laid out in front of you, and all of the files you have tagged will be sorted accordingly. In my case, I have only tagged one file (the Tag Guide Jpeg), so that one will show up everywhere. And that’s precisely its purpose – to help you outline what keywords you want to use. All other files will show up as Unspecified until I tag them too. By doing it this way, I can see what keywords I’m using at a glance instead of having to remember and guess.
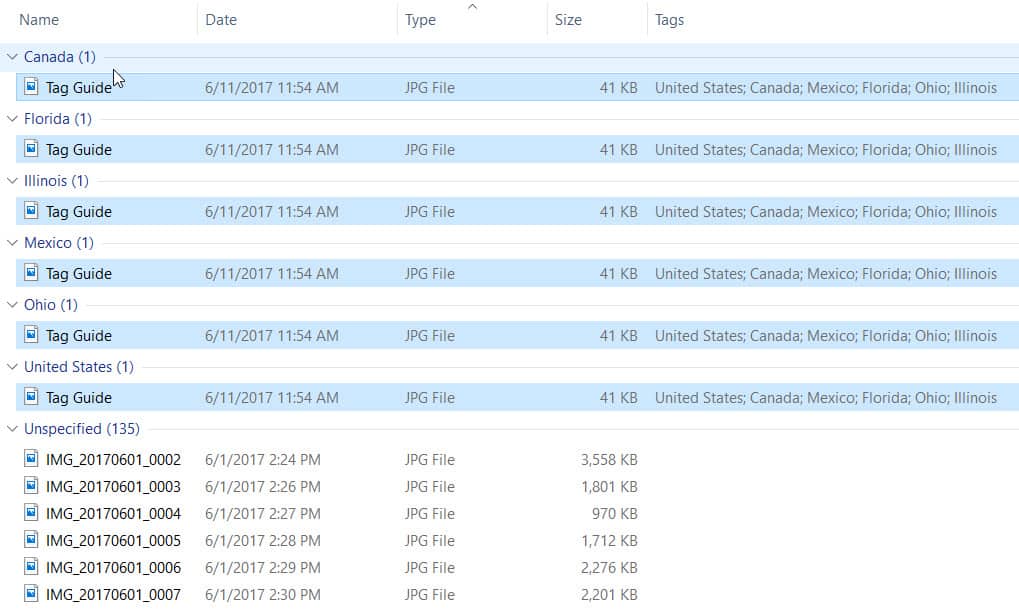
A Tag Guide file lets you see an outline of the keywords you’re using!
Just like in the other native sorting tutorial, I highly recommend starting with topical tags, and then segmenting further and further into smaller groups. For example, if you start with by tagging Countries, you can then go further into States, then into Counties, and then into Cities, and so forth. You want to sort from the top down. I wouldn’t recommend doing it all at once (unless you’re using a software, in which case this whole tutorial becomes moot).
Step 3: Review the Results
When you have tagged all of your files, you should see them line up nicely under each keyword. The only one that will show up everywhere is, as I explained earlier, the Tag Guide file. As you can see, I started with the countries, but I haven’t add the states yet. Why? Because not every file that needs the United States tag will need the Ohio tag. Start from the top and you’ll save yourself a headache later.
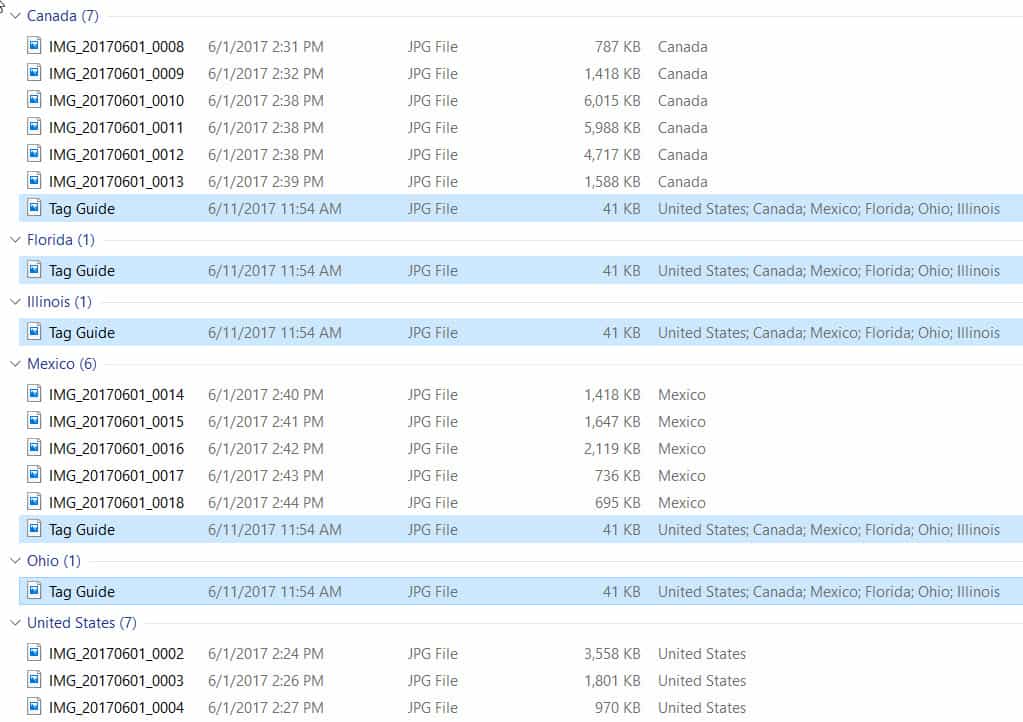
Add keywords from the top down!
Step 4: Start Process Over Again
If you are going to be segmenting your files further into groups, now is the time. In this example, I have decided to keep sorting United States into States, and so I have added those keywords as well, and it now shows both the state and the country:

Segment your photos into group using keywords!
You can keep going as long as you want, making the groups smaller and smaller, but don’t divert too much from the controlled keyword vocabulary you started at the beginning.
If you ever need to see a better overview of what tags you created, you can click the little drop-down menu at the top of the Tags column. This can be very helpful if it’s a long list of tags because otherwise you would have to scroll too much to get the whole overview. This is also your search filter, so if you want to display all the files for a particular tag, click the little box on the left.

Step 5: Move Grouped Photos into Folders
When you have tagged all your photos and you are satisfied with your groupings, you can create folders and move your files into them. That looks something like this:

Move your files into folder when you’re done entering keywords!
There’s no reason to remove the keywords from the files because metadata is always good to have attached to your files, so just leave them where they’re at (unless you’re sorting with a different system than the one you’re using for your metadata later on).
In the MacOS tutorial, you may have noticed that this step came before the segmenting step, but here in Windows you have to go about it in reverse. That’s because one limitation of Windows is that you can’t put a tag on a folder. With systems tags, you can attach them to pretty much anything, but with IPTC keywords, you can only tag your files. Ergo, you have to tag everything up front and then move the files into the correct folders. It’s a workaround, but once you get used to it, it’s not such a big deal.
What say you, readers? Do you prefer using system tags or do you go to IPTC keywords directly? Let me know in the comments below!





Fiona
September 7, 2017 at 1:53 pmHi Caroline, thank you so much for this post–you’ve answered many of my questions!
But I have a couple more… My organization has thousands of photos stored in folders and sub-folders on our shared network (using Windows 7). The problem with the IPTC tags is they don’t come up in group-by-tag if the photos are in separate folders. So for example if I’m looking for pictures tagged with “avocet”, and there are “avocet” pictures in multiple folders, I’d have no way to group the avocet images together from the master photo folder (I think?).
The other issue is our Windows search function. The photos are saved on a shared drive, and Windows doesn’t seem to want to index network folders (only offline folders. There are workarounds, but from what I’ve read they require a lot of fiddling). This really slows down searches. If I search for “avocet”, it may take half an hour to return all the avocet-tagged images!
We should be switching to Macs soonish, so maybe I should just wait for that transition rather than trying to work around these kinks? Do you have any other suggestions?
Caroline Guntur
September 8, 2017 at 11:52 amHi Fiona! Glad you found it helpful! This whole post is based on the individual computer, so yes, when you’re dealing with shared networks, you’re gonna come across a few kinks (like you’ve already found out). If you’re switching soon, then yes, I’d definitely wait! 🙂