Organizing Photos

  • Start Here
    • Beginner? Start Here!
    • Articles on Digital Photos
    • Articles on Printed Photos
    • Articles on Scanning Photos
    • Articles on Photo Gifting
    • Articles on Video & Film
    • Photo Backup & Safety
    • Genealogy & Family History
  • Coaching
    • Book a Discovery Call
    • How It Works
    • DIY Photo Organizing Options
    • Coaching for Photo Organizers
  • Courses
    • Online Course Academy Log In
    • DPO PRO: The Ultimate Photo Organizing Masterclass
    • The Organizing Formula
    • Searching Sweden: Finding Your Swedish Ancestors in Online Archives
  • Workshops
    • Apple Photos Deep-Dive 2024
    • DPO Flow 2023
    • Metadata For Genealogy
    • PBO: The Ins and Outs of Project-Based Organization
    • The People Index: Creating a Visual Index for Your Family Archive
    • Write, Design, & Publish Your Family History Book
    • Sharing with SmugMug: Creating & Managing Your Photo Archive
    • Museum Quality Storage for Photos and Heirlooms
  • About
    • Meet Caroline
    • Meet the Team
    • Press & Media Appearances
    • Contact OrganizingPhotos.net
    • Terms & Conditions | Privacy Policy | General Use Guidelines
In Beginner Photo Organizing/ Digital Photos/ Editing Digital Photos/ Intermediate Photo Organizing/ Metadata/ Organizing Digital Photos/ Photo Management Software

Native Organizing Part 4: Editing Your Photos in Preview

We continue the series on native organizing by taking a look at one of the most underrated apps in your MacOs: the Preview app. Alongside your Finder, it’s the most useful native organizing tool you have at your disposal. I use it quote a lot for small, quick fixes, but it’s capable of so much more, and I had to type this tutorial to do it justice. If you’re not familiar with what native organizing is, or why it’s great for beginners, take a look at parts 1, 2, and 3 in this series before reading this one! Enjoy! 


Preview – Your Native Editor

If you have a Mac computer, consider yourself lucky. You’re sitting on a goldmine of tools that you can use in organizing your photo collection. One of those tools is the Preview app that comes with your Mac operating system. This app is a super-easy way to make quick adjustments to your photos – the kind that many of us make, like cropping, resizing, and rotating. The Preview app also handles color adjustments, annotations, and conversions – not just for JPEGs, but also for PDFs, PNGs, and several other file formats. If you’re trying to edit some of your photos, but don’t want to learn Photoshop, look no further than this for an easy-to-use, down-to-earth alternative.


Native Organizing, Part 4: Editing Your Photos in the Preview App

I’m a Perfect Pinnable!


How to Open Preview

The Preview app is very easy to open because it’s the default image editor for any photo that you save to your Mac. Just double-clicking your photo should open the program, provided that you haven’t changed the settings. If you want to open it from the menu, you can find it in your launchpad, or under Applications in your Finder’s Go Menu. You can of course also do a quick spotlight search for it. The icon for the app is two photos combined with a magnifying glass.

Native Organizing, Part 4: Editing Your Photos in the Preview App

Open the Preview app by double-clicking on your photo in the Finder!


Navigating the Preview App

The Preview app is the perfect editing tool for beginners because it has very few buttons and it looks, well, unintimidating – unlike A LOT of other photo editors. There are just a few buttons you need to know, and they are pretty self-explanatory.

First, you get to decide how you want to view your photos. When you open the Preview app, it looks a little something like this:


Native Organizing, Part 4: Editing Your Photos in the Preview App

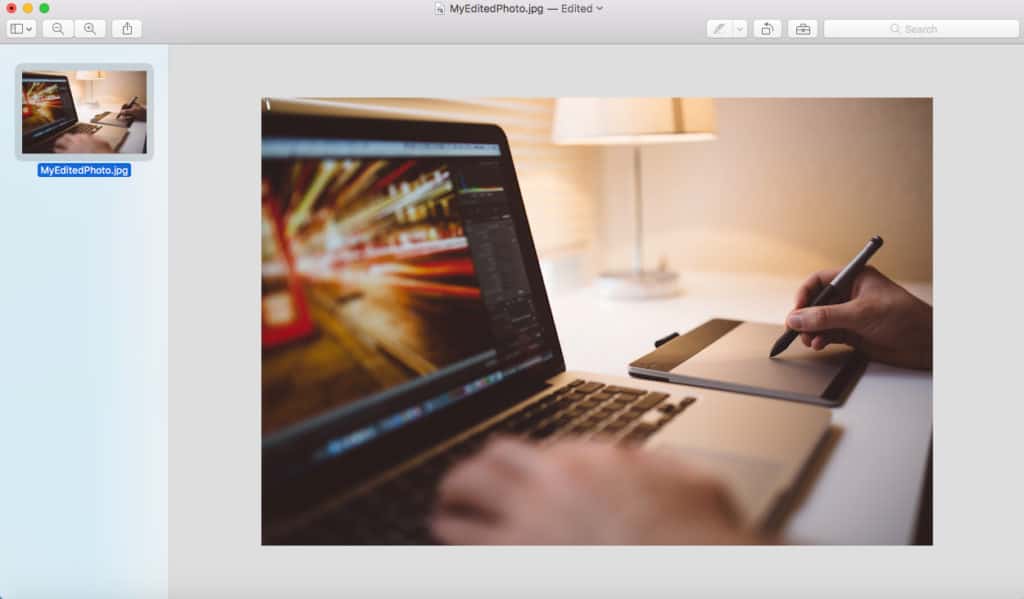
You can easily change the layout (the way you view your photos)!


Want Another Layout?

The first little button all the way on the left is your layout button. Pushing that lets you choose how you’d like to view your files – either in thumbnail view (see above), in a Table of Contents mode, or in a Contact Sheet view. You can also hide the sidebar completely if you’d rather see the selected image full-screen.

Here’s a closer look at those options:

Native Organizing, Part 4: Editing Your Photos in the Preview App

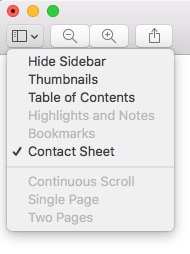
Hide or expose the sidebar, and select the best view!

Need to Zoom?

The second two buttons (minus and plus) is your zoom. You can adjust how your see the selected photo by either enlarging or minimizing it. Just note that using these buttons don’t change the actual size of your photo; it just changes just how you view it on your screen. I like to keep mine at about 75%, so I can see the entire photo unobstructed.


Import, Upload, or Share

The next icon is the upload button; pressing that lets you email, airdrop, tweet, share, import, or message your photo.
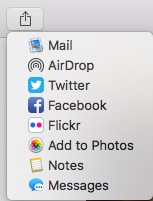
Native Organizing, Part 4: Editing Your Photos in the Preview App

Lots of options!

Rotating Your Photos

The rotate button looks like a rectangle with an angled arrow. Use it to rotate your image if it’s upside down, or on its side. The only limitations here are that (unlike Photoshop and other advanced editors), you can’t select an exact number of degrees to tilt your photo, and you can’t mirror your photo, but it’s unlikely you’ll need those features unless you’re doing more advanced editing on scanned photos.

Native Organizing Part 4: Editing Your Photos in Preview

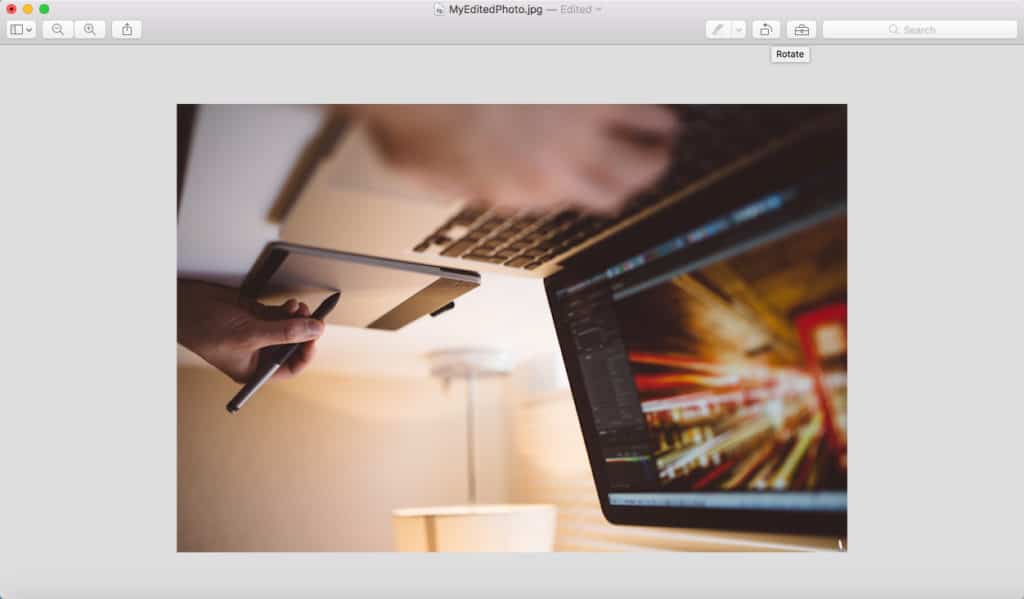
You can rotate your photo by clicking “Rotate,” Pretty easy, huh?


Display More Advanced Editing Options

The last button (next to the search) is the toggle on/off for the markup toolbar. When it’s on, it’ll display the options for the rest of the editing tools, like the lasso, color adjustments, and text tools.

Native Organizing, Part 4: Editing Your Photos in the Preview App

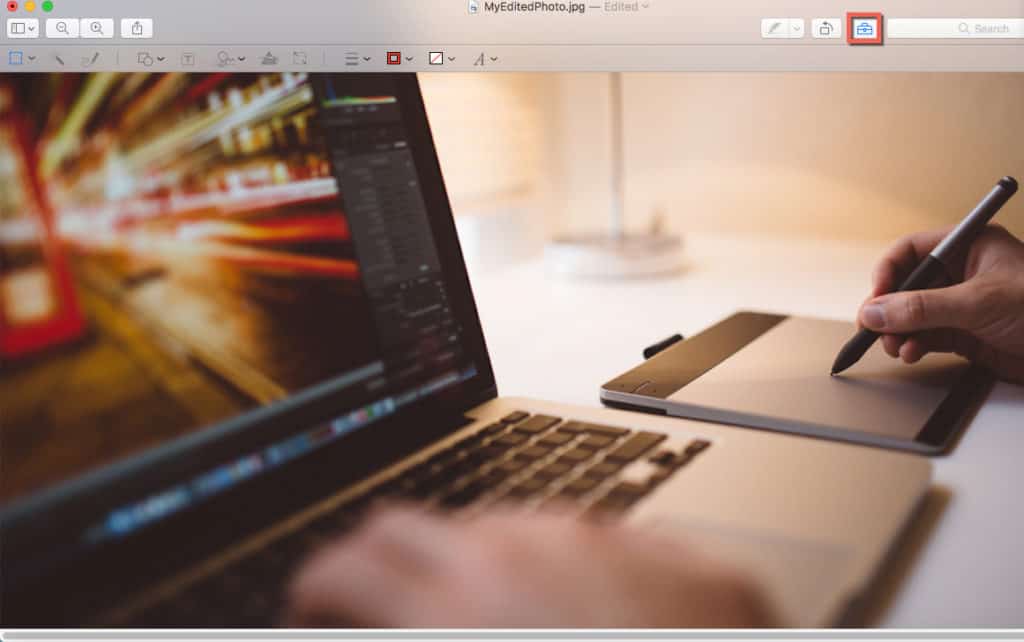
Toggle the markup tool button on for more editing features!


Just like in your Finder, you can customize what shortcuts you see in the toolbar. If you go to the Customize Toolbar option under View in the main menu, you’ll be able to add many more shortcuts that are very useful, such as magnify, and print.

Native Organizing, Part 4: Editing Your Photos in the Preview App

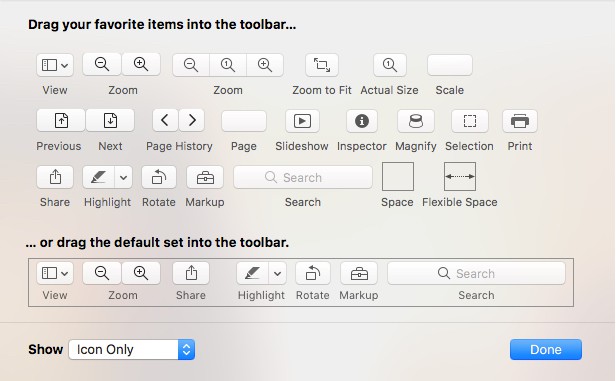
Customize your toolbar by dragging & dropping additional shortcuts into the navigation!


What Type of Editing Can You Do in Preview?

The Preview app doesn’t offer advanced editing features, so if you’re looking to restore an old faded photo, this isn’t going to work. However, if you’re just looking to make run-of-the-mill common changes, it’s all the tool you need. Let’s get into what exactly you can do with your photos in the Preview app.

Resize, Resample, or Scale Your Photo

Besides rotating your photo, you can change the size of it very easily in the Preview app – all you need to do is press the resize button (or go to Edit > Adjust Size). This lets you change the dimensions of your photo in either pixels, inches, centimeters, millimeters, points, or percent. It’s actually really similar to the options that come with more advanced editors. You can scale your photos at the same ratio, or remove the restrictions, and preview exactly what the end result will be. Very useful for making quick dimension changes!


Native Organizing, Part 4: Editing Your Photos in the Preview App

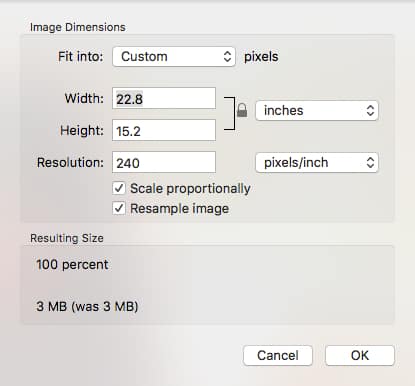
You can crop, resample, resize, and scale your photos easily in Preview!


Adjust the Color & Contrast Levels

If you need to fix the color temperature, contrast, brightness, saturation, or sharpness levels of your photos, just press the adjustment button for all those options. There are no numbers to plug in, just sliders, so it’s fairly easy for a novice to work out. Adjust until your photo looks good.


Native Organizing, Part 4: Editing Your Photos in the Preview App

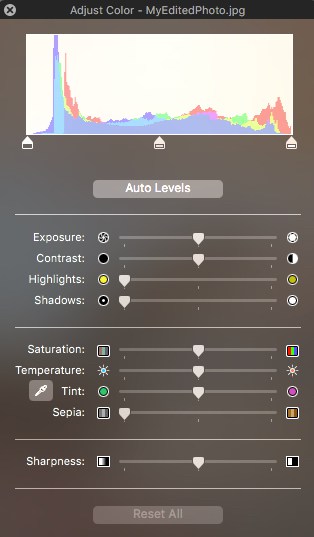
Adjust the color, exposure settings, or color temperature!


Crop Your Photo

You can also crop your photo with the Preview app. This is how I most often use it because it’s so much quicker than opening Photoshop. All you have to do is select the border of how you want it cropped, and press Command +K. Don’t forget to save your changes.


Native Organizing, Part 4: Editing Your Photos in the Preview App

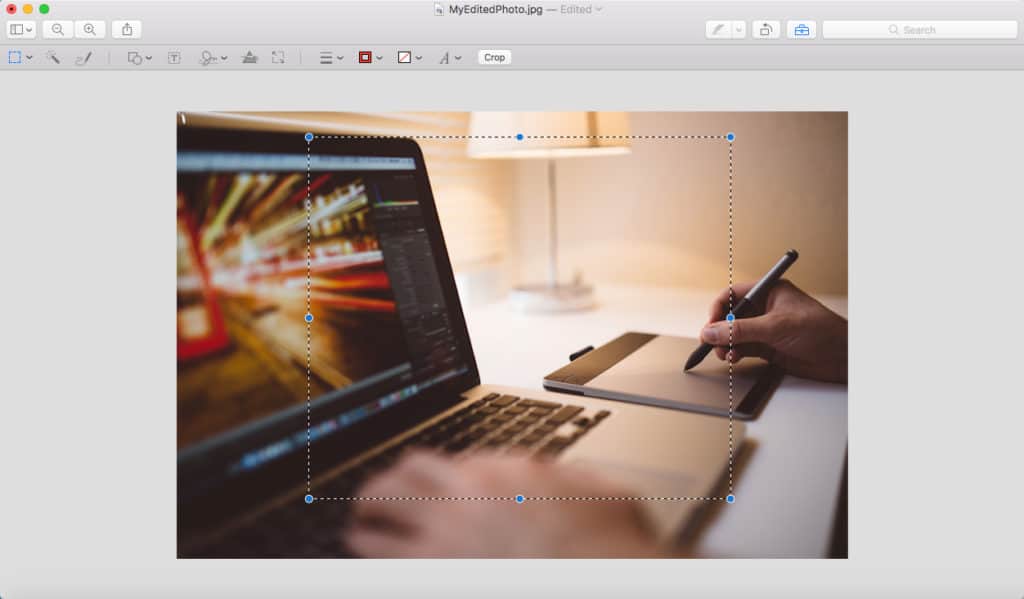
You can crop your photo with the selection tool. The shortcut is Command + K .


Annotate Your Photo

Did you know that in Preview you can also annotate your photos, and add text to your file in almost any font, size, and color? This is very useful if you’re creating any type of tutorial (as I am in this blog post), but it’s also useful for making other types of graphics.

I read a blog post recently where the idea of creating captions was presented. One of my colleagues pointed out that it would be a great idea to actually create a border around the photo and use the text tool to type in the story of the photo. Personally, I don’t know that a technique like that would fit my workflow, but what a great way to preserve the stories if you have the time to do it.


Native Organizing, Part 4: Editing Your Photos in the Preview App

Did you know you can annotate both photos and PDFs in the Preview app?


The text tool lets you pick the font, size, color, and justification of your text, and what more do you need that that, really? As with other text editors, you can bold, italicize, and underscore your text too.


Native Organizing, Part 4: Editing Your Photos in the Preview App

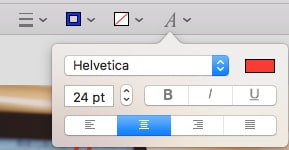
You can change the font, size, color, and justification quickly under the text tool!


Convert Your File Formats

Got something other than a JPEG? No problem. The Preview app can actually read and convert many different type of files formats. This means that you probably won’t run into any issues trying to read a file, even if you’re not sure what that format is, or what type of reader could possibly open it. Preview lets you open anything from graphics files (BMPs, GIFs, PSDs, PNGs, etc.) to certain raw files, to document formats (like PDFs) to PowerPoint presentations. Once opened, any file can be exported to a different format. Not in batches, sure, but it’s still convenient if you have only a few files.


View the Photo’s Metadata

You don’t need to know how to create metadata to know how to view it. On a Mac, you can press Command + I at any time to show the inspector for the selected file.

You can also find that option under the Tools menu in the main navigation:


Native Organizing, Part 4: Editing Your Photos in the Preview App

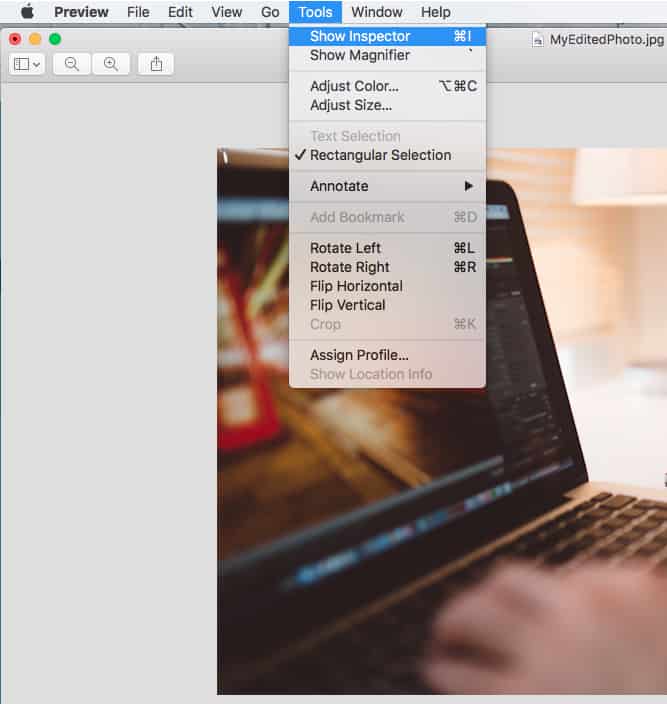
Click Tools > Show Inspector to view the metadata for your photo!


When the inspector opens, choose the information tab to see the metadata for the photo. You can see both the Exif metadata, which is essentially the details on how the files was created and with what settings, and the IPTC metadata, which is the descriptive information about your photo.


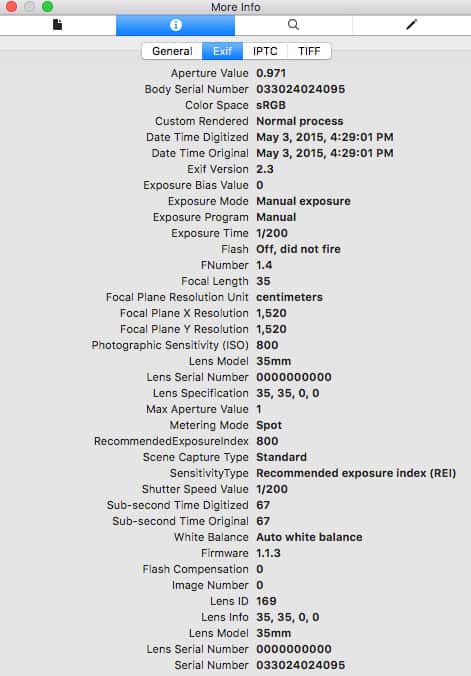
You can see both Exif and IPTC metadata!


Finder + Preview = Photo Management Made Easy

As you can see from this post (and from part 2 in this series), your Mac’s built-in apps can do A LOT. In fact, the Finder and the Preview apps together are the cornerstone of native organizing, and together, they’re all you really need to manage your photo collection. Is the Finder the most elegant way to view files? No. Is Preview the most efficient way to edit hundreds of photos? No. But they can get the job done. And for many people, that’s enough. If you need more upscaled features, like editing your Exif data, try adding on a simple image browser, like Adobe Bridge or Photo Mechanic to turbo-charge your efficiency.

Don’t forget that Finder & Preview also work perfectly fine with all your other files, unlike photo-specific software programs that may or may not open your files because of their format. So take full advantage of them all!

What say you, readers? Are you taking full advantage of the Preview app?


Ready for Part 5 of this series? It’s right here!

Print Friendly, PDF & Email

Share this:

  • Click to share on Facebook (Opens in new window) Facebook
  • Click to share on X (Opens in new window) X
  • Click to share on Pinterest (Opens in new window) Pinterest
  • Click to share on Reddit (Opens in new window) Reddit
  • Click to share on Pocket (Opens in new window) Pocket
  • Click to share on LinkedIn (Opens in new window) LinkedIn
  • Click to share on WhatsApp (Opens in new window) WhatsApp
  • Click to share on Tumblr (Opens in new window) Tumblr
  • Click to email a link to a friend (Opens in new window) Email
  • Click to print (Opens in new window) Print

Related

Digital OrganizingDigital PhotosEditing Photos
June 27, 2017 By Caroline Guntur
Share Tweet Pin it Share
About Caroline Guntur

Caroline Guntur, better known as The Swedish Organizer, is the CEO of The Swedish Organizer, LLC. As a Certified Photo Organizer, she enjoys helping others preserve and protect their memories, hence this blog. Caroline is a longtime member and Advisory Board Member of The Photo Managers, and a Golden Circle member of NAPO (the National Association of Organizing & Productivity Professionals).

You Might Also Like

Create Better Stories by Storyboarding Your Photo Books

October 19, 2020
Color-Coding Fun, Part 2: Customizing Your Folders on a PC | OrganizingPhotos.net

Color-Coding Fun, Part 2: Customizing Your Folders on a PC

February 6, 2018
Photo Motivation

Photo Motivation: Need a Little Bit?

August 15, 2017
Previous Post Next Post

Hi There!

Hi There!

I'm Caroline, a Certified Photo Organizer, and I'm here to help you sort your stashes of memories, once and for all.


I live at the intersection of Family History and Digital Organization, so I teach people just like you how to organize and preserve their family stories and treasures, so that future generations can enjoy them too! You can read more about me here!


My company offers online courses, online workshops, and private coaching to help you get your ducks in a row! I invite you to book a Discovery Session to see how we can help you get organized!

Browse by Category

Trending Right Now:

  • Scanning Goes Mobile: An In-Depth Review of Photomyne
  • 3 Ways to View Old Slides and Negatives (Without Scanning a Thing!)
  • How to Use Metadata to Supercharge Your Photo Organization Process
  • 10 Tips to Optimize Your Photo Editing & Culling Workflow
  • How to Create a Photo & Video Slideshow with Microsoft Photos
  • 4 Great Ways to Sort Your Photos (It's not as hard as you think!)
  • The #1 Mistake People Make When Trying to Organize Their Photos (+How You Can Avoid It!)
  • Simplified Photo Organization: Apps, Programs and Tactics
  • Date Taken, Date Created, Date Modified: What's the Difference? A Simple Guide to Photo Time Stamps!
  • 5 Photographer Tips to Better Organize Your Digital Photos

Pin with Me!

Follow The Swedish Organizer, LLC's board The Swedish Organizer, LLC on Pinterest.

Recent Reviews

Patricia P. Holler, Oregon
🌟🌟🌟🌟🌟

In desperation about the hodgepodge of digital photos that were scattered around unorganized in my life, in July 2020, I found info about Caroline Guntur’s DPO PRO class. I signed up and devoted the early Covid-19 lockdown months to working through the modules offered in the class. The class videos were very informative and enlightening. I gathered thousands of digital photos from many locations — old phones, old computers, CDs & DVDs, plus emails & text messages. I went through them all and discarded many duplicates. I formulated a naming convention for pictures, that I have now begun using for all my digital files. Along the way, I had many questions which I emailed to Caroline. Her patience is phenomenal, and her always-attentive care and prompt responses helped me immensely. I also learned so many useful things in this class that were not directly related to organizing photos. For example, I now have an automated system that backs up my entire computer daily, in addition to a cloud-based backup system that I already used. For me, the cost of the DPO PRO class was a hefty financial investment, but it has already been worth every penny. Caroline is a wonderful teacher, and I think of her as a friend, though we have never met.


Bryn M., Sweden
🌟🌟🌟🌟🌟

Caroline helped me finally organize 20 years of images, in various formats, scattered across multiple locations and devices - a task I had been wanting to accomplish for years, but was completely overwhelmed about how to begin. I had three iPhoto libraries and didn’t know which one was the most current or had the most images, plus I had images saved in several Dropbox folders, a few thumb drives, my computer hard drive, two external hard drives, an iPad and two years of images on my iPhone. I also had images in an Aperture library, a program that doesn’t exist anymore so I didn’t know how to access them. I’m a reasonably “techie” person, but reading online articles about how to begin sorting through them always left me feeling overwhelmed. None of the step-by-step articles applied to me and my specific needs...Finally, I have ONE image library for all my images, all organized so I can quickly find any image I want, and with the peace of mind that all my images are constantly backed up and secure... I never would have been able to figure out how to do this alone. It is the best money I have spent in a long time!

Most Popular Tags

Apple Photos Backing up Backup Basics Cloud Cloud Storage Coaching Digital Digital Organizing Digital Photo Organizing Digital Photos distaster prevention DPO PRO Event Events Film Genealogy Hub iCloud Labeling Memories Metadata Native Organizing Online Organize Organizing Photo Photo Books Photo Hub Photo Projects Photos Presentations Printed Photos Prints Process Scanning Slideshows Sorting Storage Storing Storytelling Tags Video Webinar Workflow
Certified Photo Manager

Got a Question?

You can always reach us quickly by emailing hello@theswedishorganizer.com. If you’re interested in guest blogging, click here for submission guidelines.


The Legal Stuff

| Terms & Conditions | General Use Guidelines | Privacy Policy | Use of Cookies | Copyright Policy

Certified

Affiliate Disclaimer

On occasion, we recommend third-party products and services that may help you organize your memories. Such recommendations are always based on experience and testing combined with our belief that they may be of value to you, our readers. Links to third-party websites on this blog may be affiliate links, and if you click through and make a purchase with them, this company may receive a commission. We do not specifically endorse the statements, marketing efforts, or opinions of third-party companies.
Facebook Instagram Pinterest Youtube LinkedIn

© 2009-2025 The Swedish Organizer, LLC. All Rights Reserved.

Back to top
This website uses cookies to improve your experience. We'll assume you're ok with this, but you can opt-out if you wish. Cookie settingsACCEPT
Privacy & Cookies Policy

Privacy Overview

This website uses cookies to improve your experience while you navigate through the website. Out of these cookies, the cookies that are categorized as necessary are stored on your browser as they are as essential for the working of basic functionalities of the website. We also use third-party cookies that help us analyze and understand how you use this website. These cookies will be stored in your browser only with your consent. You also have the option to opt-out of these cookies. But opting out of some of these cookies may have an effect on your browsing experience.
Necessary
Always Enabled
Necessary cookies are absolutely essential for the website to function properly. This category only includes cookies that ensures basic functionalities and security features of the website. These cookies do not store any personal information.
Non-necessary
Any cookies that may not be particularly necessary for the website to function and is used specifically to collect user personal data via analytics, ads, other embedded contents are termed as non-necessary cookies. It is mandatory to procure user consent prior to running these cookies on your website.
SAVE & ACCEPT
 

Loading Comments...