We continue our video series, courtesy of Selin Tagmat and Mind Your Photos, with a tutorial on how to create slideshows with FilmoraGo! This is a great way to share your memories quickly with family and friends when you’re our and about (perhaps even traveling?), so I suggest you read to your heart’s content and then pin this page for later reference! Enjoy!
On the Go? Try FilmoraGo!
Today, you take photos and videos anytime and anywhere by simply grabbing your phone from your pocket. And you know what? You can also create photo and video slideshows on the go with your phone – thanks to various apps! In this post, I have a tutorial for you on how to create a slideshow on FilmoraGo, a totally free, super easy-to-use and quite powerful video editor app for iOS and Android devices. For those interested in taking it to the next level, there are also Mac and Windows versions with more advanced video editing features available, which are free for personal use only.
Mobile Alternatives
FilmoraGo is just one of the good apps available on the market right now! If you are a more advanced user working with a video editor on your computer, check if they also have an app for your phone that you can use. For the Apple universe, you have the great iMovie option that makes your video projects available across your Apple devices. Love Adobe Creative Cloud? You might want to go for Adobe Premiere Clip for your phone, where you can later on open your projects for fine-tuning on Adobe Premiere Pro CC with more advanced features. If you’re using ProShow, which I would like to cover soon in a blog post, then you can check the ProShow mobile app for iOS devices. These are just a few examples, of course, but you get the idea!

I’m a Perfect Pinnable!
How to Create a Slideshow with FilmoraGo
Here are the steps for creating a photo & video slideshow with FilmoraGo!
Step #1 – Make a Plan and Prep Your Content
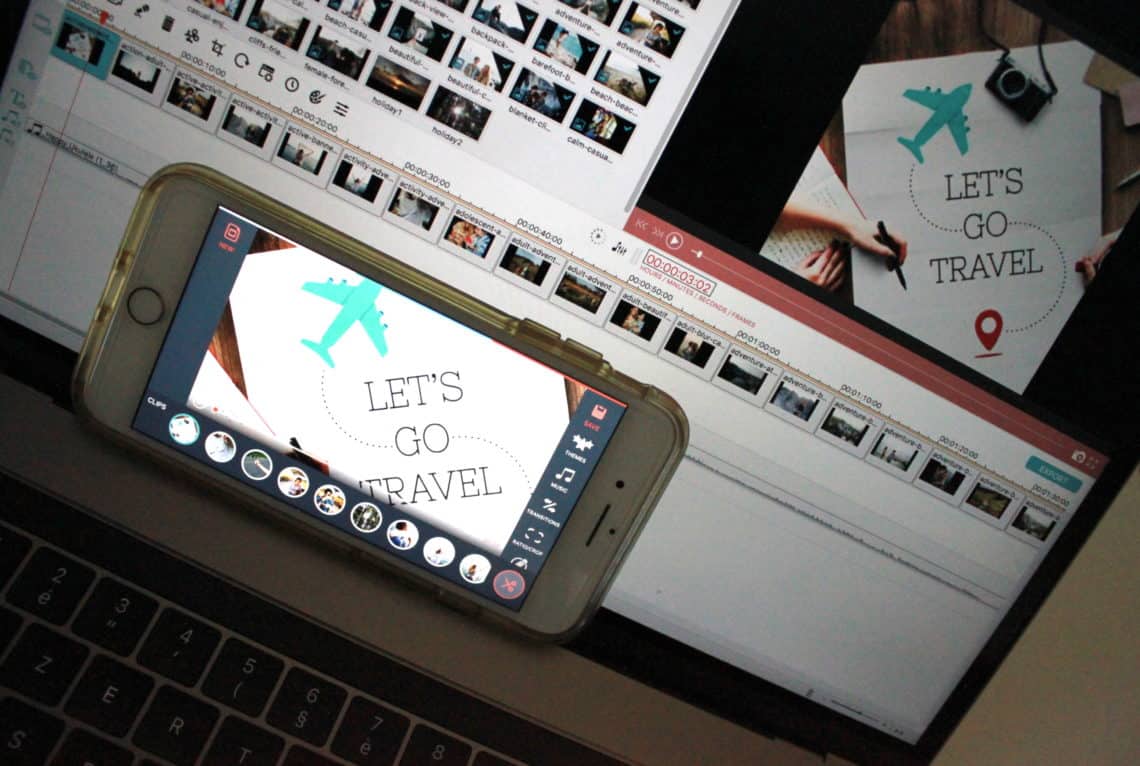
The first step for creating a slideshow is to decide on your slideshow concept, think of an outline, and prepare your content accordingly. For this tutorial, I’ll prepare a slideshow to share some weekend trip photos and videos with friends in a fun and uplifting style. The video will be around 3 to 4 minutes long. I selected 43 photos and 3 videos and created a dedicated album on Apple Photos app. I always sort my slideshow content in the right order. That way, I can easily add my it to the video editor without adding on extra organizing work.
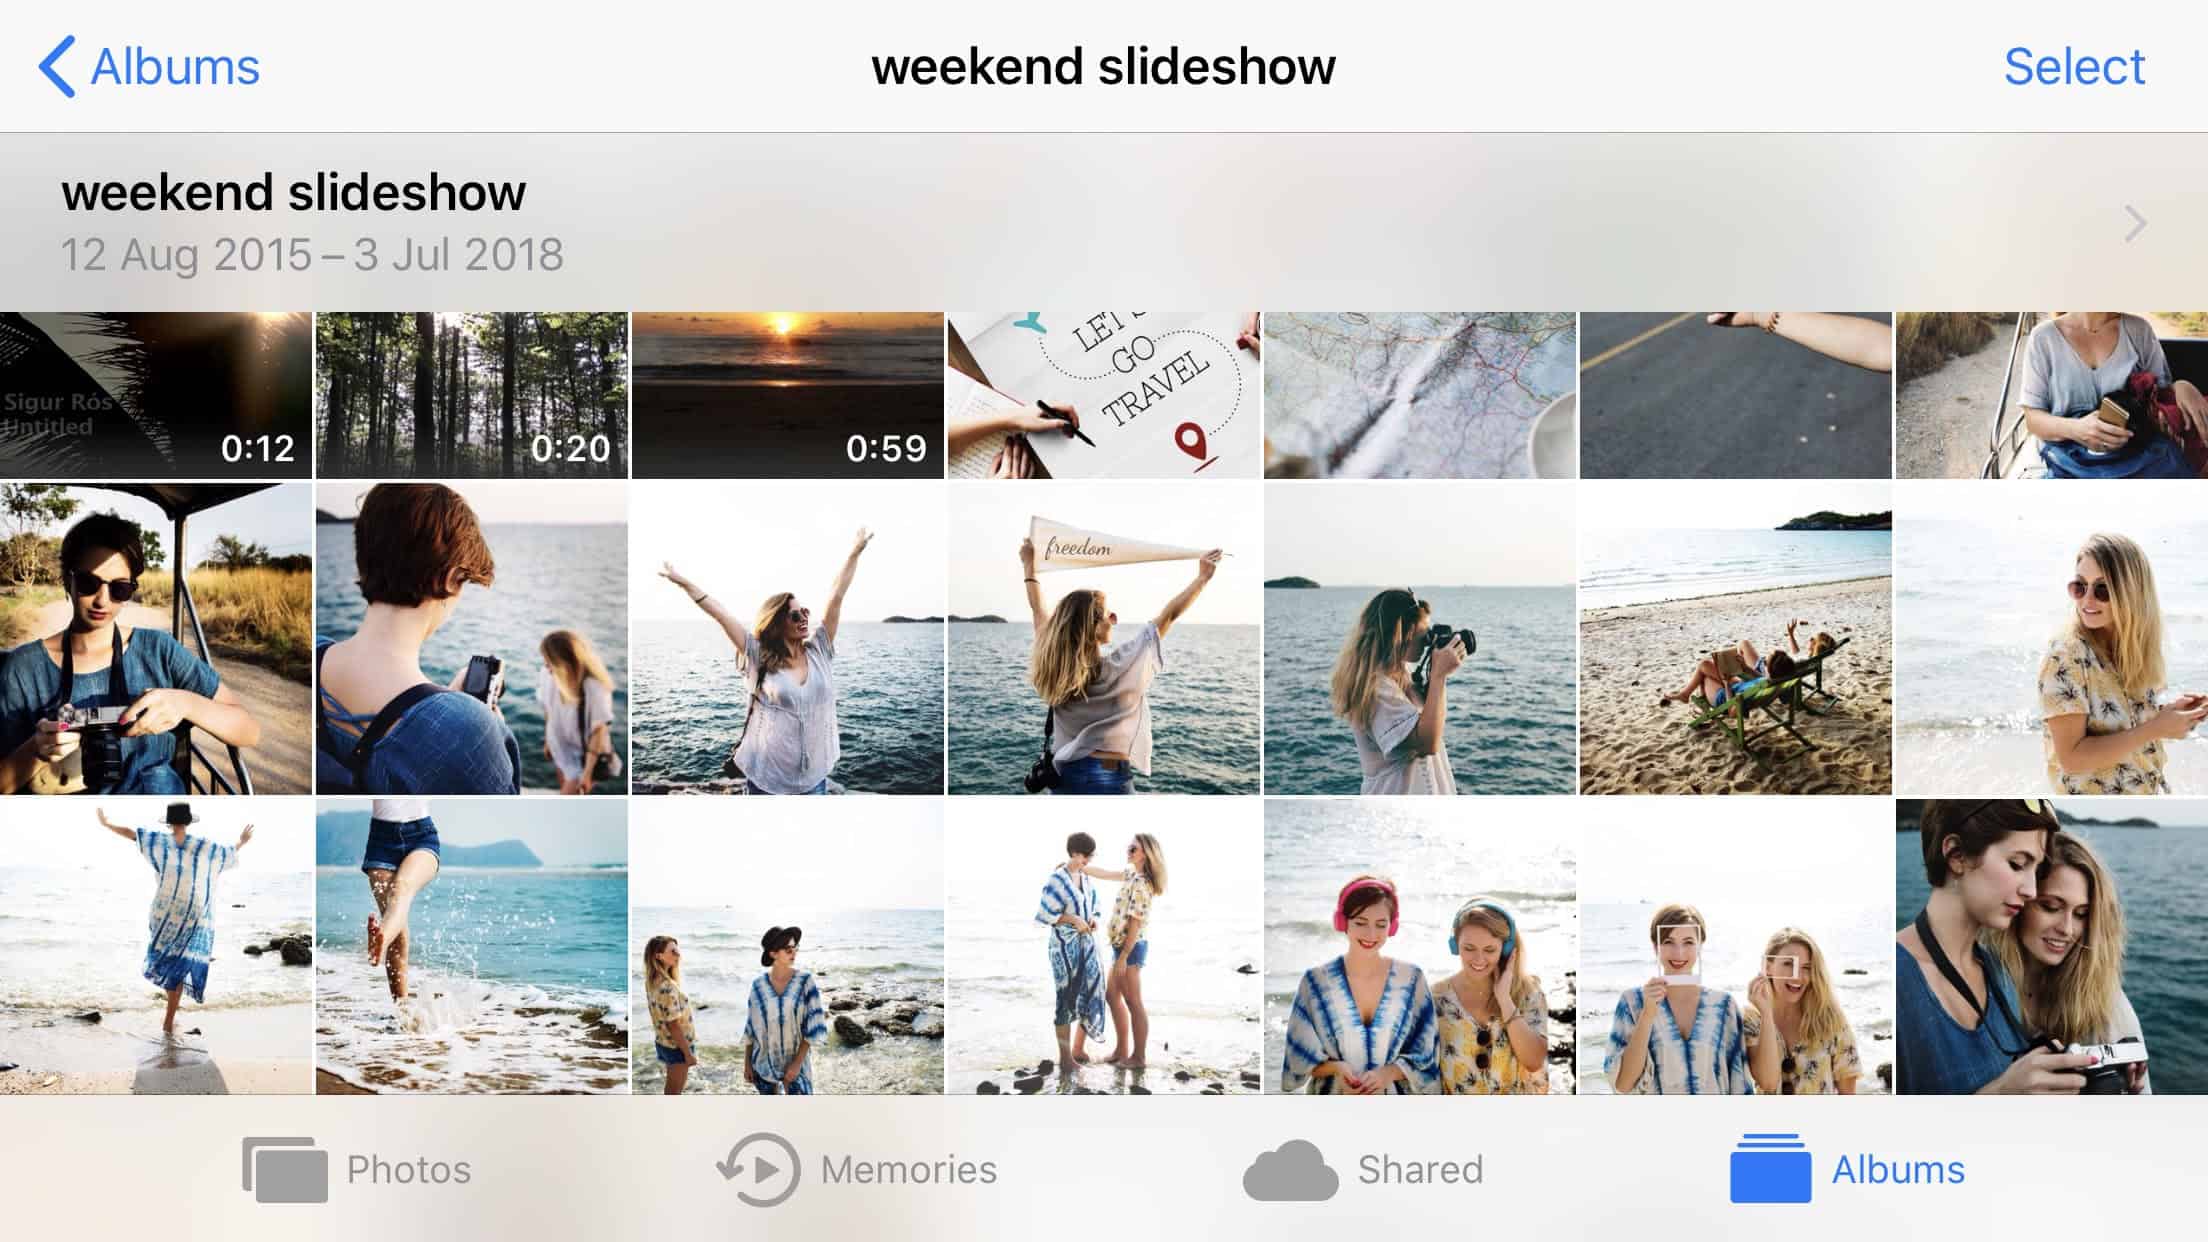
This is my album on Apple Photos with the slideshow content. Thanks to rawpixel for the photos and pexels for the videos!
If you need some basic tips and tricks on how to get well prepared and make the best out of your photo and video slideshows, you can find that here.
Step #2 – Download FilmoraGo
Download FilmoraGo on the App Store for your iOS devices, or get it on Google Play for your Android devices. For this tutorial, I used the iOS version on my iPhone.
FilmoraGo is free, but you have in-app purchase options if you’d like to use some effects beyond what’s offered. The free package is more than enough to make a nice looking photo and video slideshow, but you can always think of adding more if you like. You will have a FilmoraGo watermark at the end of your slideshow, but I think it’s a good compromise to be able to take advantage of the free powerful features offered by the app.
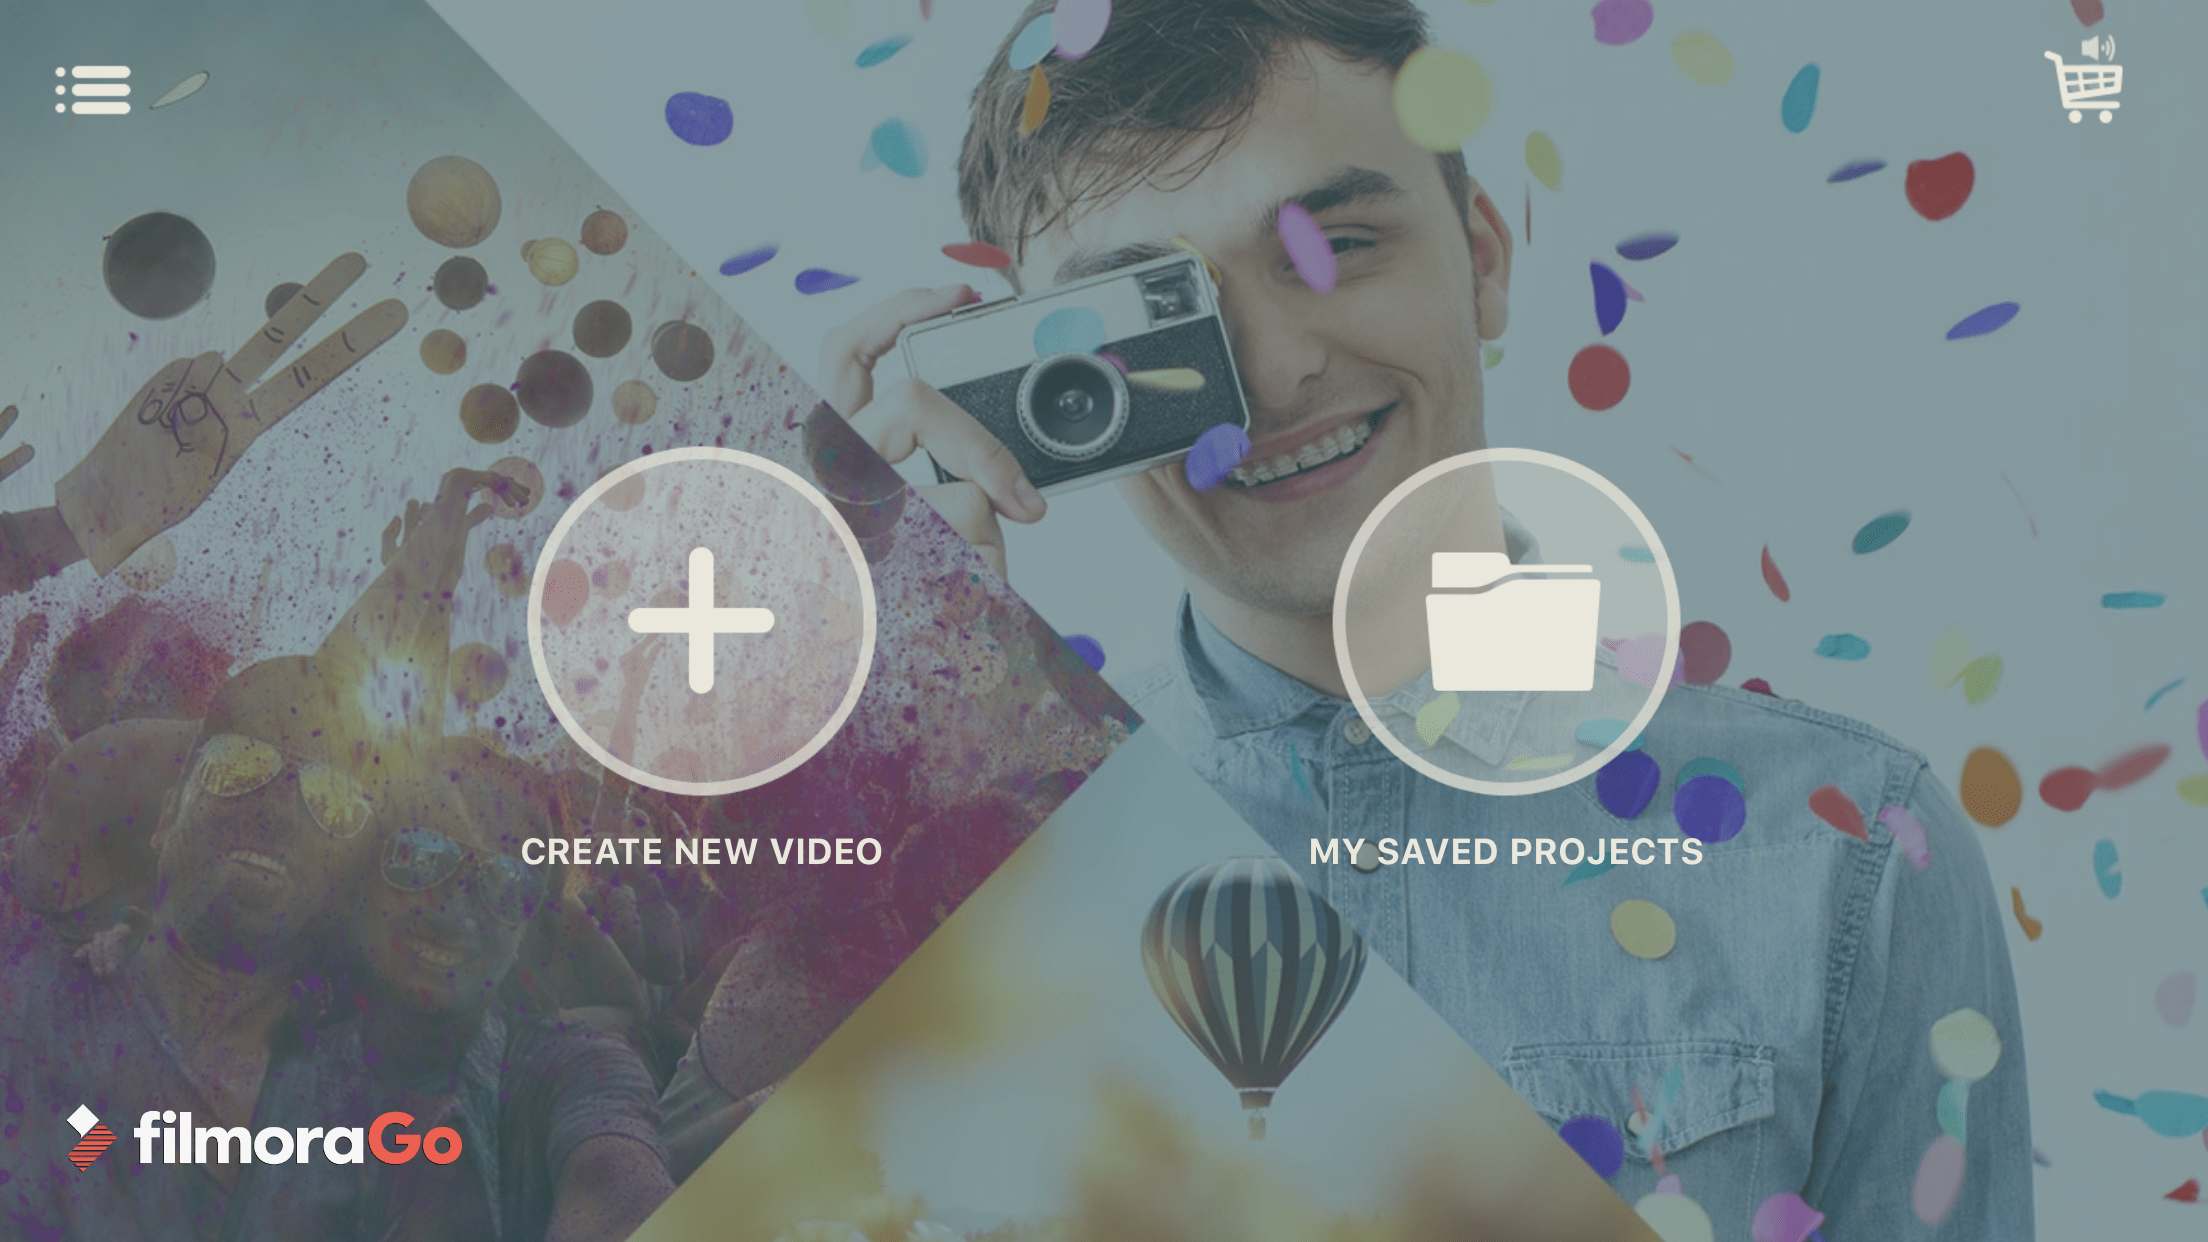
This is the first screen that appears when you launch FilmoraGo on your phone.
Click on Create New Video to start creating your slideshow. You can also access to your earlier saved projects by clicking on My Saved Projects.
Step #3 – Import Photos and Videos
FilmoraGo is handy as you can select your content from various sources: your phone camera roll, albums created on Apple Photos app as well as your Facebook and Instagram. You’ll need to login to your social media accounts to access and select content from those accounts.

FilmoraGo allows you to select content from various available sources.
When you select and add a photo to your content, you will see it moving into the blue arrow at the bottom left. This is where all your content is collected. You’ll see an increasing number indicated on the arrow as you add new content. Click on the arrow to see which photos are added so far and if you want you can remove any content from here.
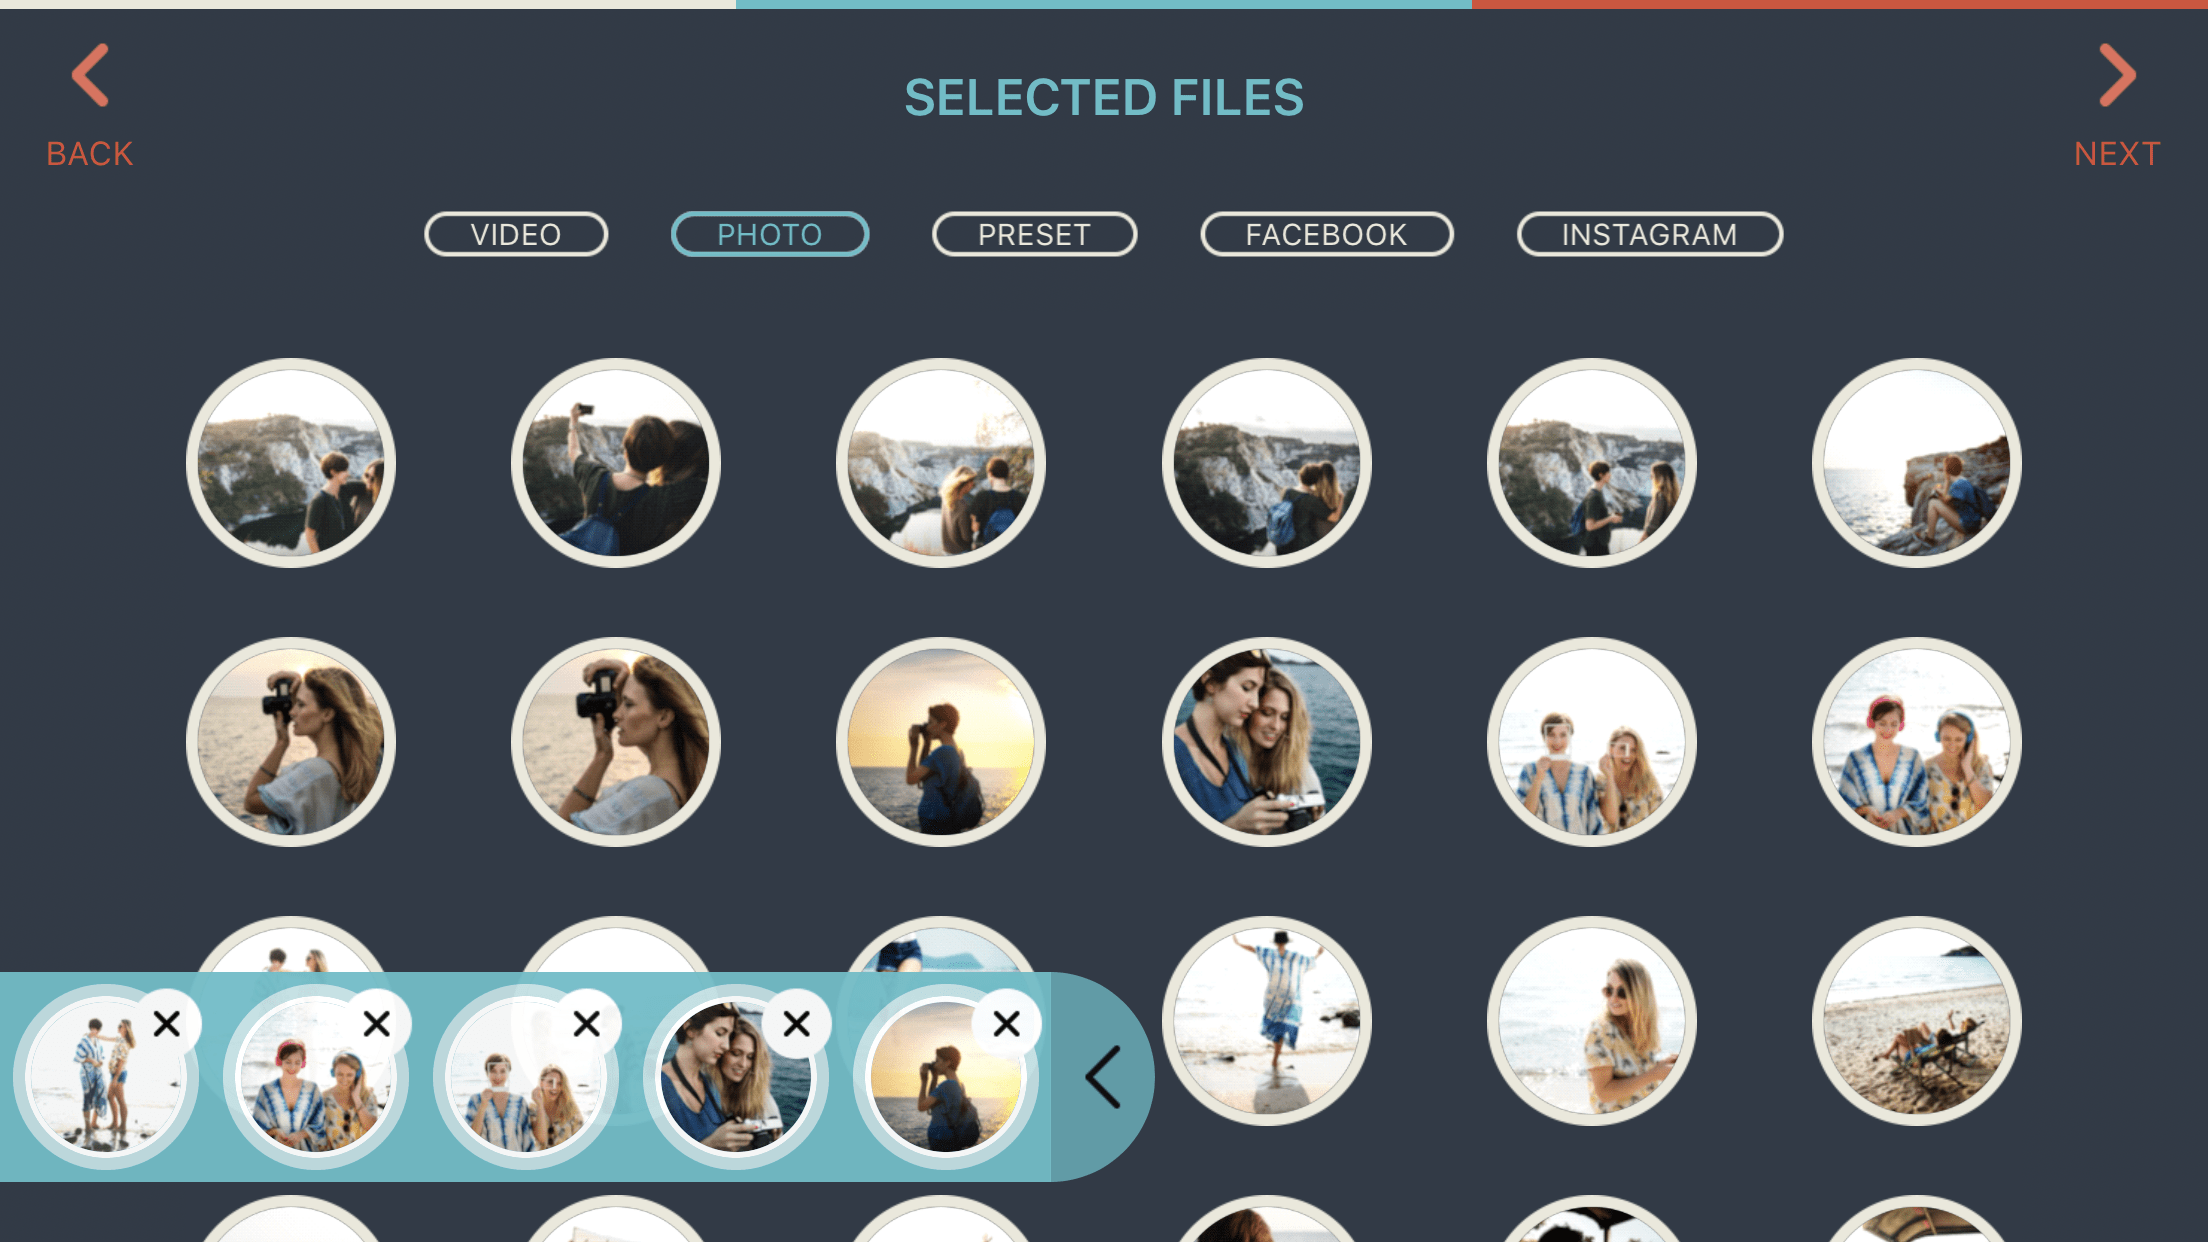
The blue indicator tells you what content has been added so far.
When you select a video, FilmoraGo will first give you the option to trim your video before adding it to your slideshow content. I find this handy. If you already know what you want, you can take care of this at the very beginning of the project.
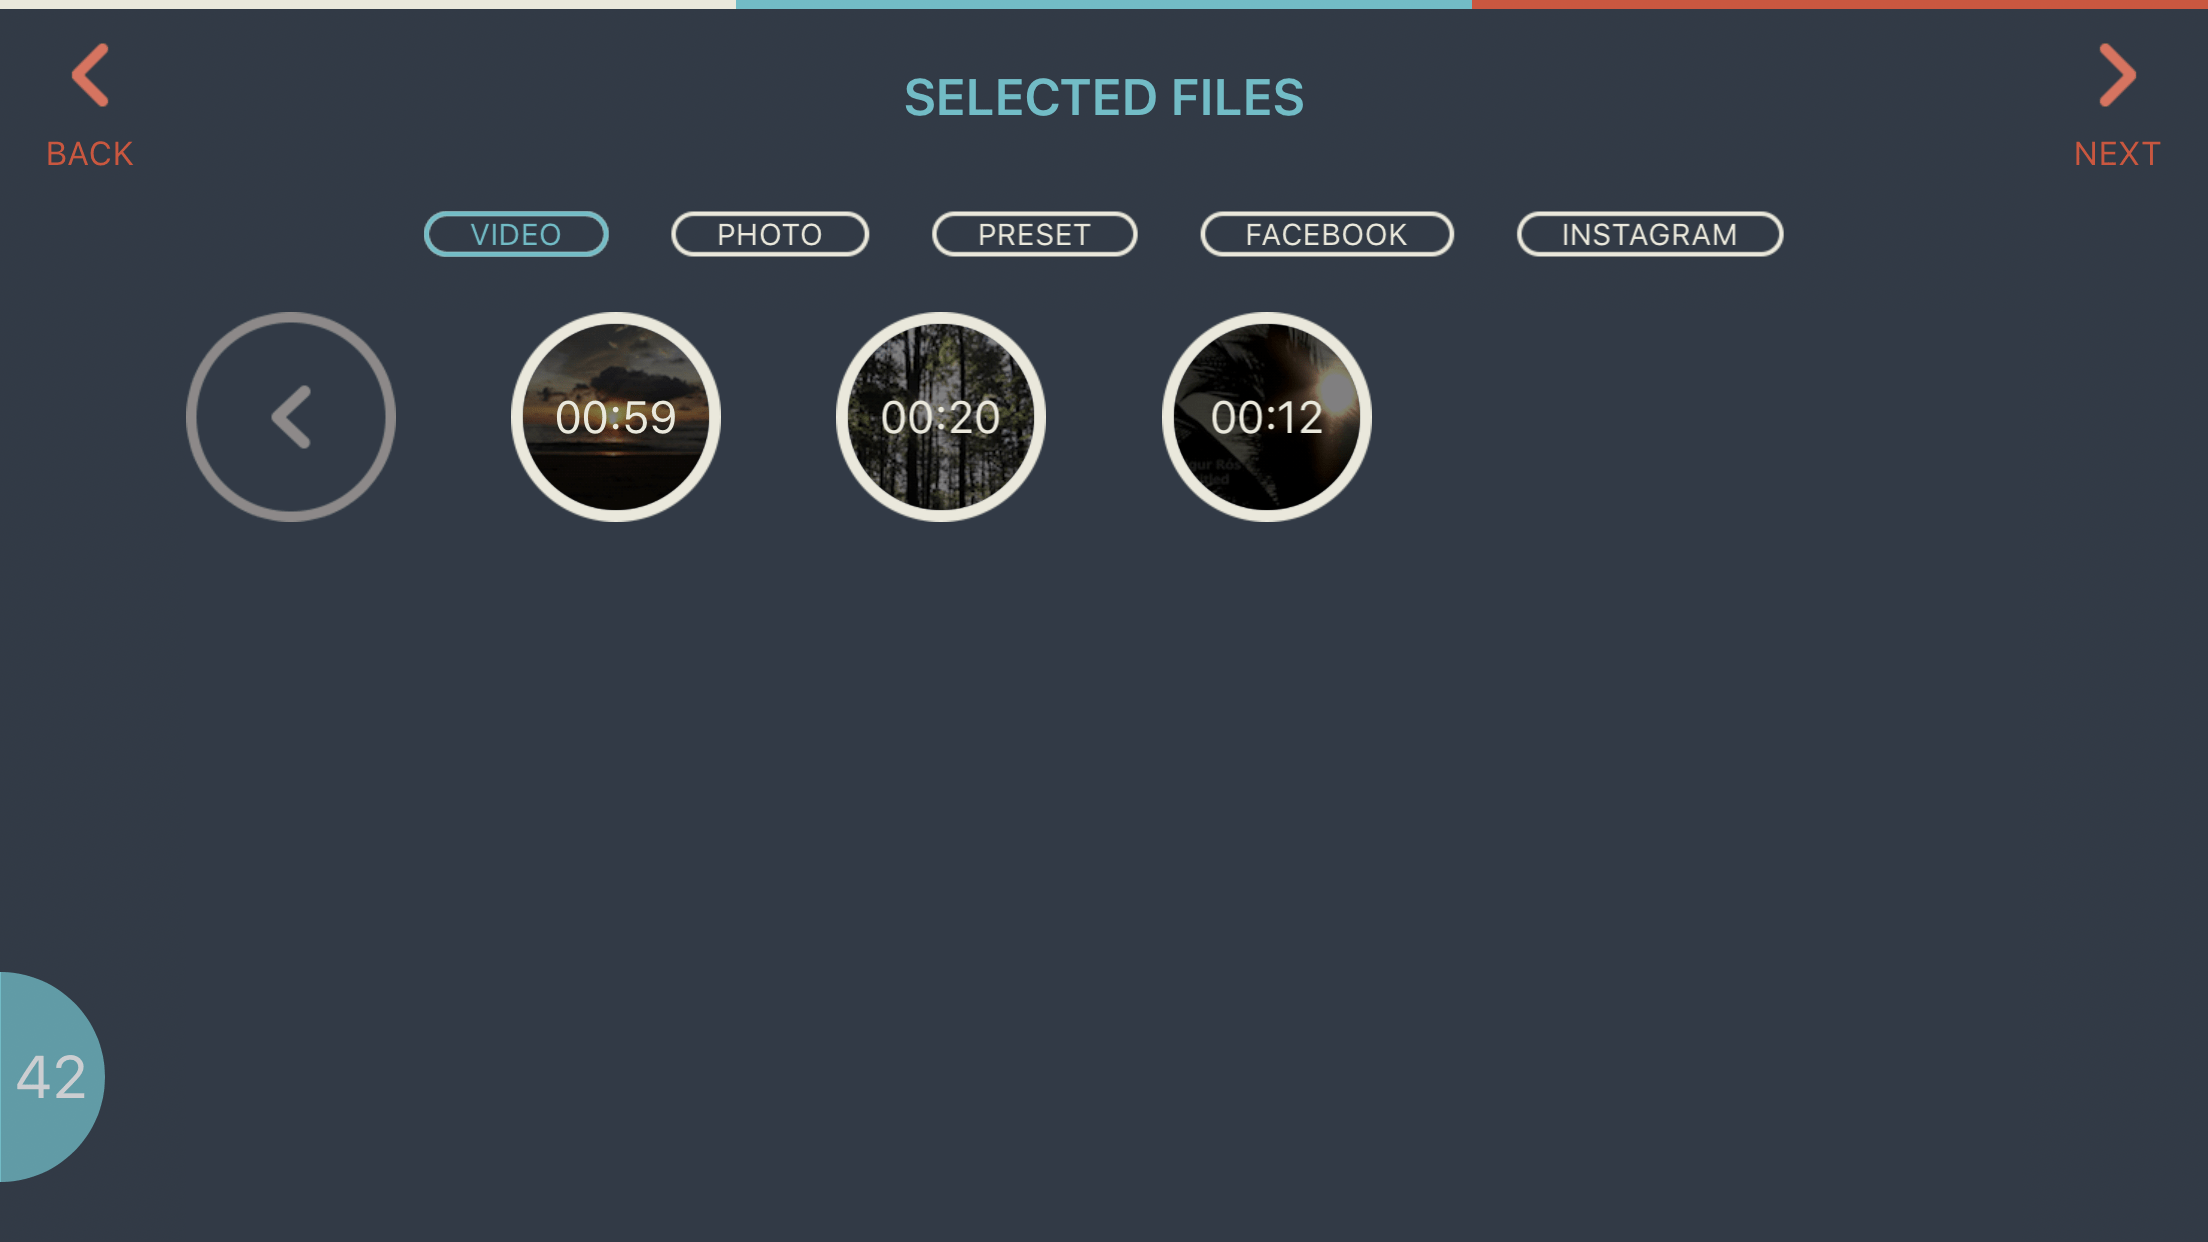
Trim your videos in the beginning.
Move the two sliders to the position you want to cut the video. Once you’re done, click on “+” icon to add the video to your slideshow content.
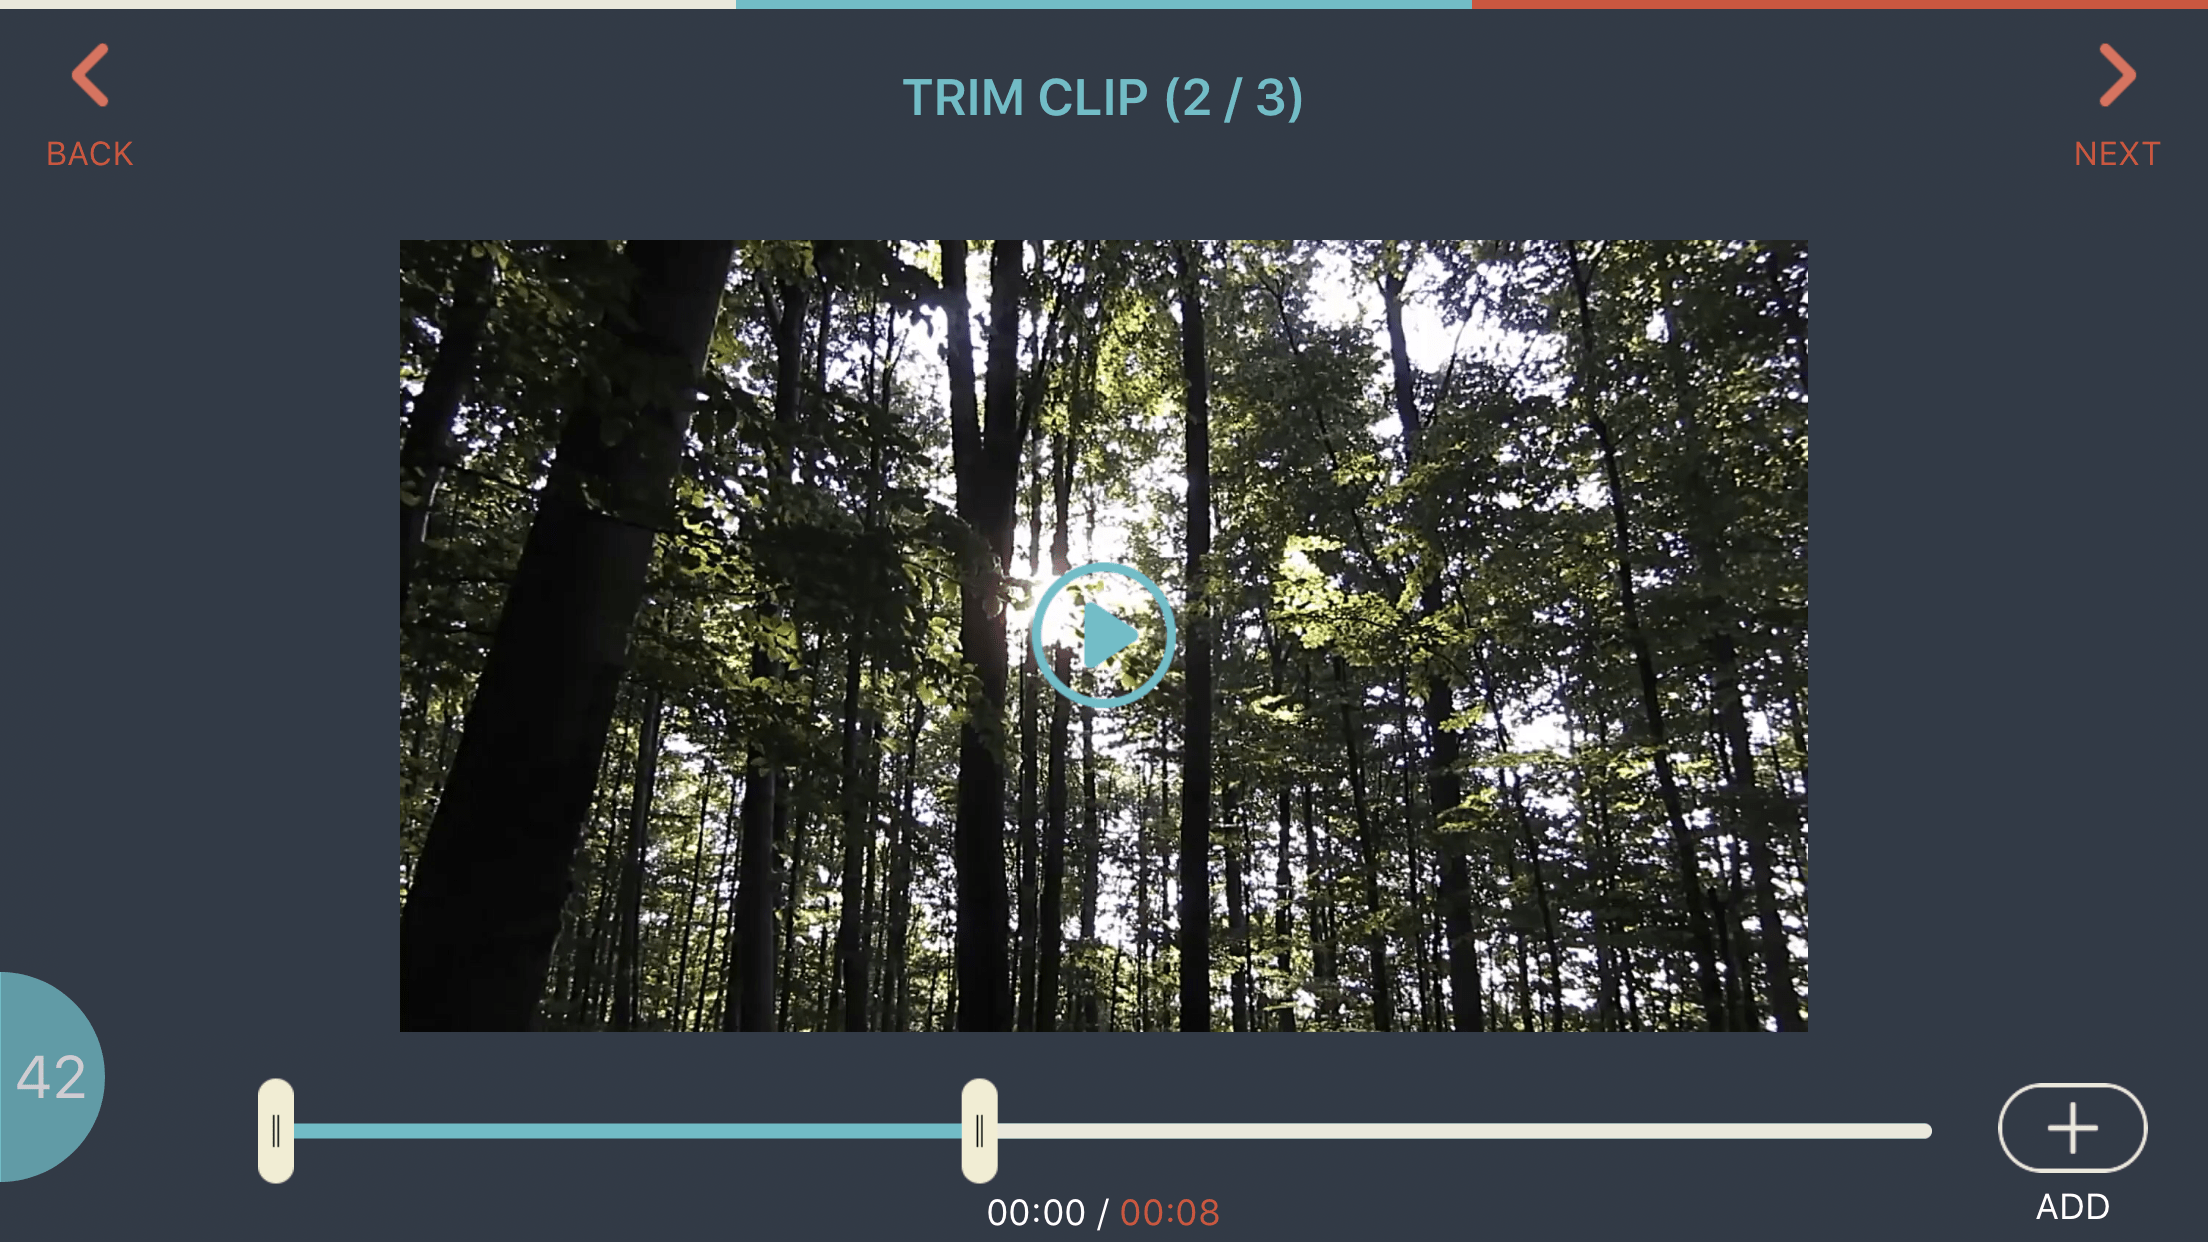
Adjust the sliders until you’re satisfied with the clip length.
Step #4 – Arrange Your Photos and Videos
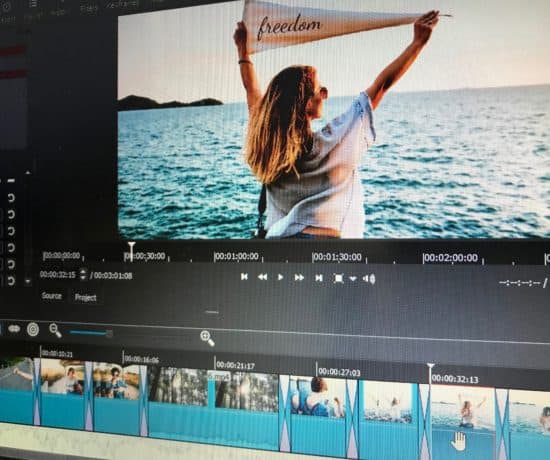
Once you select and add your content, you’ll move to the editing screen where you can arrange and edit your photos and videos.
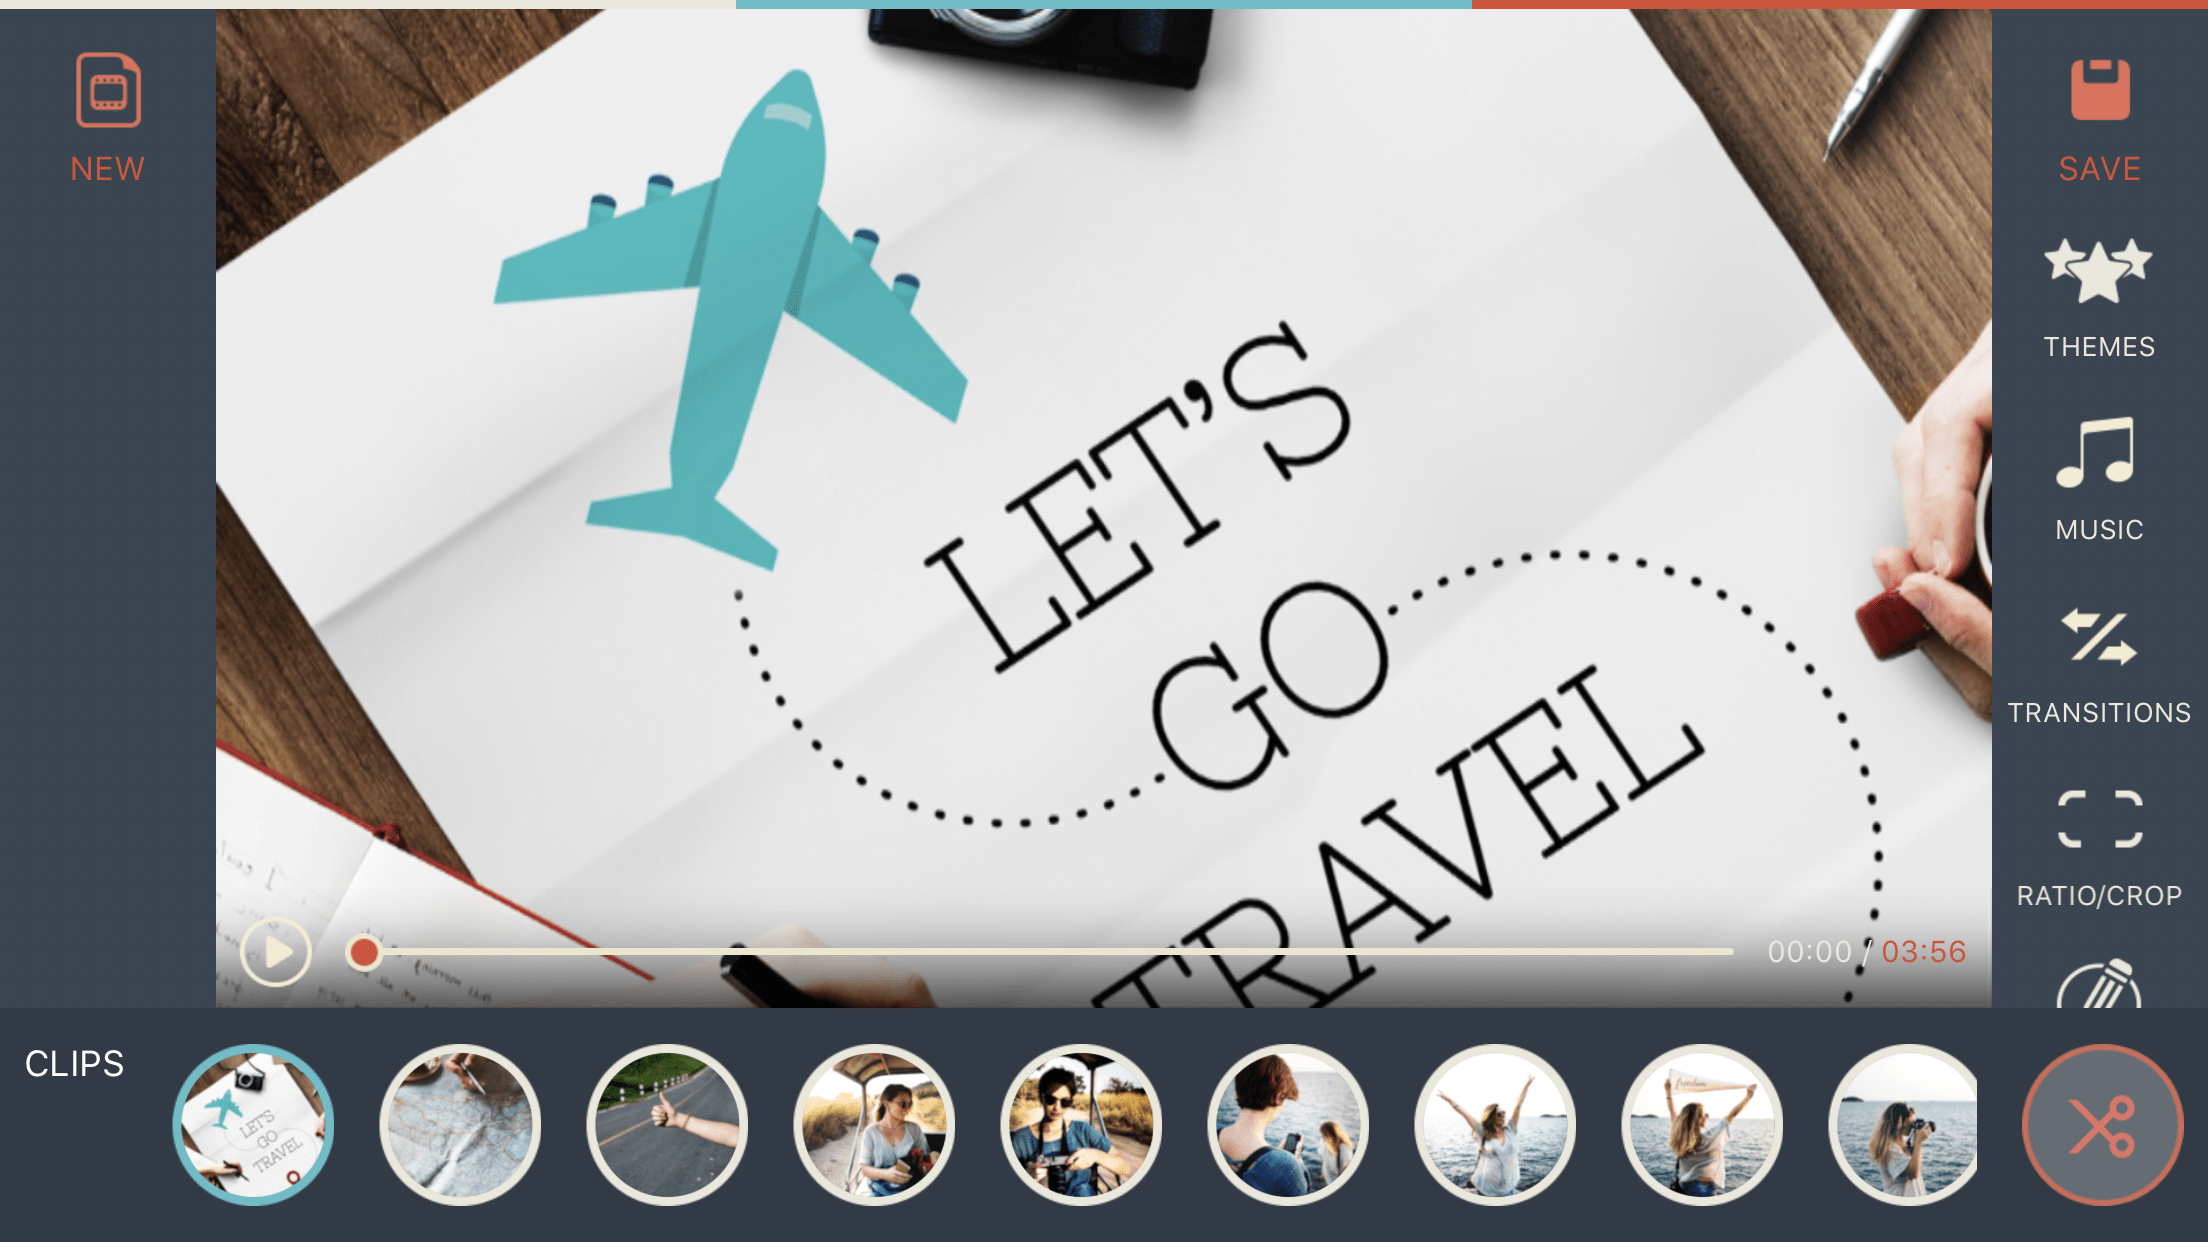
This is the main editing screen where you have preview window, timeline and editing menu.
A powerful feature of FilmoraGo is that it automatically fits your photos and videos on a 16:9 aspect ratio by cutting the sides with a nice panning effect. And it really conventient that I don’t need to make any single adjustments. In several other video editors, this process is rather time consuming.
I advise you to set your aspect ratio at this stage if you want to have a different setting than this default. For example, you might want to set a 1:1 aspect ratio for a slideshow that you want to share on Instagram. You just need to go to the Ratio/Crop option from the right menu of the main editing screen. After this, just make sure that all your content and timeline order is in place!
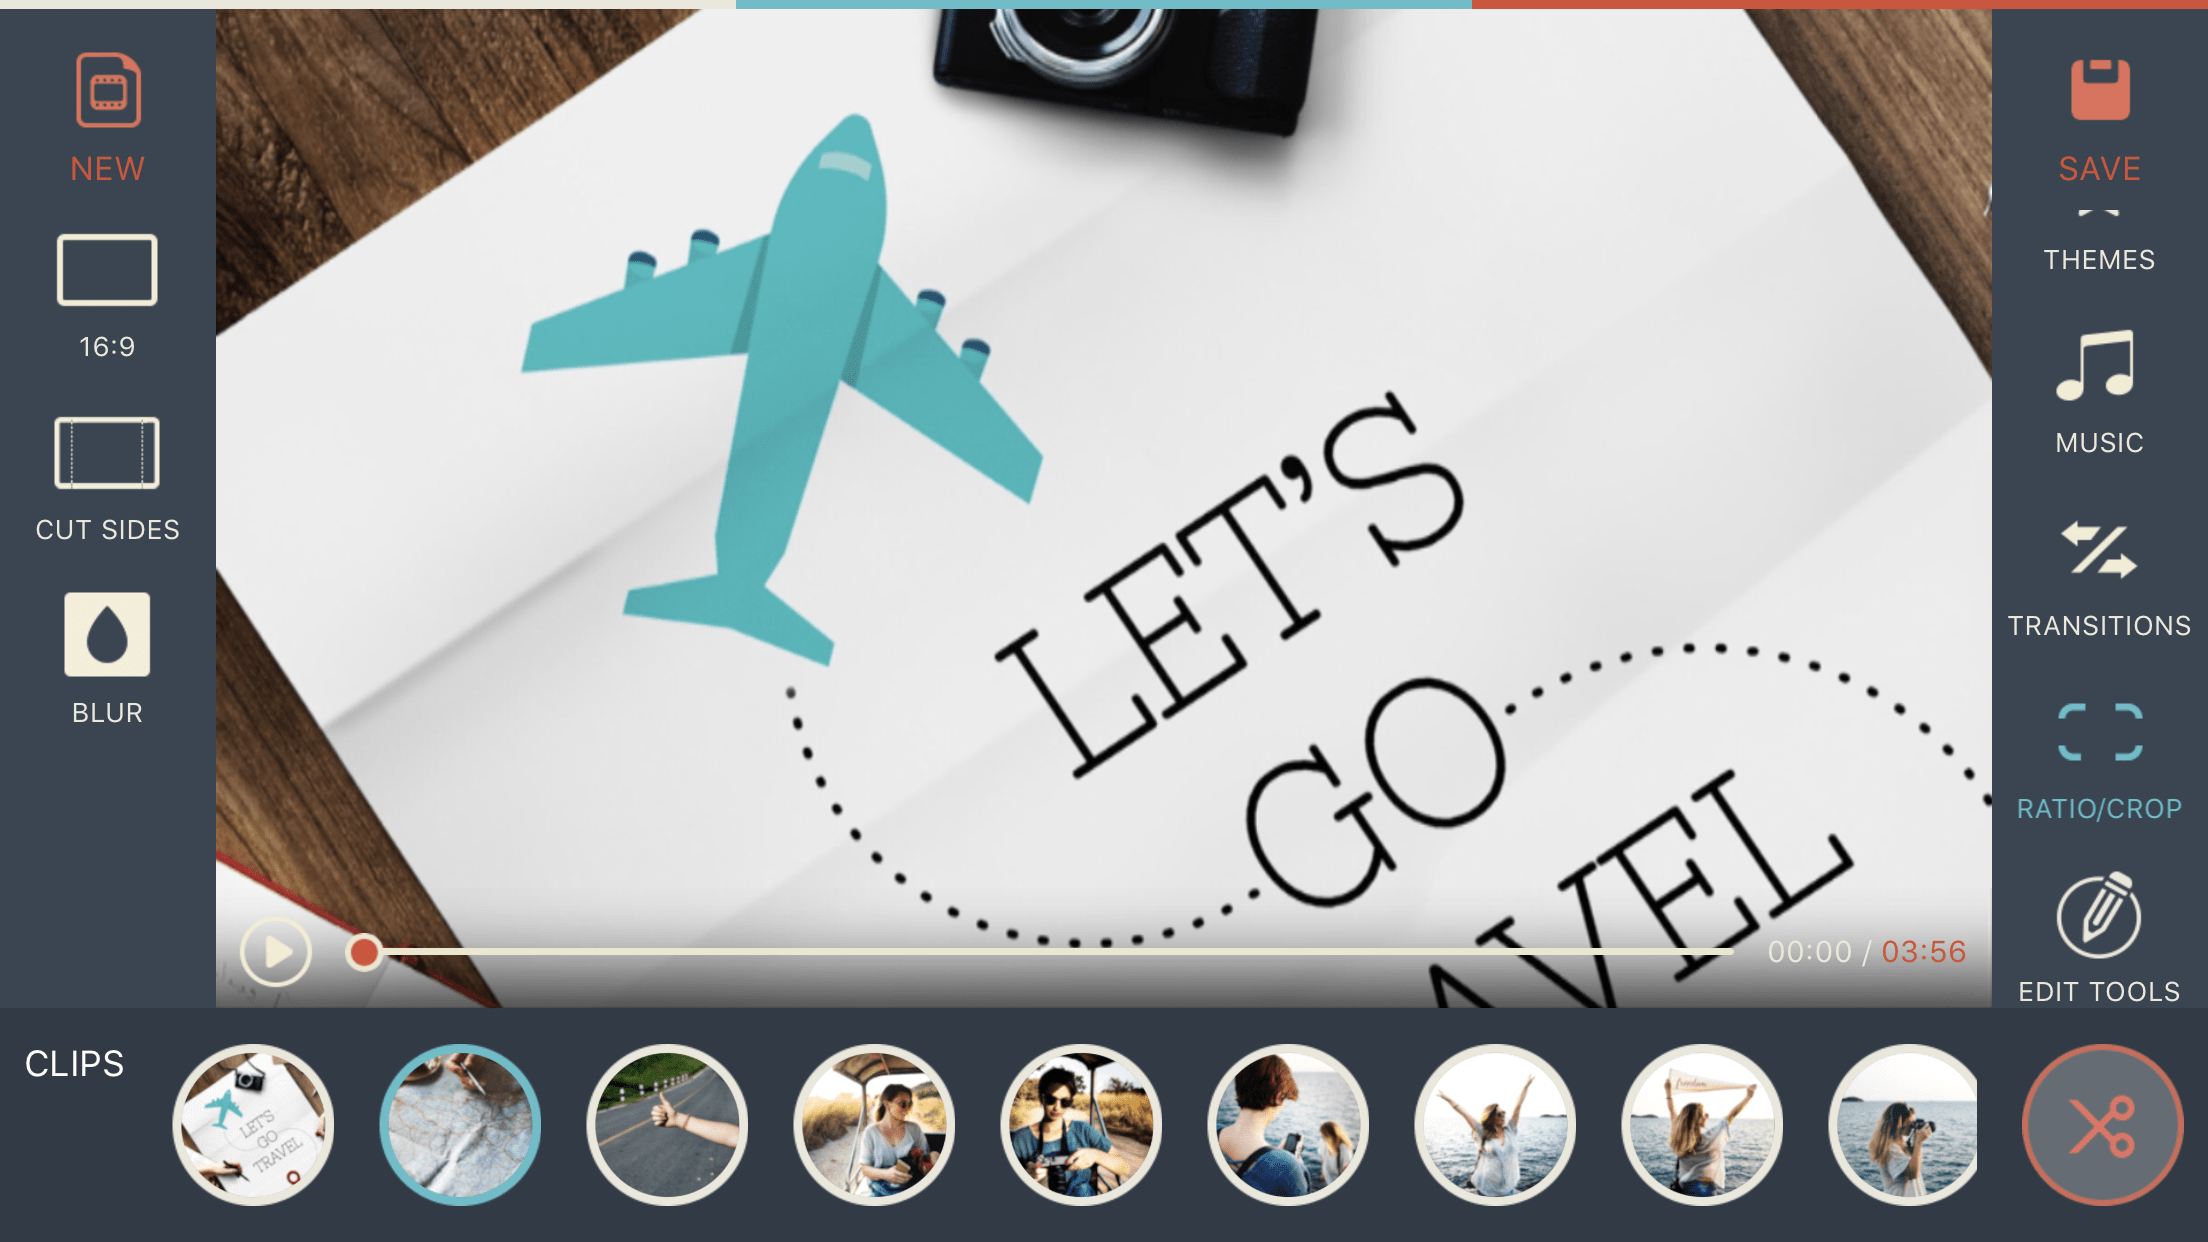
Set your aspect ratio and select your crop options. For my slideshow, the default 16:9 Aspect ratio with Cut sides just works perfectly!
Want to change the order of your content on your timeline? Simply drag and drop them to their new position.
Some further options to arrange your photos and videos are available when you click on the trim icon (red scissor) at the right bottom corner. Once you do this, you can go through all your photos and videos in the slideshow timeline. Select a photo or a video that you want to work on.
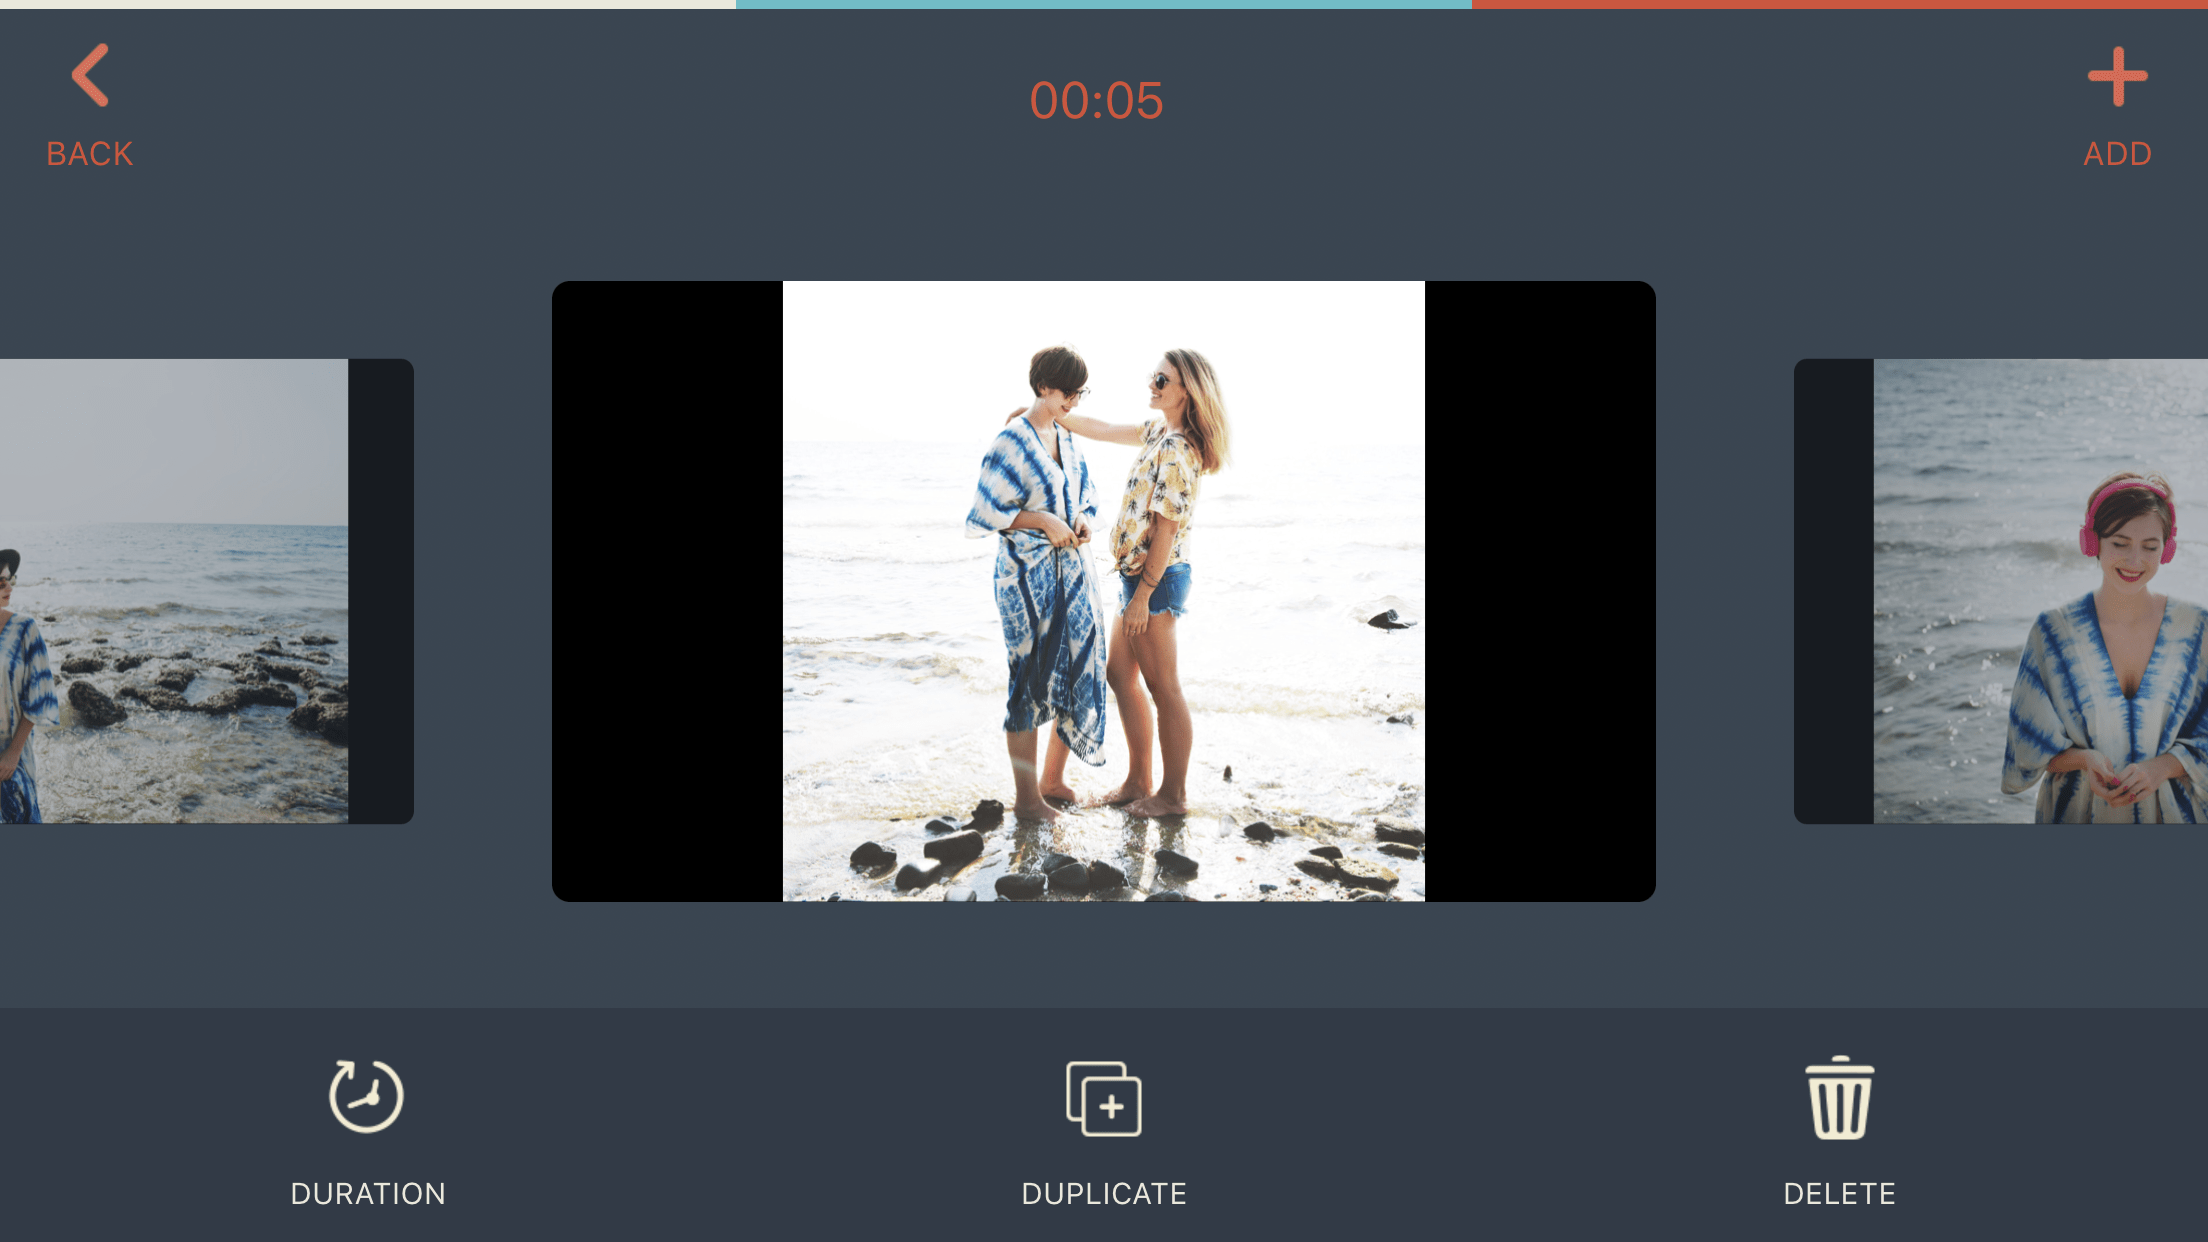
For your photos, you can adjust the duration, duplicate or delete the photo. Do you want to add new content? Click on “+” icon at the top right.
When it comes to videos, you can trim and split them, make them play in reverse, duplicate, and delete them. You can add new content here too by simply clicking on Add.
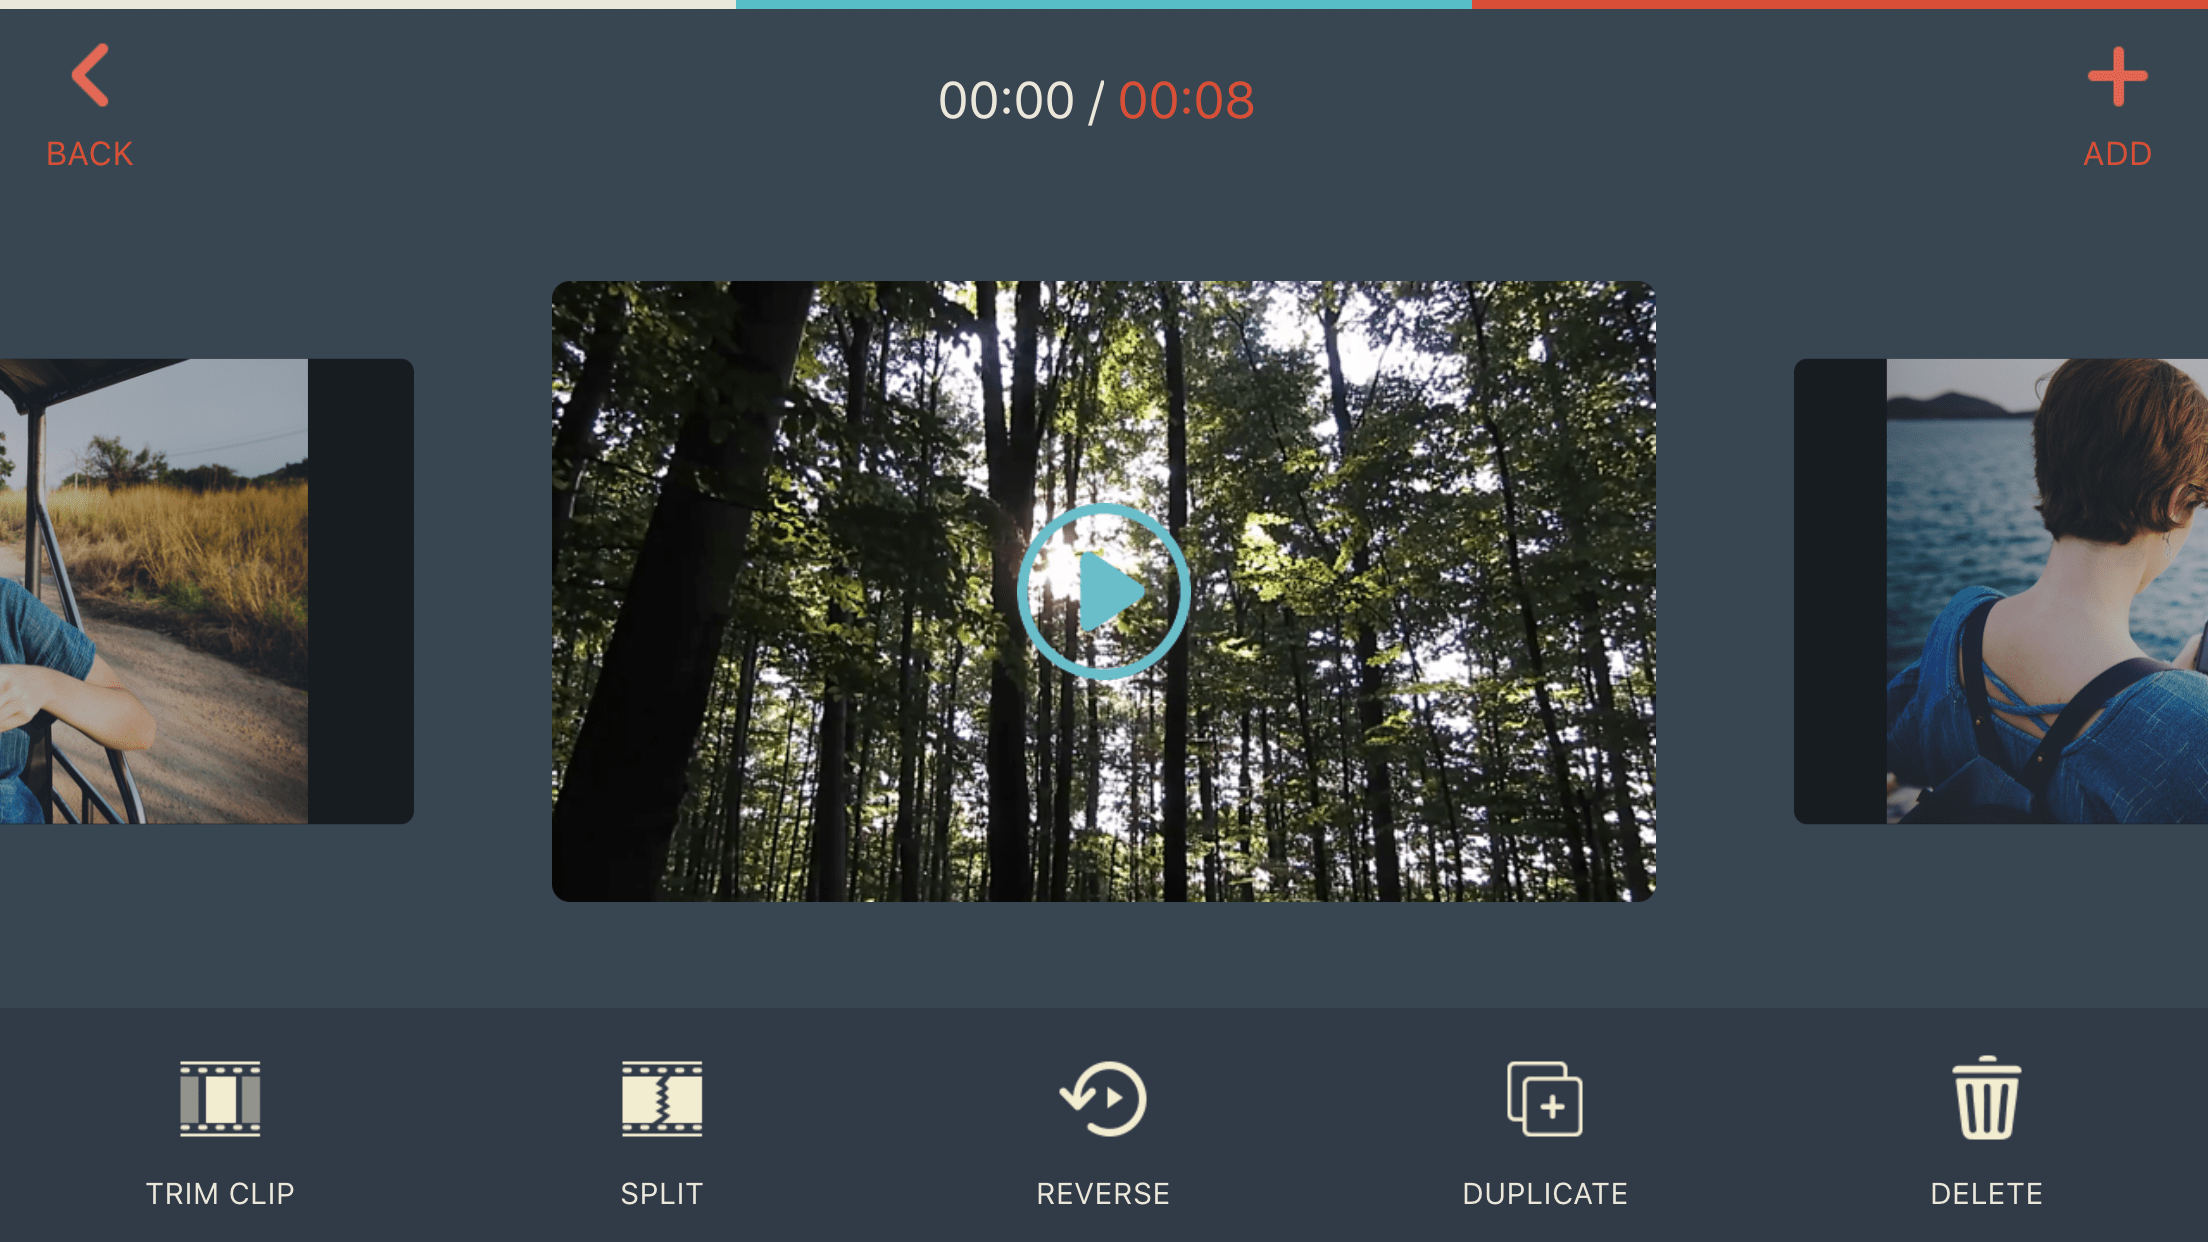
You can trim, split, reverse, duplicate, or delete your existing videos.
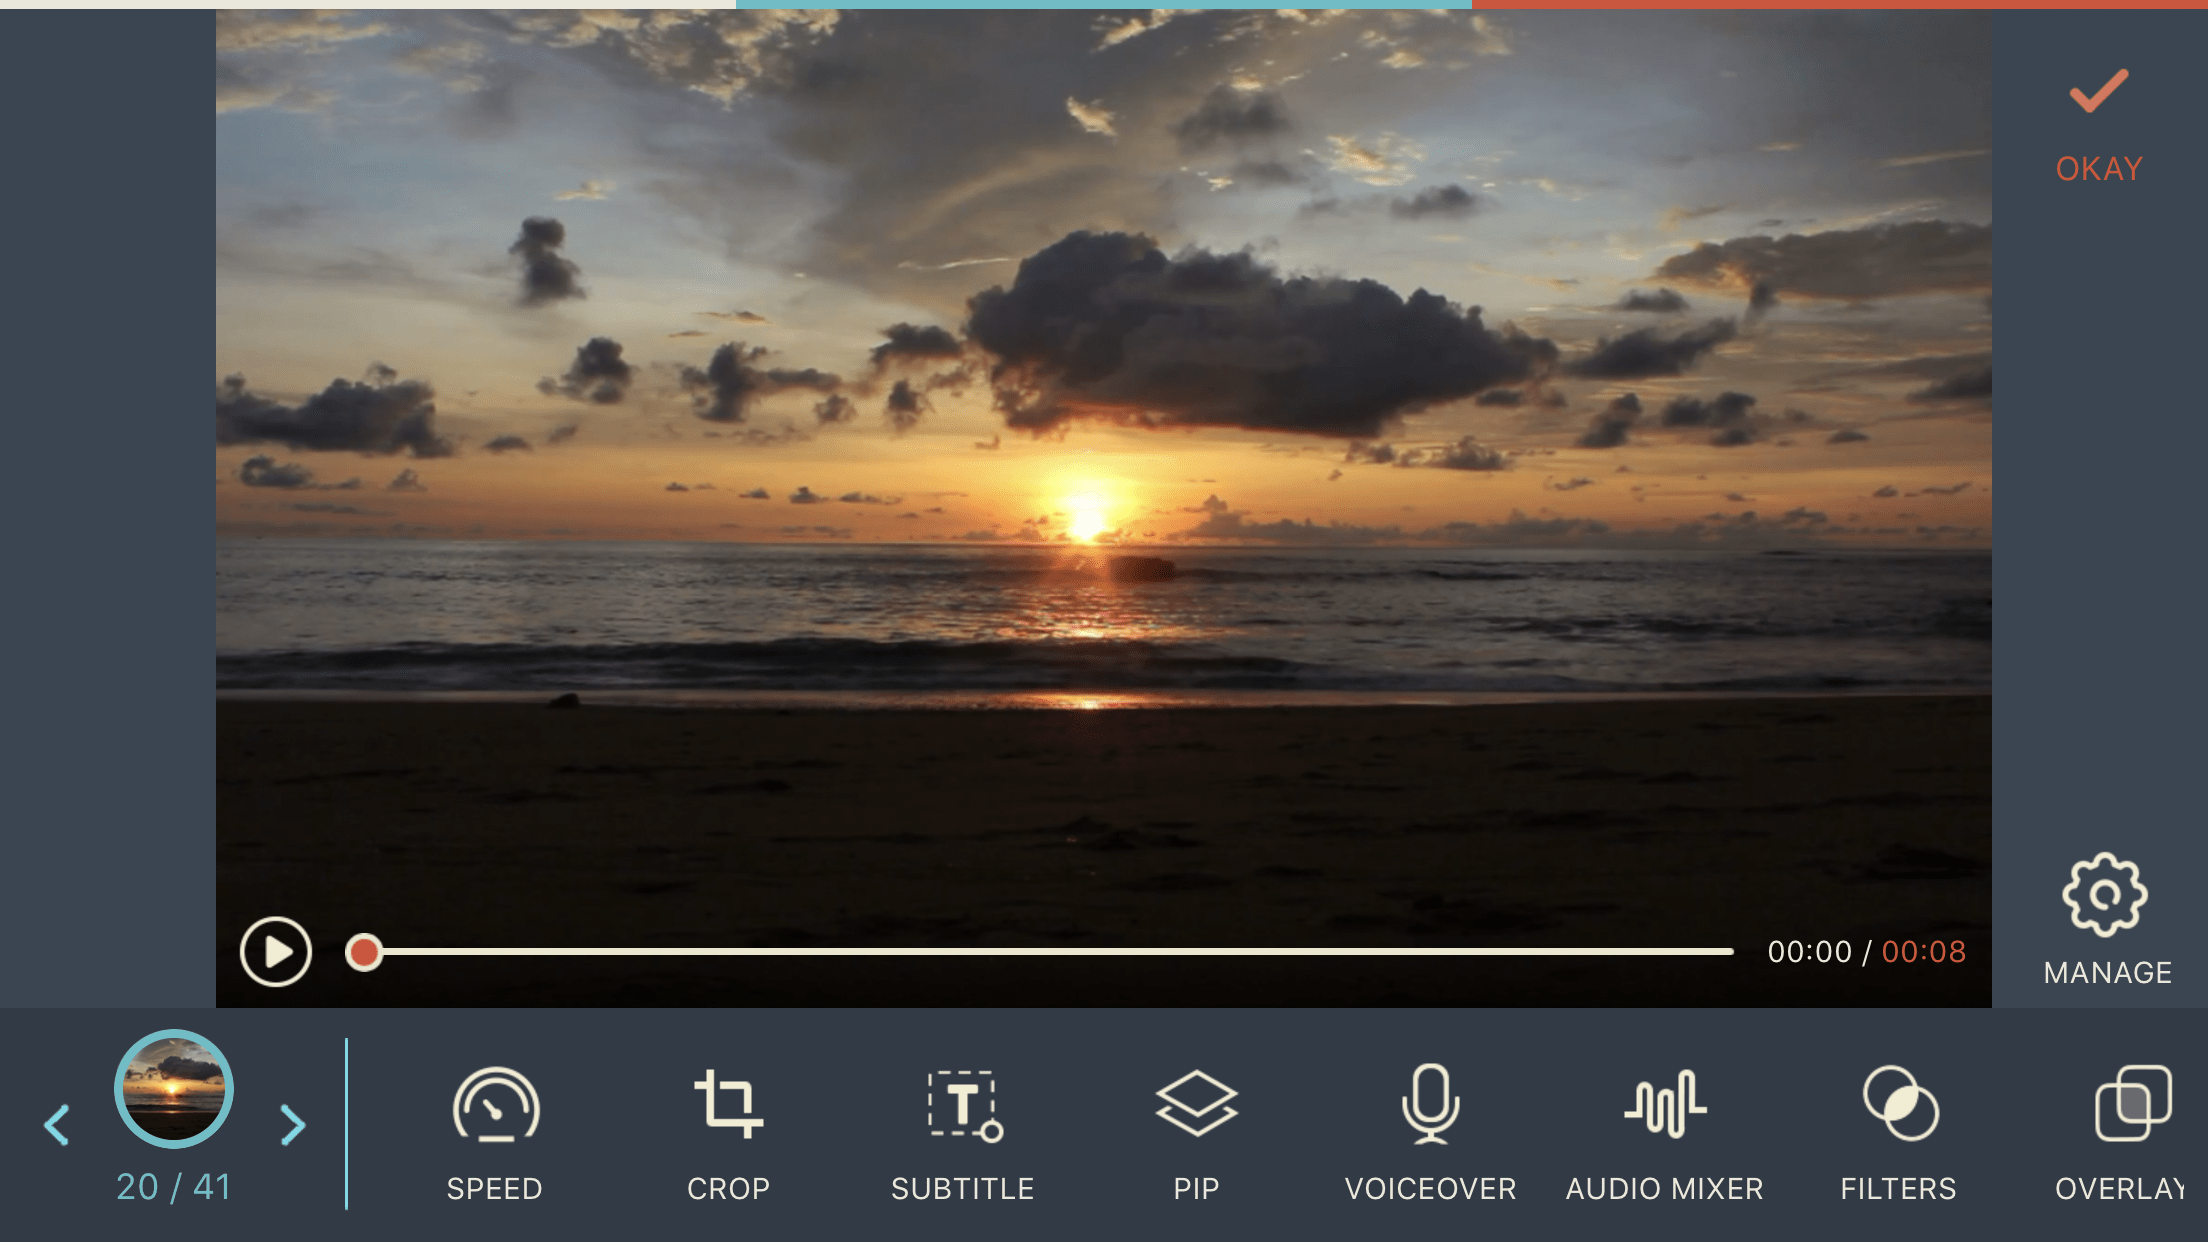
Step #5 – Edit Your Photos
FilmoraGo offers a good variety of editing features for a free smartphone app that helps you create a slideshow quickly. I really like that. There are two ways to access the editing tools:
- Click on the Edit Tools option from the right menu on the main screen
- Click on a photo or a video from the timeline
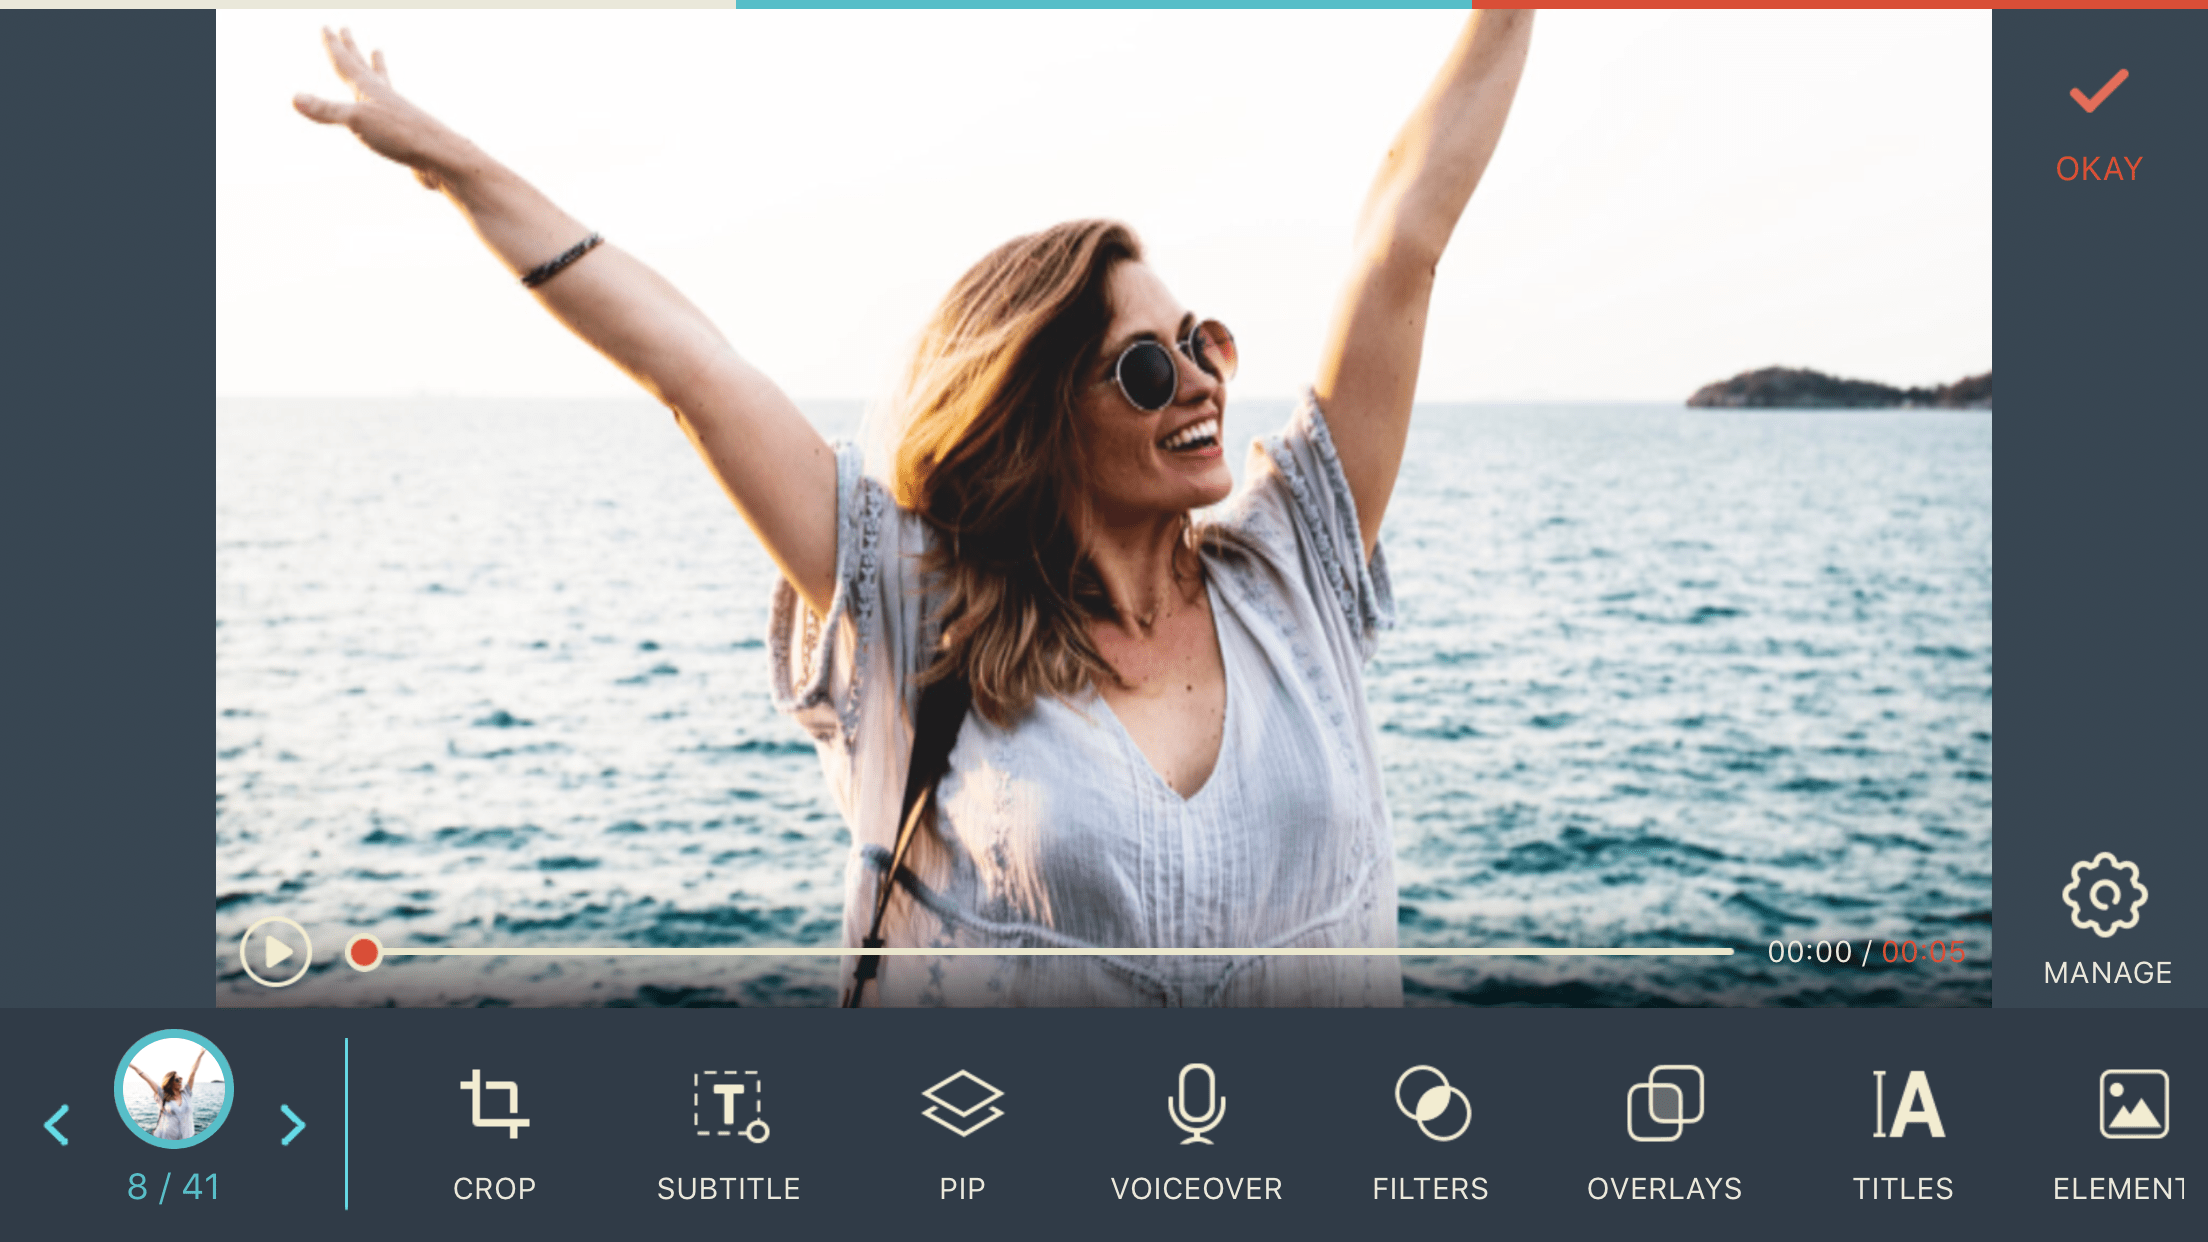
This is the Edit Tools menu for photos (Crop, Subtitle, PIP, Voiceover, Filters, Overlays, Titles, Elements, Rotate and Adjust)
Well, most of these editing options, such as Crop, Subtitle, Voiceover, Titles, and Rotate are self-evident, so just go edit which you think will make your slideshow nicer.
Let’s have a look at a few more of them:
- PIP is the picture-in-picture feature where you can insert a picture or a GIF to be displayed on your photo and video clip. I find such features to be more relevant for fun slideshows.
- Filters and Overlays are some effects that you can use to create some fancy-looking content.
- Adjust offers you a variety of photo editing features including Brightness, Contrast, Saturation, Temperature, Sharpness and Vignette. So you still have the possibility to do some fine-tuning for your photos during the editing process.
Having explained these, for a professional-looking and elegant slideshow, I suggest you to edit your photos with your usual workflow and keep your photos as natural as possible during the video editing process.
Step #6 – Edit Your Videos
The Edit Tools for videos offer two additional features when compared to photos: Speed and Audio Mixer. One of the FilmoraGo features that I like is to be able to crop your videos easily in one click. With some other video editors you would need to do this with an additional app.
This is the “Edit” tools for your videos.
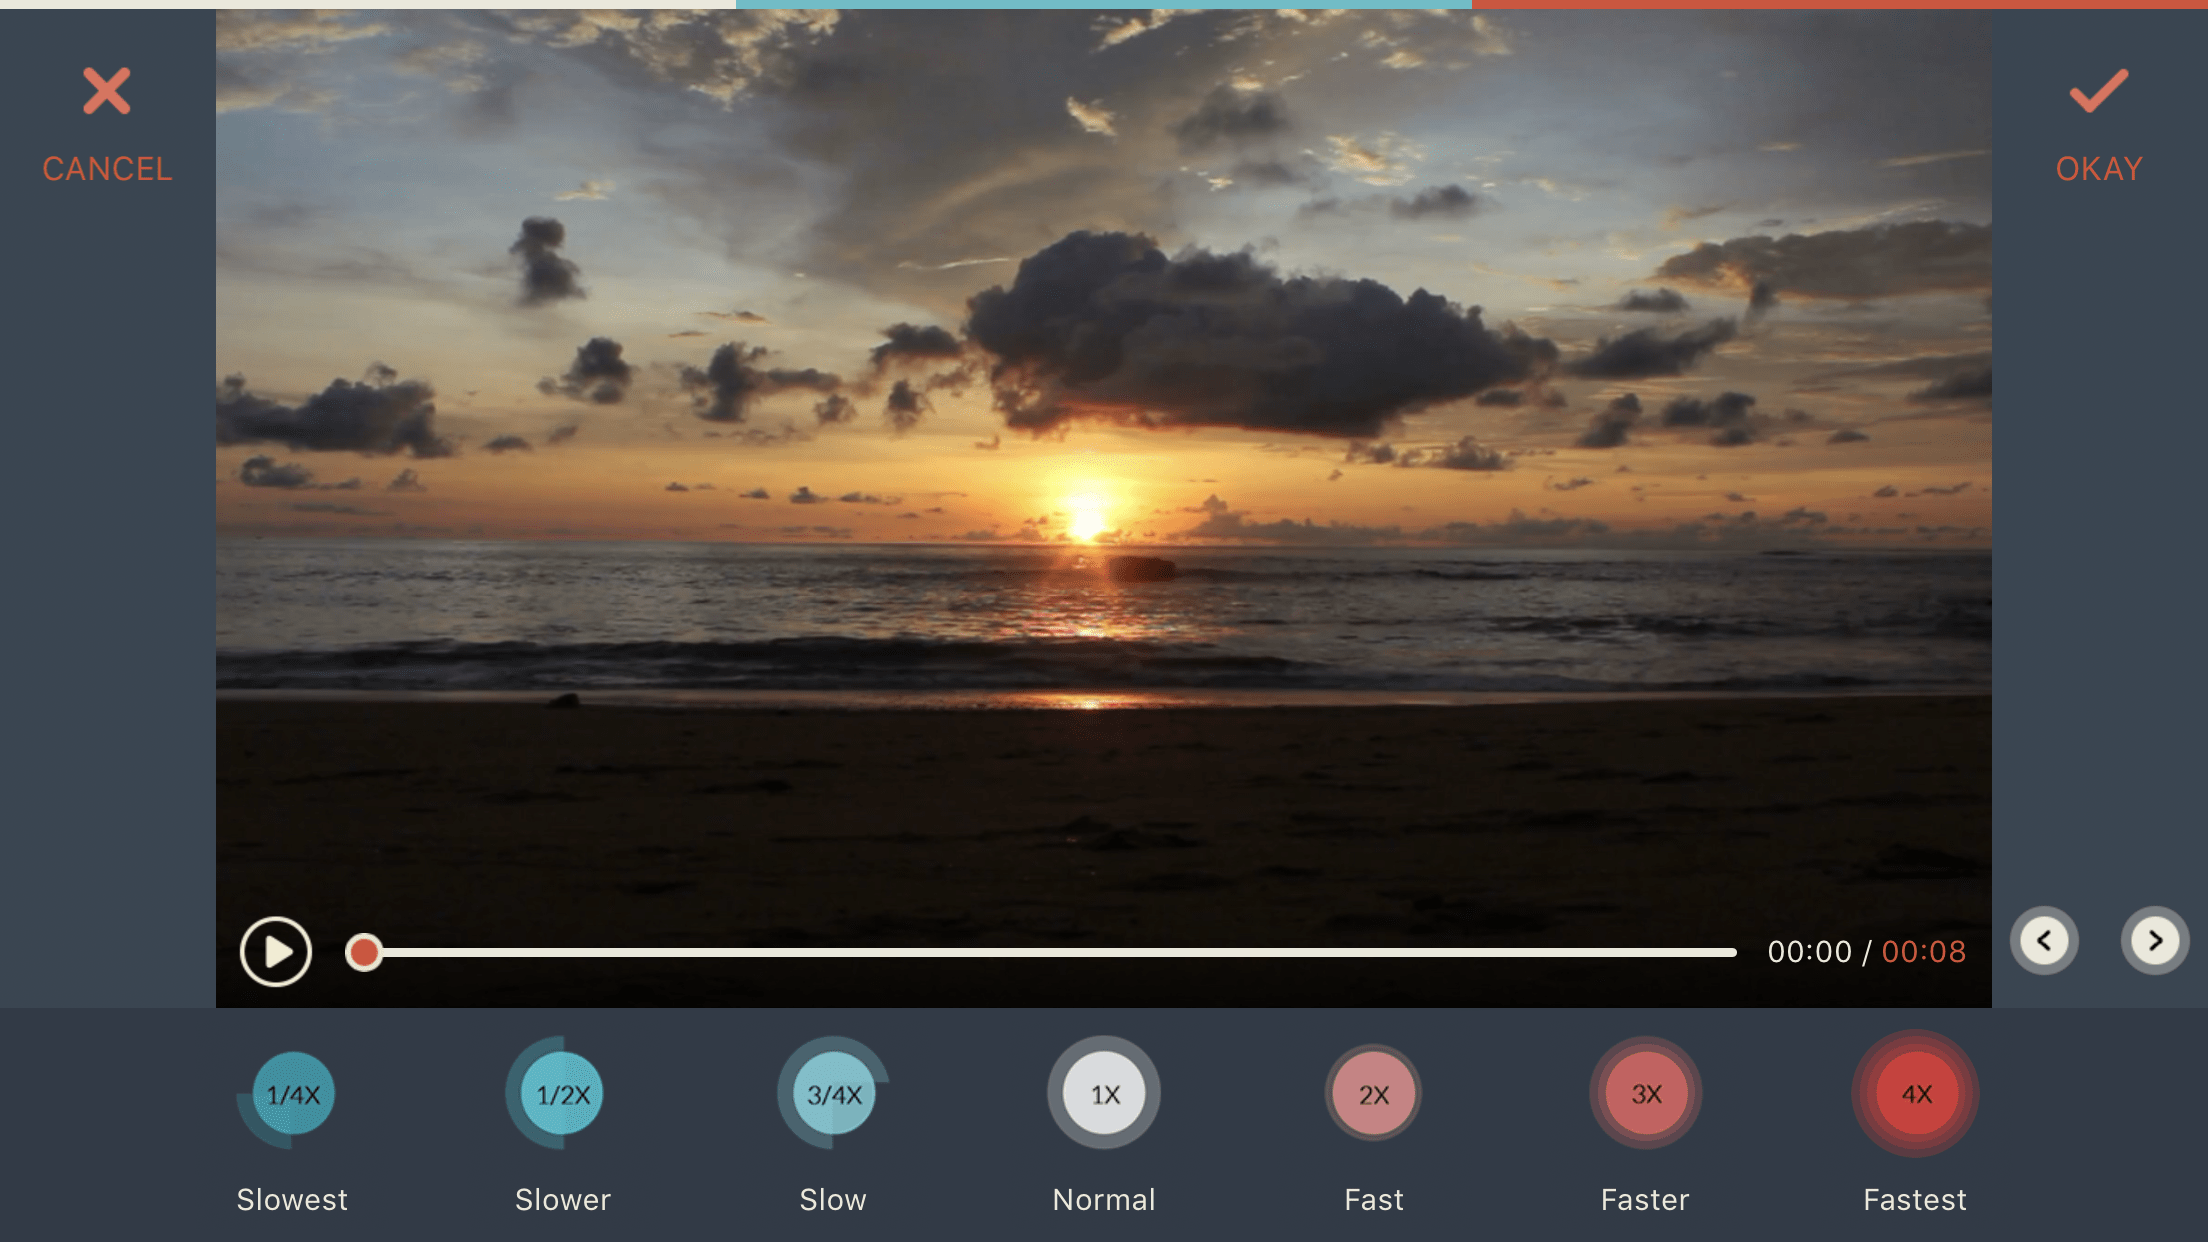
“Speed” allows you to adjust the speed of your video clip – you can make it slower or faster.
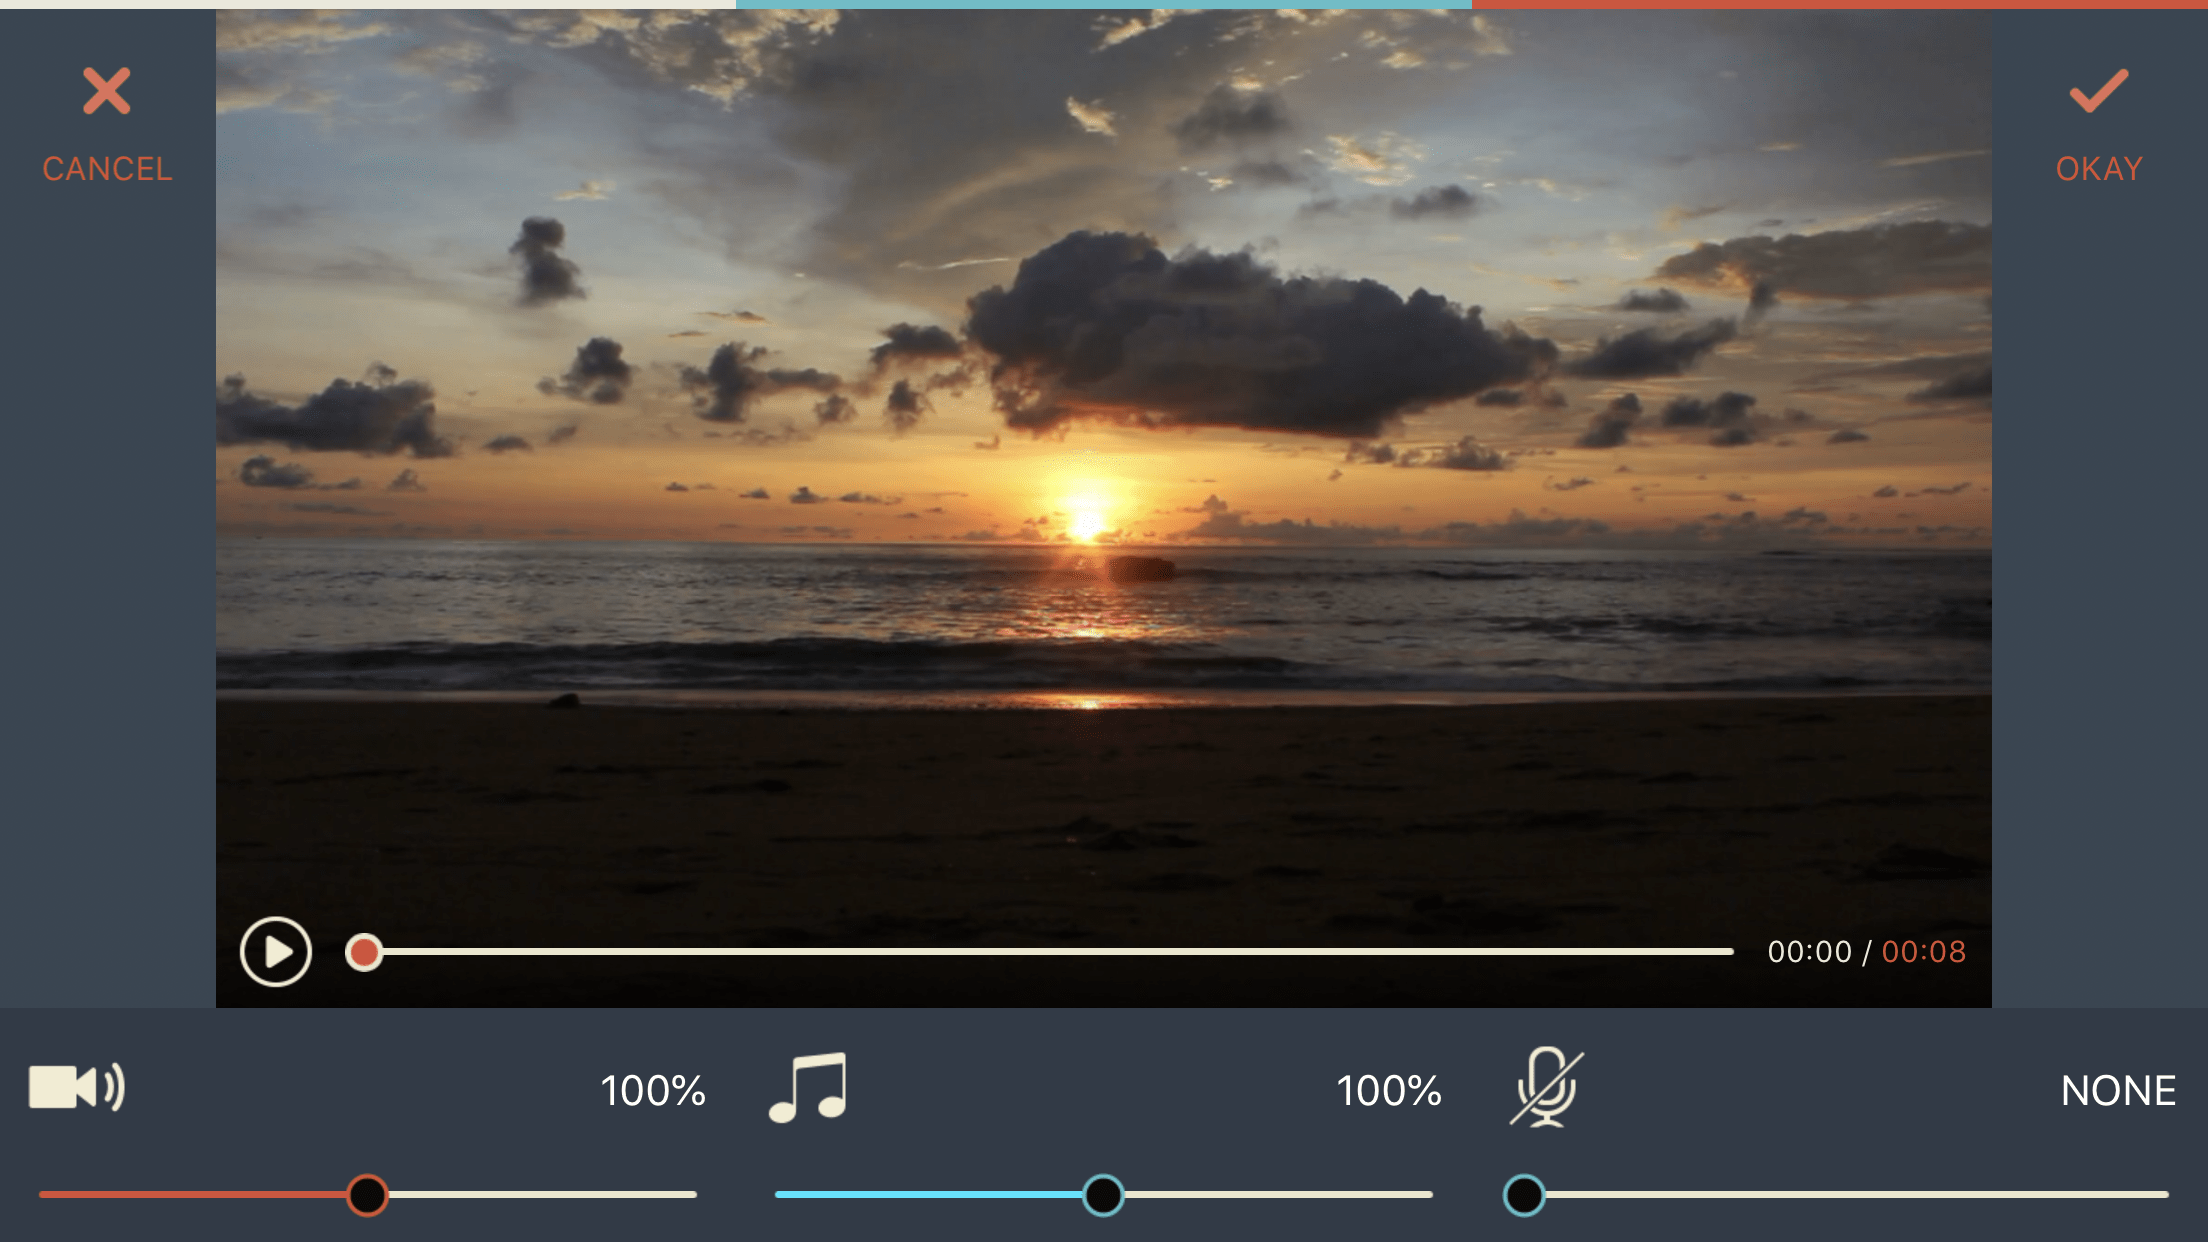
“Audio Mixer” allows you to set the right balance between the audio of your video clip, music, and voice over.
Step #7 – Add Transitions
To add transitions between your clips, click on Transitions from the right menu on the main editing screen. Select a transition icon between two clips and select a transition from the left menu. Be sure to select the Apply All option at the right if you want to apply the transition to all your slideshow.
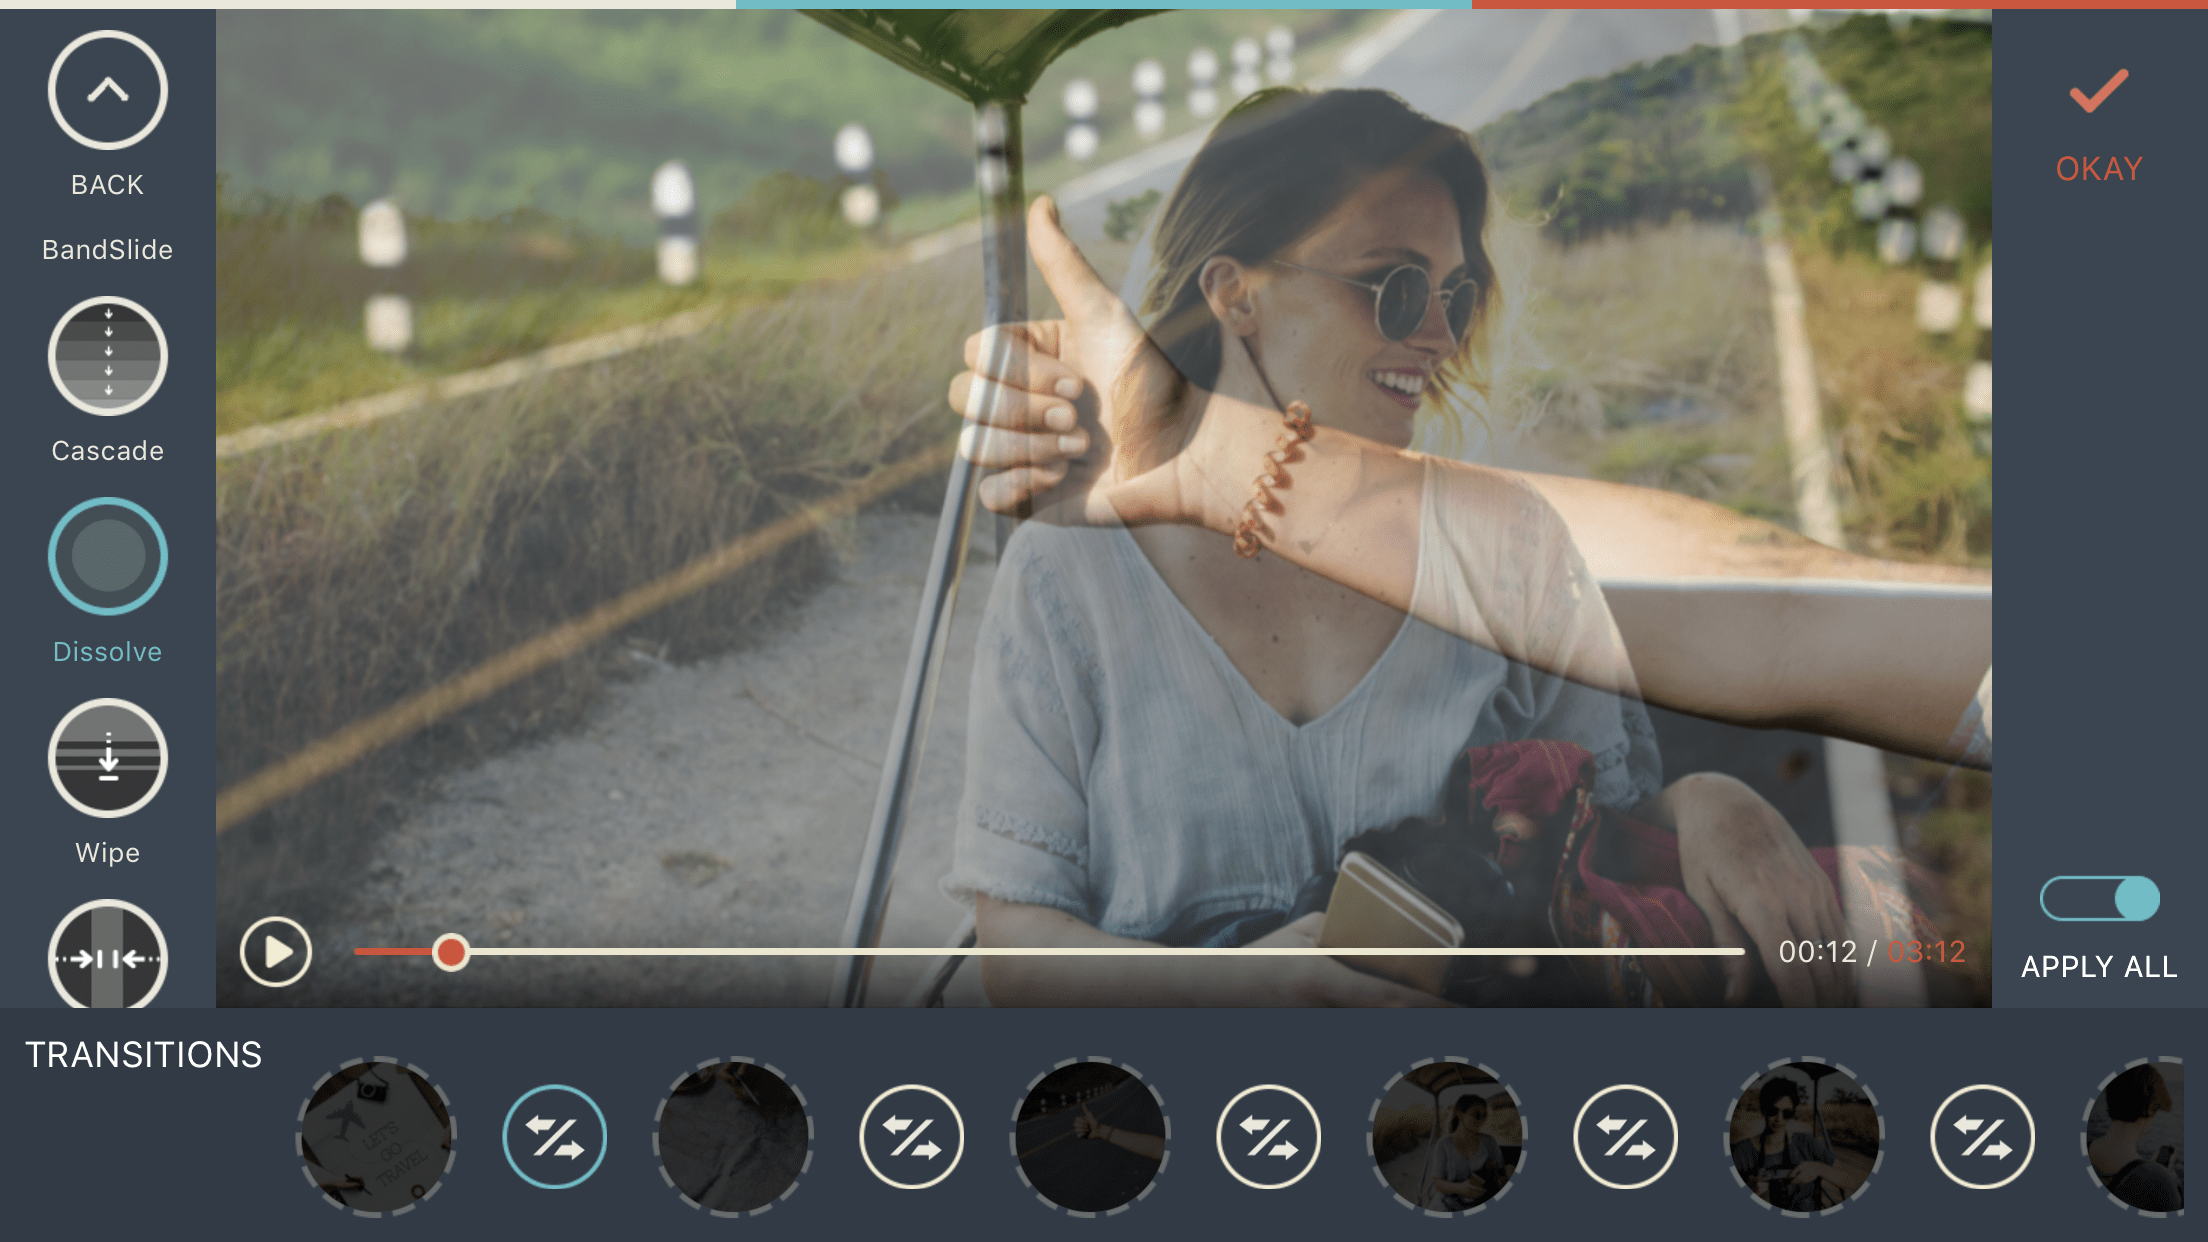
“Transitions” allow your slideshow to flow better.
The best transition that works elegantly in any slideshow is Dissolve. Feel free to have a look and preview other options too as there are plenty of options.
Step #8 – Add Music
Make a music choice relevant (to the mood you want to create among your audience) and add it to your slideshow. Do you want to learn what you should be careful about when selecting the music in terms of style and copyright? You can find answers in this previous blog post.
To start, click on Music from the right menu on the main editing screen and select your music from the built-in music library offered by FilmoraGo or from your own library. For this tutorial, I chose one fast piece (“Down the way”) that matched the lively first part of the slideshow, and one piece that had a medium pace (“Happy Ukulele”) that was perfect for the peaceful second part. Thank you audionautix.com!
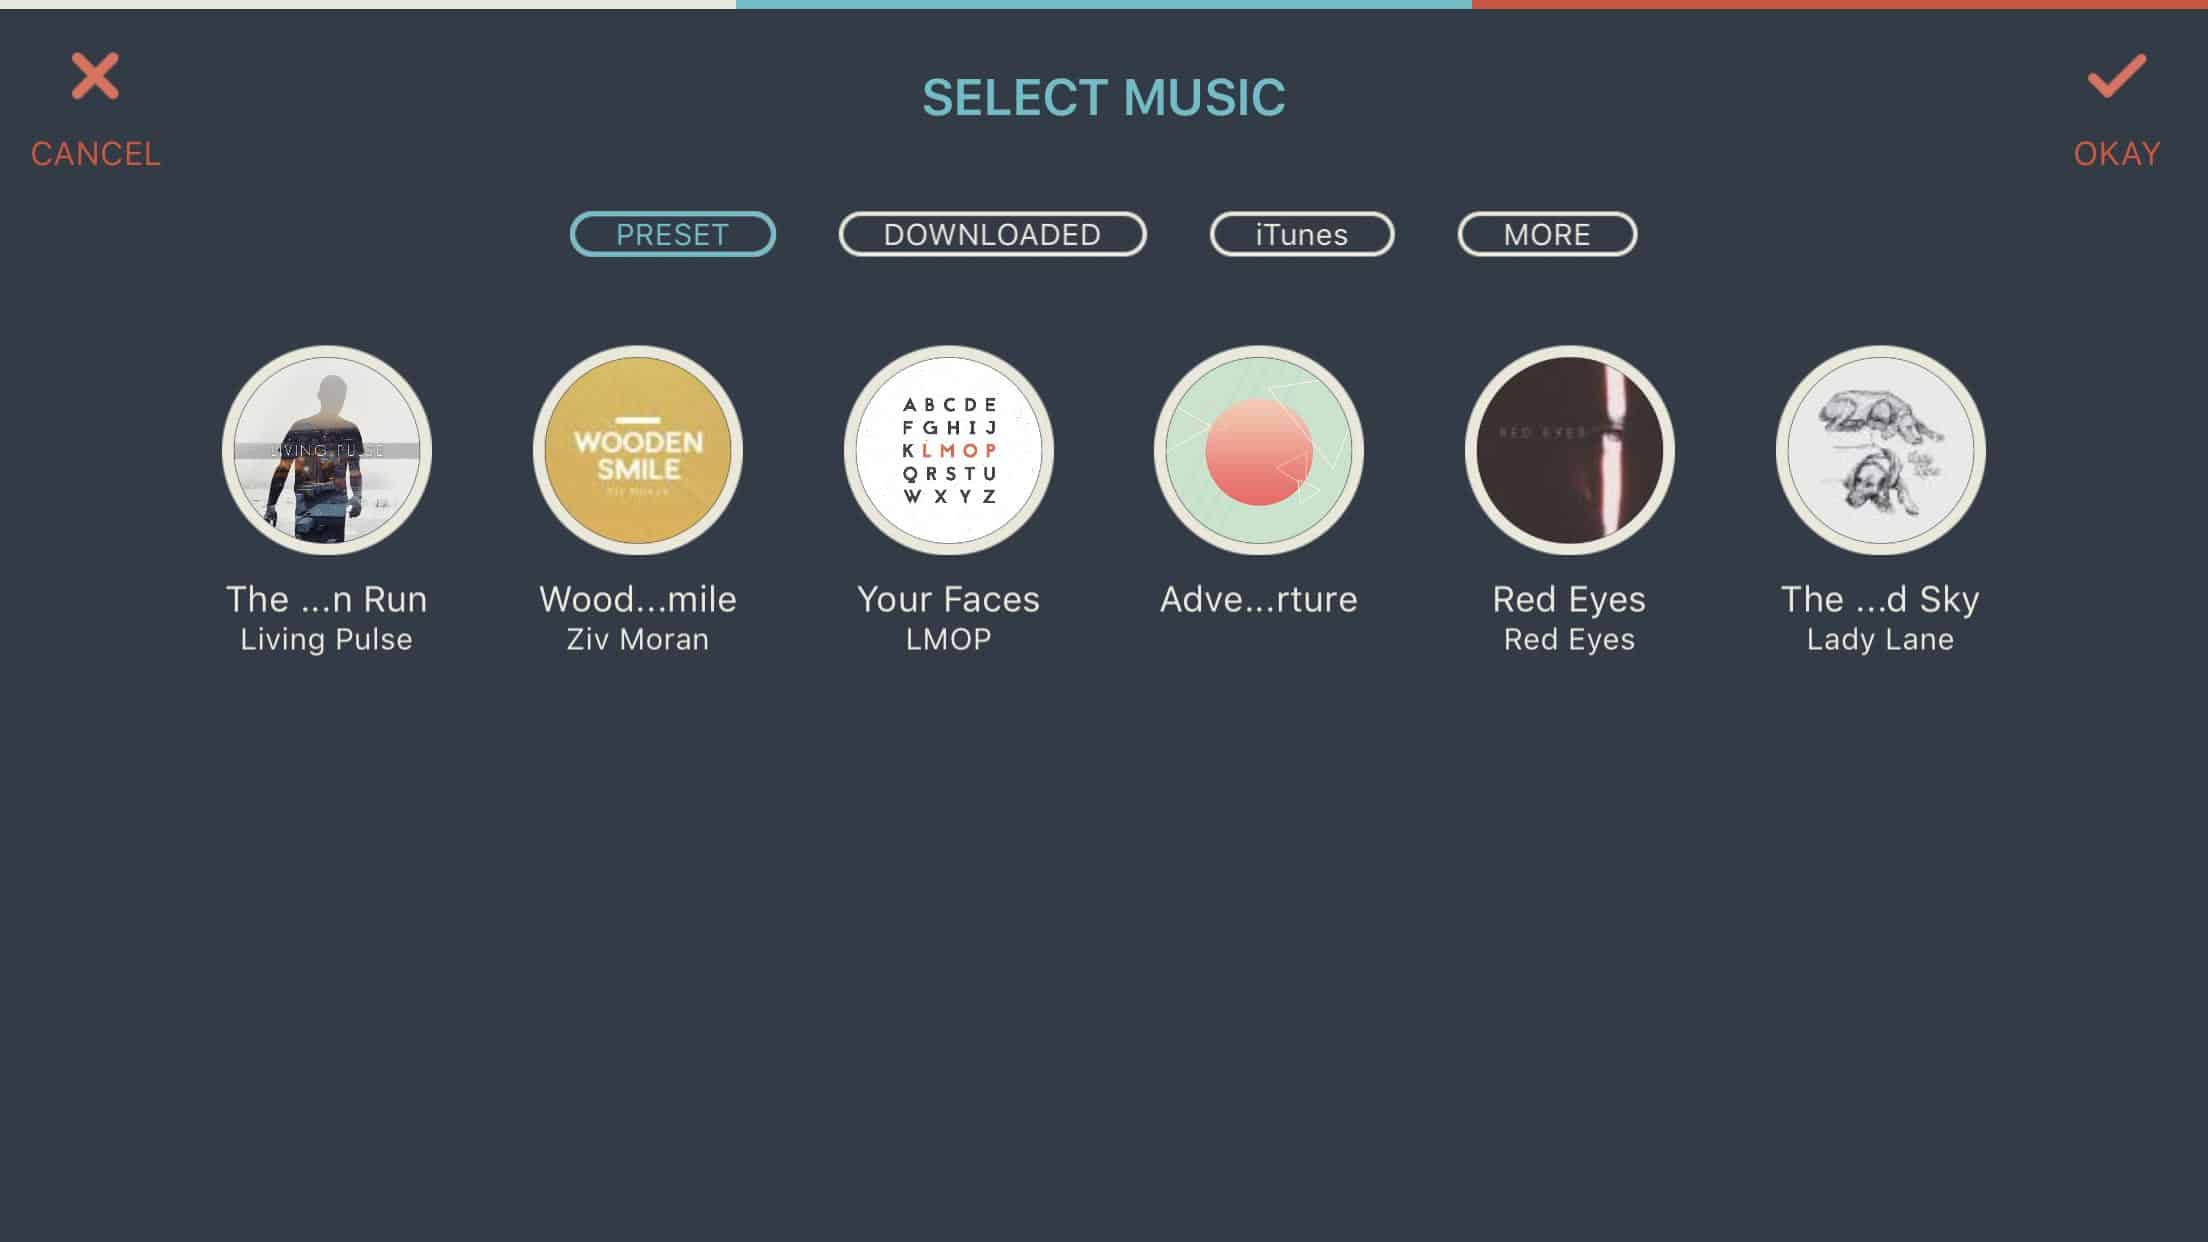
Be sure to add music that matches the feel of your slideshow!
After you add your music to the slideshow, click on each song and move the two sliders to mark at what point of the slideshow your music should start and end. This way you can place more than one music piece on the slideshow timeline and adjust how they play one after another.
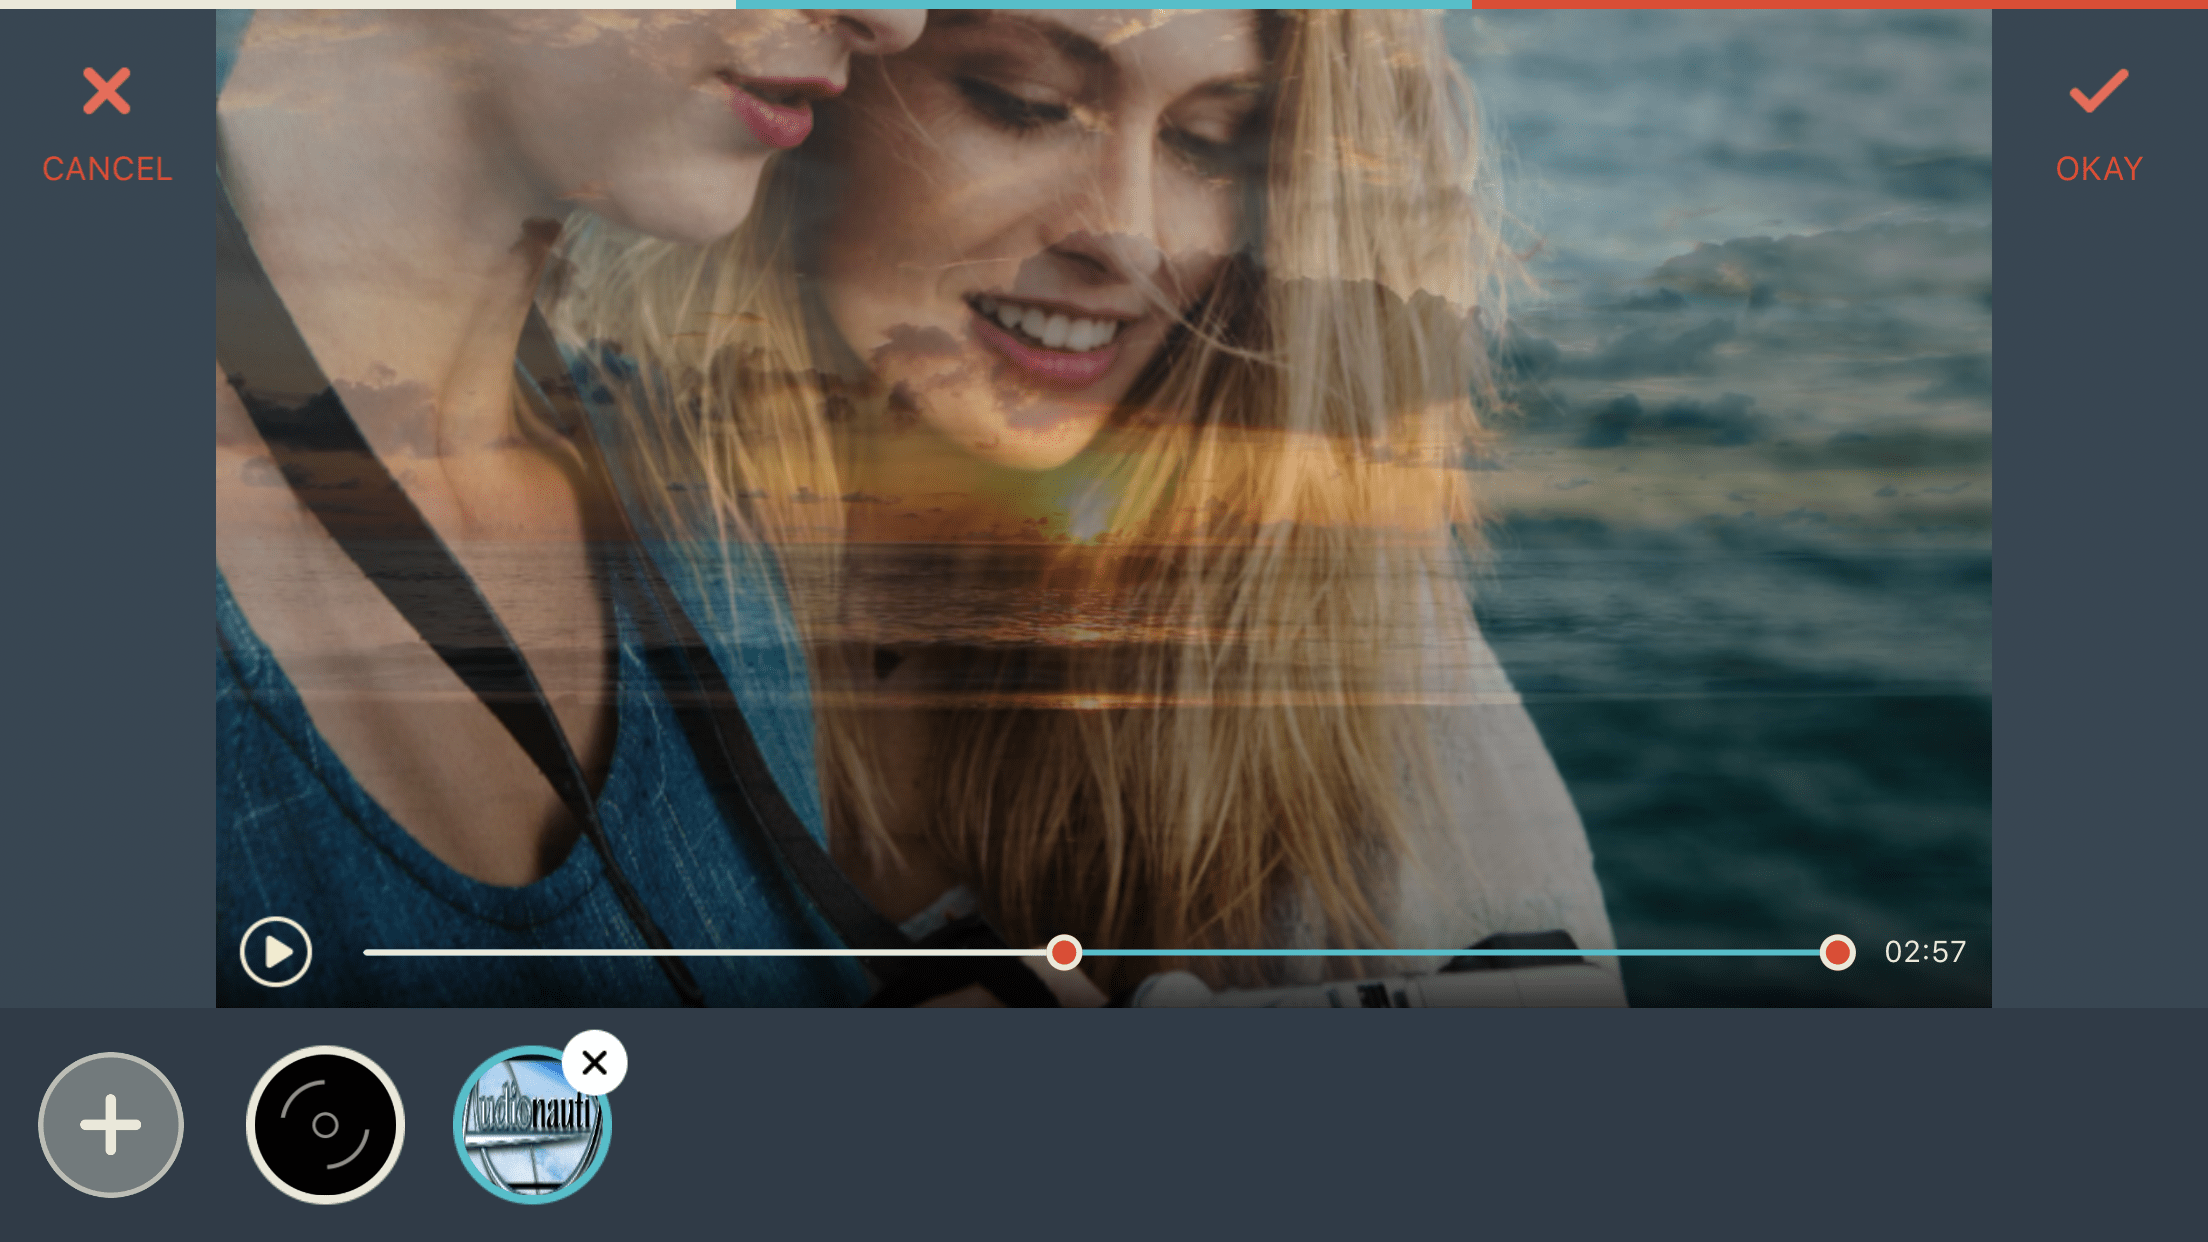
Trim your music as needed.
Step #9 – Synchronize Everything
When you add your content to the timeline, FilmoraGo sets the duration for each photo to 5 seconds by default. Check if this synchronizes well with the beats of your slideshow background music with the transitions. If not, you’ll have to synchronize music and content manually by adjusting the duration of your clips. Access the Trim menu the same way you did in step #4 and adjust the duration of each clip one-by-one manually.
It would have been perfect to have a batch editing feature for this just like there is batch editing option for transitions, but I don’t think it’s possible at the moment. If it were, it would absolutely make FilmoraGo even more powerful! Developers, take note!
Step #10 – Export Your Slideshow
Preview your slideshow, make some fine-tuning, and once you are happy with what you have, export and save your slideshow! Click on Save from the right menu of the main screen and wait until FilmoraGo exports your slideshow.
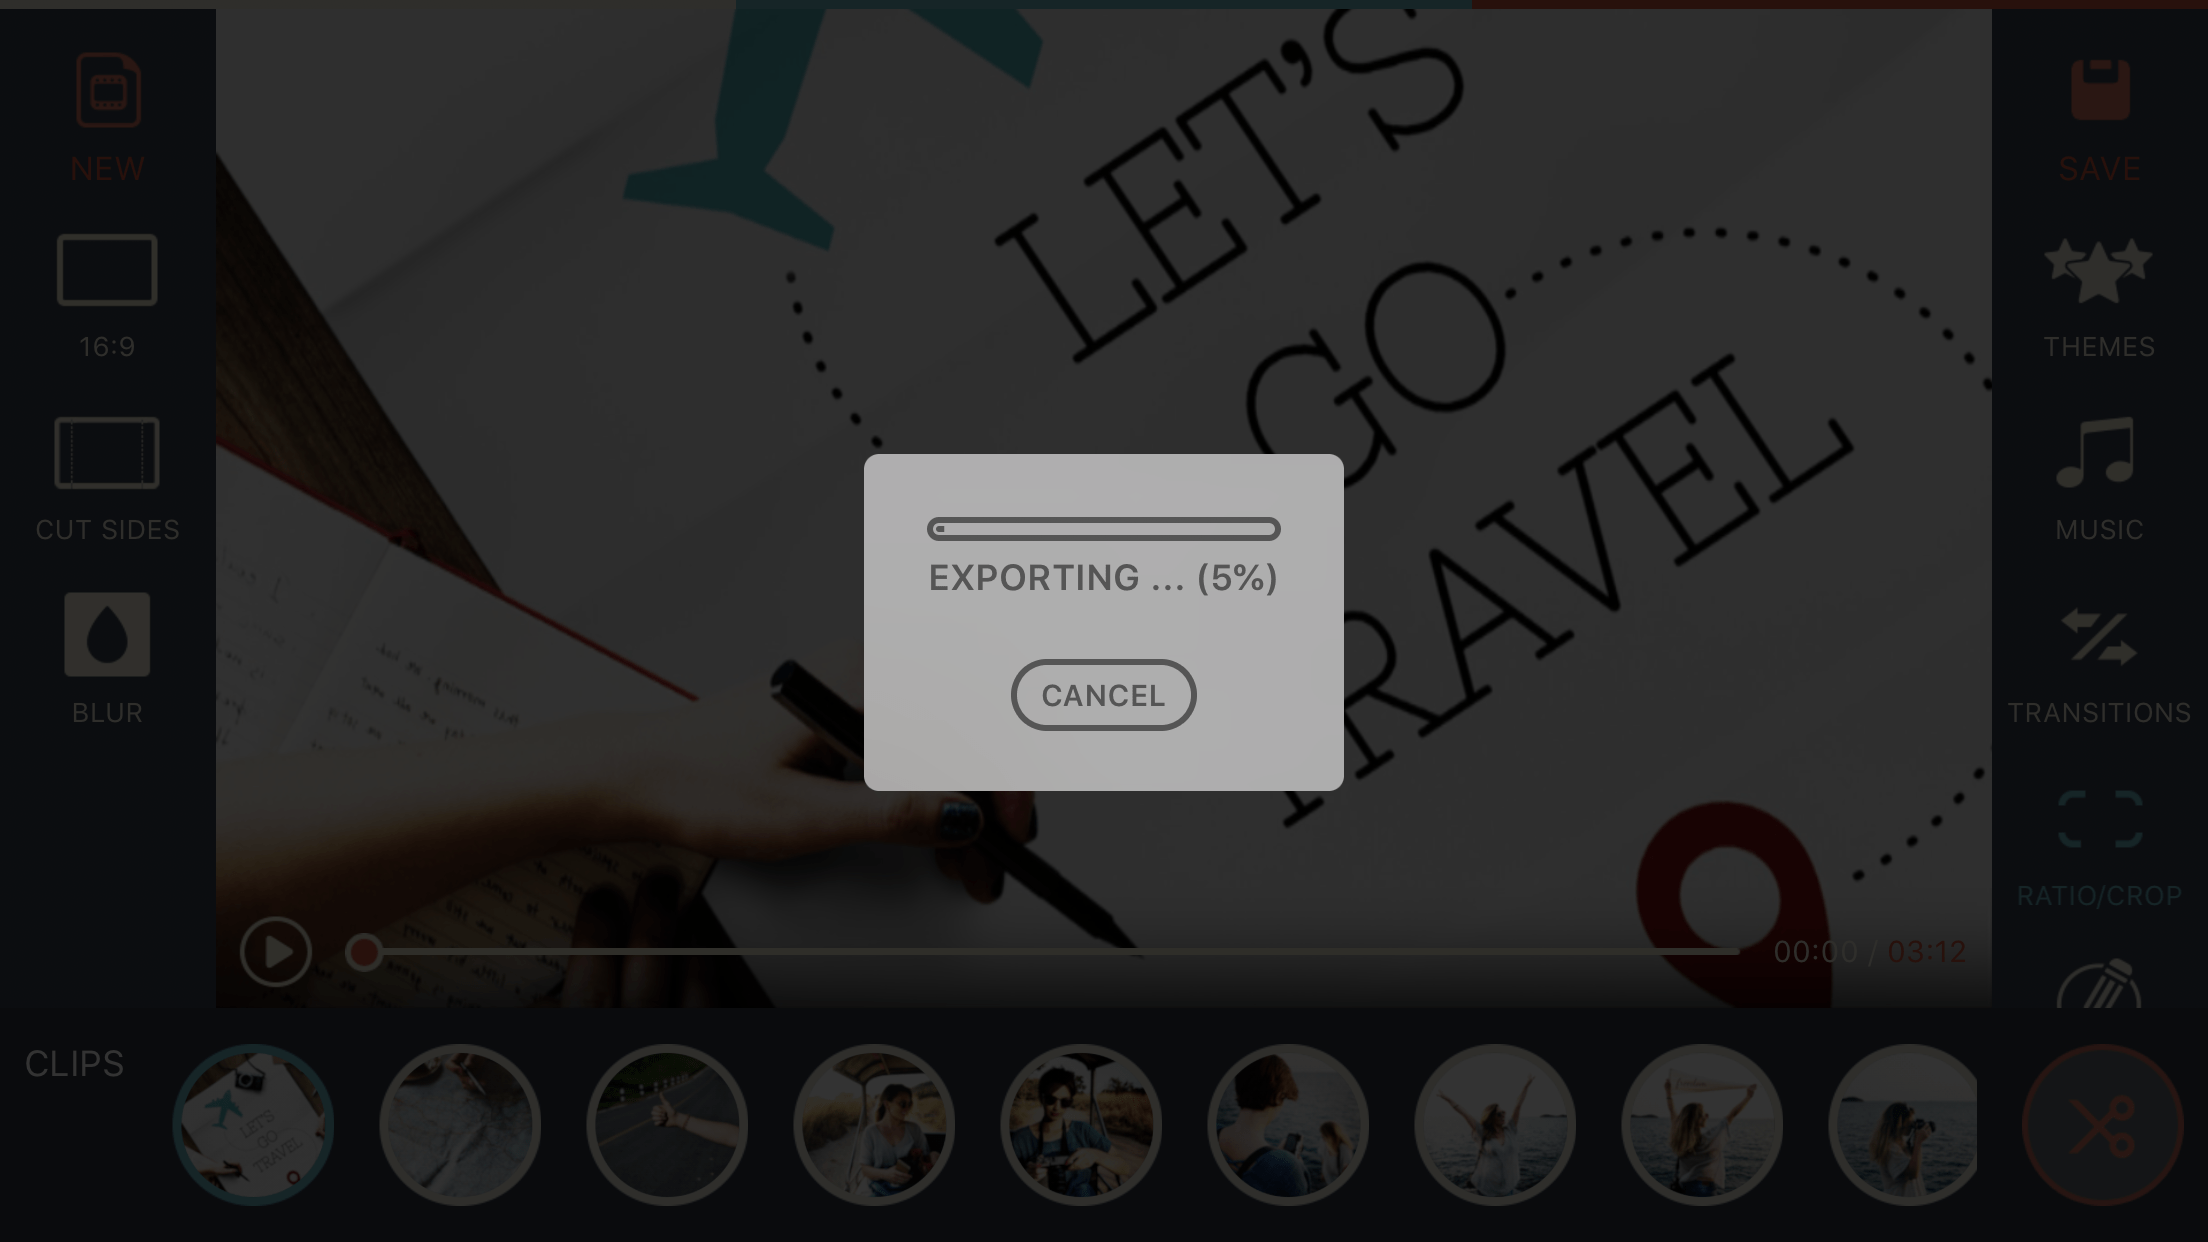
Export and share your slideshow! This is the fun part!
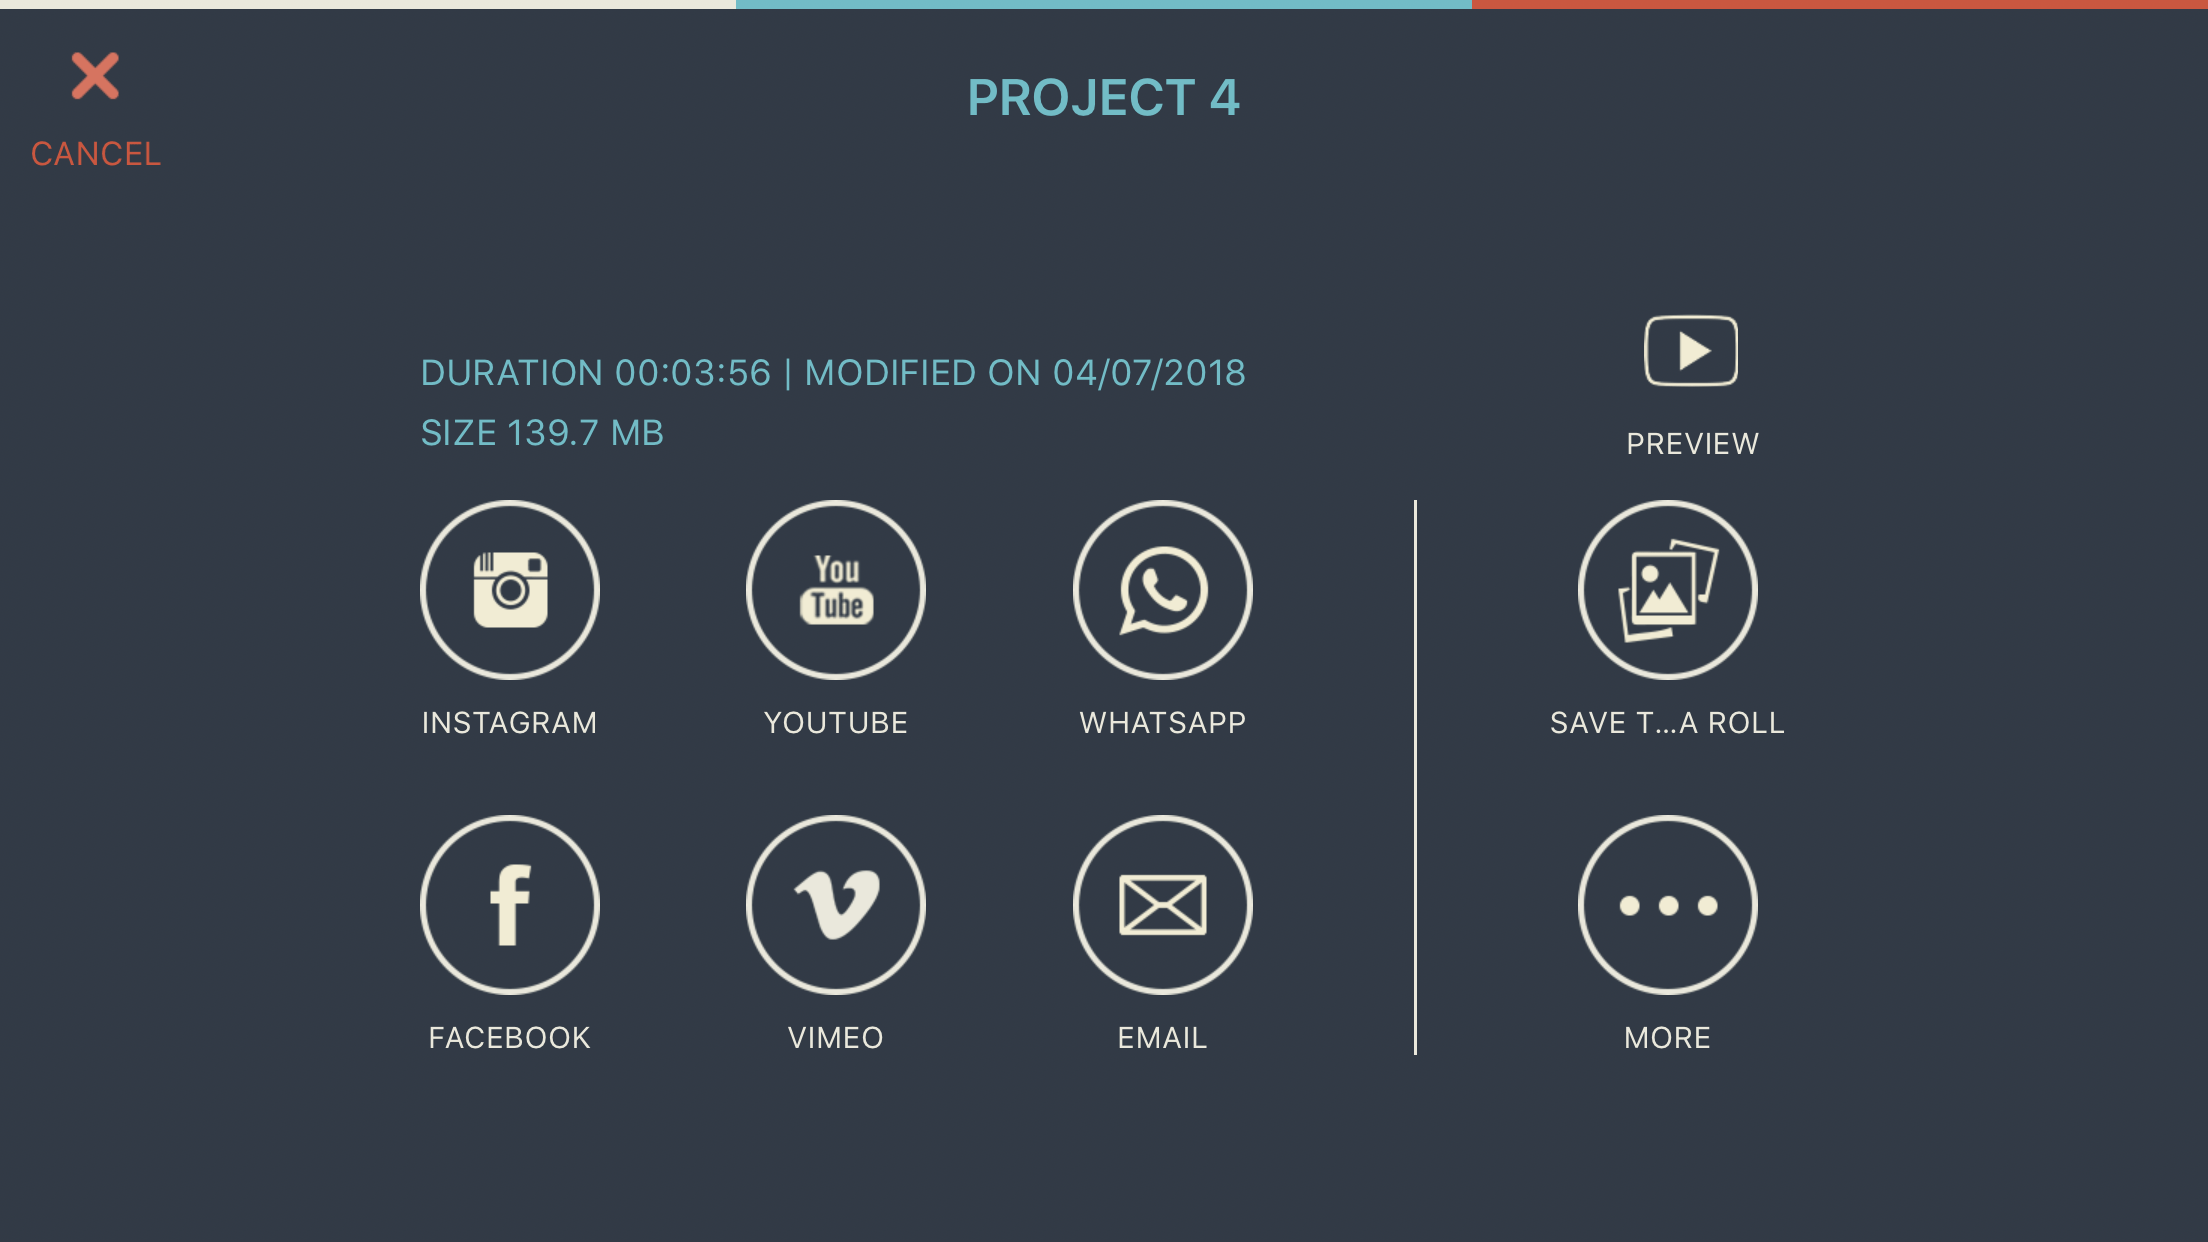
You can preview your slideshow, share it with others, or save it to your camera roll. Whenever I create a slideshow on the go, I prefer to save it on my camera roll first and then share it with others from my phone rather than directly sharing from the app, just to be on the safe side.
Enjoy slideshow experience, anytime and anywhere!
I really enjoy creating slideshows on the go as I can work on them anytime and anywhere. I like FilmoraGo as I can create nice and elegant looking slideshows on my phone easily without much of a hassle for free.
Wanna see how it turned out? Just click play!
Weekend trip slideshow from mind your photos on Vimeo.
Want More?
Interested in some tips on creating powerful slideshows and tutorials on some other video editing tools for your other devices? Don’t forget to take a look at these series of posts and learn more, and stay tuned to learn about further video editing tools and tips to create nice slideshows like a pro!
What say you, readers? Do you like being creative on the go? What’s your favorite app?
Featured Photo Courtesy of Selin Tagmat
Join the Community!
Subscribe to get our latest content by email. You will also get occasional notifications about new sales and promotions.
Please read our Privacy Policy!