This is big. Really big. Which is why we want to cover it. Sometimes you delete something you didn’t mean to delete, and you start to panic. Is there a way to get it back? you think… Have I lost it forever? With this new blog series, we’ll attempt to answer the most common questions you’re faced with when files go missing, starting with your computer’s recycle bin. Let’s do it!
Deleted Photos? Yes, There’s Hope!
Hopefully you’re reading this blog post leisurely and not in panic, but if you are, take a deep breath… and then some notes. We have all deleted something accidentally at some point (which is why I have a whole blog post series on creating backups). What if the file you deleted by accident is a cherished photo? Is there hope? Can anything be saved? I’m here to tell you that yes, there is hope. In many cases, something that you have deleted from your recycle bin (trash) can be recovered. Is it easy? Somewhat. With the right tool.
First, Can You Restore?
It may sound obvious to my more advanced readers, but let’s start by pointing out that you can restore files from your recycle bin (trash) by clicking on the file (inside the bin) and then selecting the Restore option. This is what the recycle bin is for – sometimes you change your mind, and if you do, you can bring your file back to where it was originally stored.
If you’ve already emptied your recycle bin, maybe without checking the contents, you can still recover, but it’s slightly more difficult. You’ll need a good software, and I’m going to share my favorite one with you in a bit.
Second, Do You Have a Backup?
Before we move into the next step of trying to recover your photos, you want to see if you have a backed up version somewhere else because that’s a lot less stressful, at least most of the time. If so, see if you can access that version of your file. If not, you need to start backing up a.s.a.p. because it is the simplest way to never have this type of OMG-I-think-I-made-a-mistake problem.
You need to have a clear backup strategy. One that you have planned, analyzed, implemented, and tested. Besides having a whole blog series available on that here, we have a backup strategy template available for you to purchase here, so you won’t have an excuse going forward to not think about this. But I don’t want this to be a long I-told-you-so speech, so let’s get back to the problem at hand.
What Actually Happens When You Delete?
Let’s first go over what happens when you delete a file permanently from your computer: When you remove a file from the recycle bin (trash), the computer doesn’t necessarily delete the file itself. It deletes the reference to where that file was stored on your computer’s internal hard drive. That means that the file itself isn’t gone; it’s just inaccessible to you. Huh? I hear you asking. Yep, it’s a little technical, but basically the computer kinda just forgets where the file is rather than throw it out. Think of it as a broken link, i.e. when the link is broken, the computer can’t pull up the file anymore.
But here’s the thing. The deleted (and now invisible) file is only recoverable until new data overwrites it. When you delete, you’re basically telling your computer that the little storage bin it used for that file (Yes, I imagine little bins! lol) is now available for use with new files, and once your computer has put something new in that bin, it’s game over (unless you’re really into data forensics). This is why you have to try and recover your files as soon as possible. Like immediately.
What to Do if You’ve Deleted Files By Accident
As soon as you discover the mistake, you want to take action. First, stop saving new files to your computer. This will lessen the probability of overwriting the inaccessible file you need to reach. Next, download a recovery software. I have tried a few different ones over the years, but some time ago, I got the opportunity to try out Stellar Recovery Software ($39.99/year). Fortunately, it was just for *fun,* but since I loved it so much, it’s become my go-to recovery software to recommend.
You’re probably thinking “isn’t there a free way to recover permanently deleted files?” Actually, yes. There are free programs out there, and you could even do a manual command prompt from safe mode, but unless you know what you’re doing, I wouldn’t recommend tinkering with that. The risk of you messing up more would be too great. Instead, I’d recommend getting a good software and following their directions. It’s not a bad idea to have a solid recovery software on your computer, just in case.
Recovering Deleted Photos with Stellar Recovery Software
Here’s how to use Stellar Recovery to scan and recover deleted files from your system:
1. Purchase and Download the Software
You can get it from their website at https://www.stellarinfo.com/mac-photo-recovery.php (they also have a Windows version here). Like I mentioned before, this is my preferred software, but but you can find many other similar programs out there with a simple google search (iSkysoft has a good one too, for example). You’ll want to make sure you pick a reputable solution because the last thing you want when you’re in panic is to get frustrated trying to figure out the software that’s supposed to help you.
2. Install and Activate the Software
You can run a free trial, but you’ll get access to all the features with the full version, so I highly recommend getting that if you’re serious about the scan you’re about to do.
3. Open the Software
The dashboard looks like this:
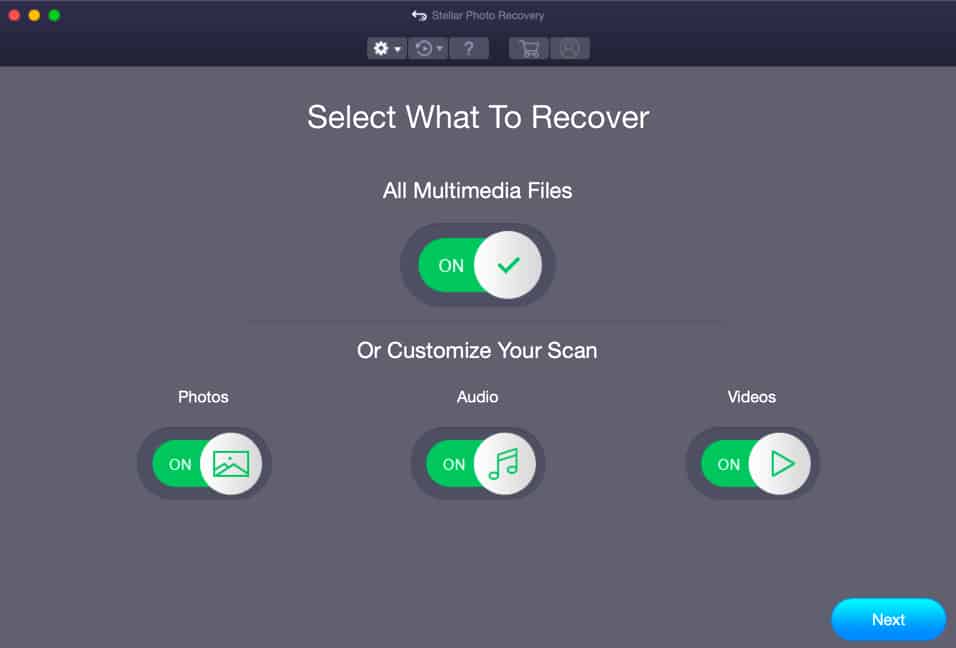
It’s pretty straightforward. You can customize your scan or look for all multimedia files at once. The more you select, the longer it takes though.
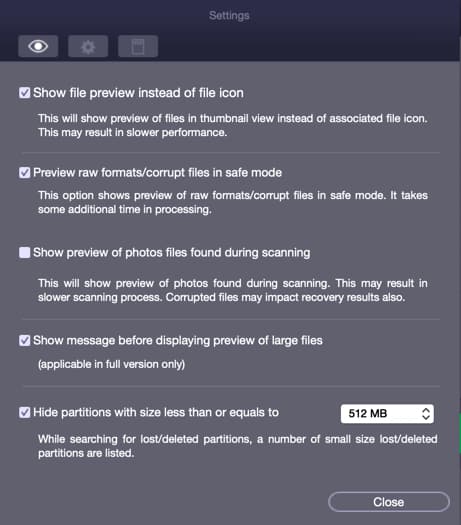
4. Check Your Settings
Before actually running a scan, I recommend checking your settings to make sure they’re set correctly, mainly in terms of showing previews and opening large files. By default, most options will be checked, but adjust as needed.
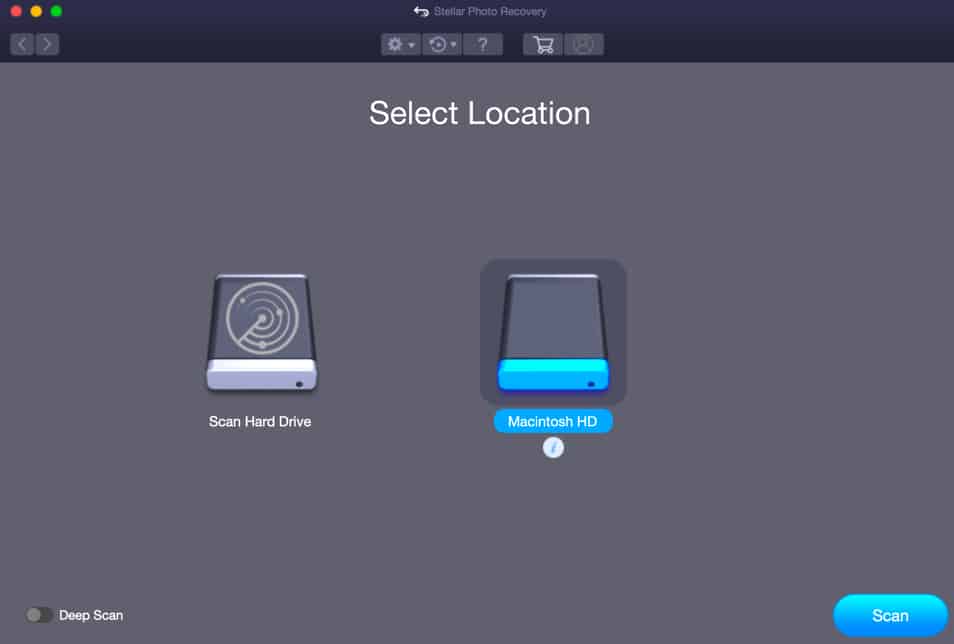
5. Select Which Drive To Scan
In the next screen, you’ll get to choose which drive you want to scan. If you have multiple, select the one you need by clicking on it, and then “Next.”
6. Disable and Reenable the SIP, If Needed
If you’re running MacOS Mojave or High Sierra, you’ll need to disable the SIP (System Integrity Protection) to allow the software to access certain directories. This won’t harm your computer; it’s just a temporarily override to let the software see and access the files that are there. You can enable this protection again when done.
To do this:
- Reboot/Restart your Mac in Safe Mode. To do this, hold down [Command + R] until the Apple logo appears and then boot into recovery mode.
- From the Utilities menu, select Terminal, and type the following command into the terminal: csrutil disable; reboot.
- Hit [Return]. This turns the SIP off.
- Close the terminal app, and restart your system again.
- Run the software again, and continue where you left off (see step 7).
- Once the recovery is complete, you can reenable the SIP by typing csrutil enable in the recovery mode terminal.
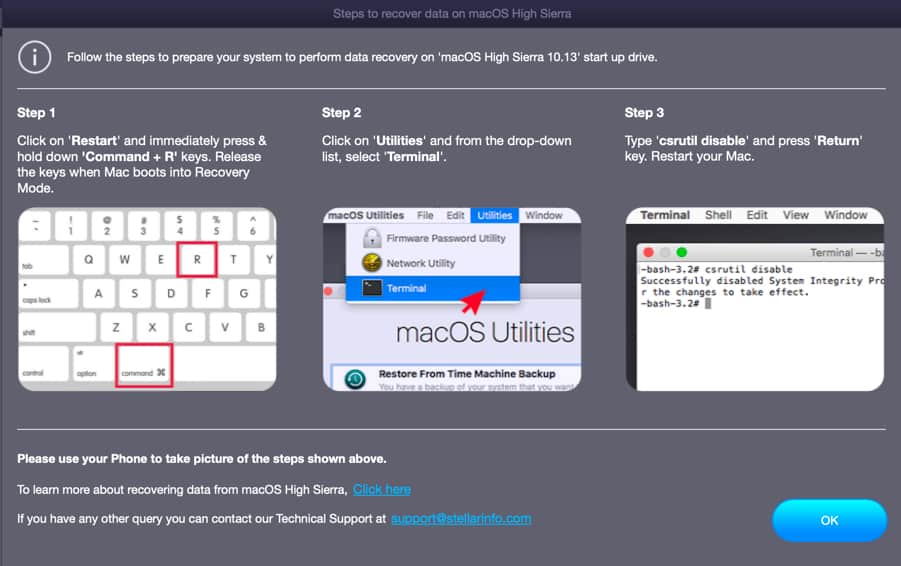
Disable the SIP, if necessary. If you won’t remember the commands by heart, make sure to write them down before rebooting!
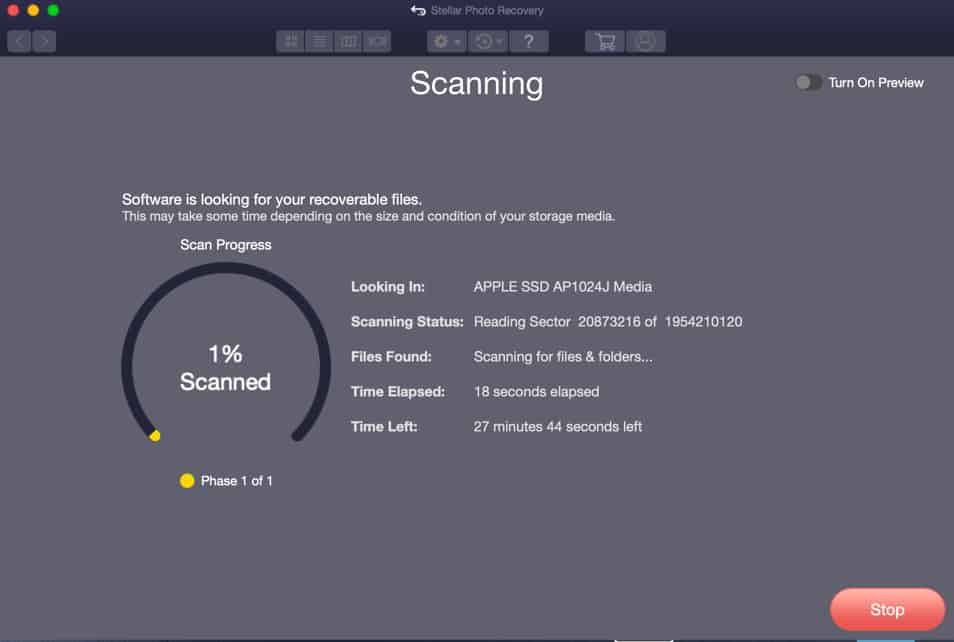
7. Scan Your Computer For Deleted Files
Scan your entire internal hard drive for deleted files. You can always try a quick scan first, but a deep scan will get you the most thorough results. Fair warning: this may take a while, up to a couple of hours or more. Something that’s very helpful is to turn on the preview, so you can see in real time what files the software is finding. You can filter by file type too, which is great.
8. Recover Your Deleted Photos
Finally, when the software is done scanning, you can just click in the list (sidebar) to recover whichever files you want to keep. Simple as that! Hopefully, you’ll find what you’re looking for somewhere in that list! The lists tend to be long, so you have a pretty good shot at it!
If You Optimize Often, You May Be Out of Luck…
I want to mention that if you use some soft of optimization software for your computer, such as Clean My Mac or Drive Genius, then you may be out of luck. Often times that type of software gets rid of all traces of files (because that’s what they’re meant to do). Helper apps like that are great…except for when you make a mistake, so don’t run one if you know you’ve made a mistake. Always try to recover first.

I’m a Perfect Pinnable!
Recovery Recommendation
I hope you never have to run a recovery software ever, but if you do, I highly recommend Stellar Recovery’s apps and services. Not only is the software easy to use, but their team is incredibly responsive and helpful, and they will help you out in times of need! I’ve personally dealt with several of their team members and I’ve always hung up the phone relieved. And that’s what you need when you’re in crisis mode, right? A calm voice at the end of the other line. That’s always what I try to be to my own clients, but it’s nice to know that there are people out there who can help me once in a while. Agreed?
We can’t guarantee that you’ll get your files back, but there’s no harm in trying, so if you find yourself in that unfortunate situation, take a deep breath and reach out for help. Not all recoveries end up successfully, but maybe yours will – it’s worth a shot, wouldn’t you say?
Have you ever had to recover files from the recycle bin? Were you successful? I’d love to know in the comments below! …Hey, that rhymed! 😉
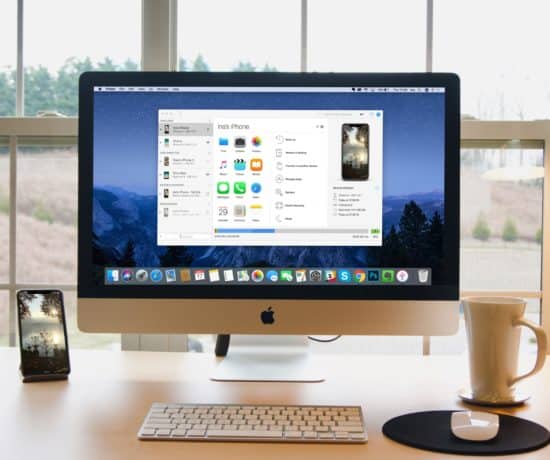
Featured Photo Courtesy of Soumil Kumar
Join the Community!
Subscribe to get our latest content by email. You will also get occasional notifications about new sales and promotions.
Please read our Privacy Policy!