Hopefully you enjoyed our last tutorial on how to quickly restore photos in Adobe Photoshop, but we know that there are some of you out there who are looking for an even simpler way to edit your photos. Perhaps you want to curb your learning curve when it comes to photo restoration, or maybe you don’t want a monthly subscription? If this sounds like you, you’re in for a treat! In this post, we take a look at Vivid Pix’s Restore software, one of the simplest ways to fix your flawed photos…Let’s do it!
What is Vivid-Pix Restore?
Vivid-Pix Restore is a guided photo editing software that provides you with an easy and affordable way to restore your old faded photos with a few simple clicks. You can edit any digital photo, scan, or document that needs a quick touch-up by adjusting settings like brightness & contrast, color temperature, and vividness. It’s important to note that this software will not let you fix tears, cracks, or heavier damage (for that you would need a more advanced solution), but Vivid-Pix Restore gives you everything you need to bring your faded photos back to life. And there’s no learning curve! Yaaassss!
You can purchase and download the Restore software Vivid-Pix’s website, and the software is available for both PCs and Macs for $49.99, which is a steal compared to other solutions on the market. If you’re a fan of ocean photography, you’ll also be happy to know that they also have two additional offerings available: Land & Sea, and Land & Sea Scuba. Great for improving all those vacation photos!

I’m a Perfect Pinnable!
How to use Vivid-Pix Restore
Honestly, we felt like we barely had to write this tutorial because the software is just that easy to use, but for the sake of illustrating it to you, here is it!
Step #1 – Open Restore
Once you have downloaded, installed, and activated the software, you’re ready to get started. Click Select Image in the top left corner and pick a photo you’d like to work on.
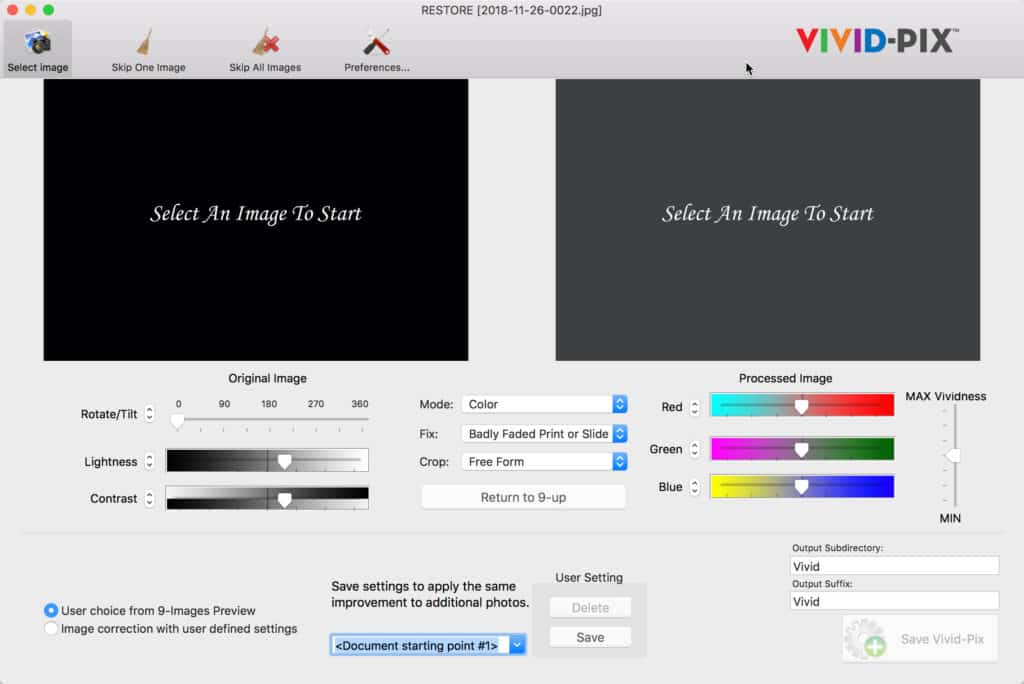
The opening screen in Vivid-Pix Restore.
Step #2 – Select a Restore Option
Before you do anything else with the photo, choose the best restore option for the type of image you have. You can find this in the drop-down menu on the left. Do you have a “faded print or slide,” a “badly faded print or slide,” or a “digital or cell phone camera” photo? The algorithm of the software will show you variations based on the type of photo you’re editing, so be sure to pick what fits best.
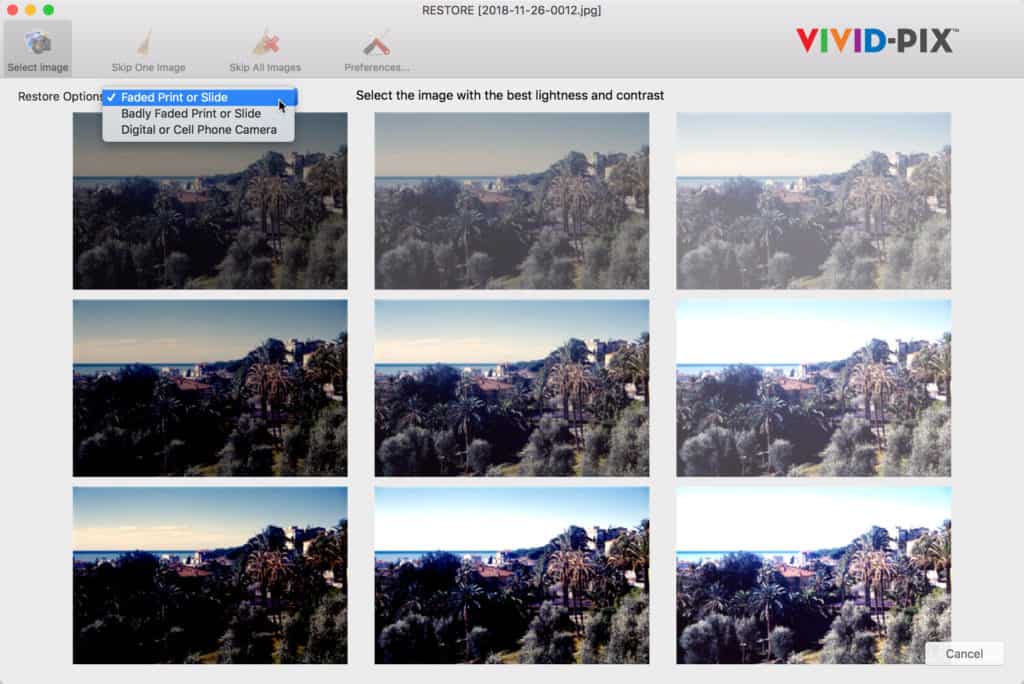
Select your restore option by choosing a setting from the drop-down menu.
Step #3 – Pick The Closest Match to Your Ideal Photo
By default, Restore will show you 9 different versions of your photo with varying lighting and contrast options. Pick the photo that looks the best to you by clicking on it.
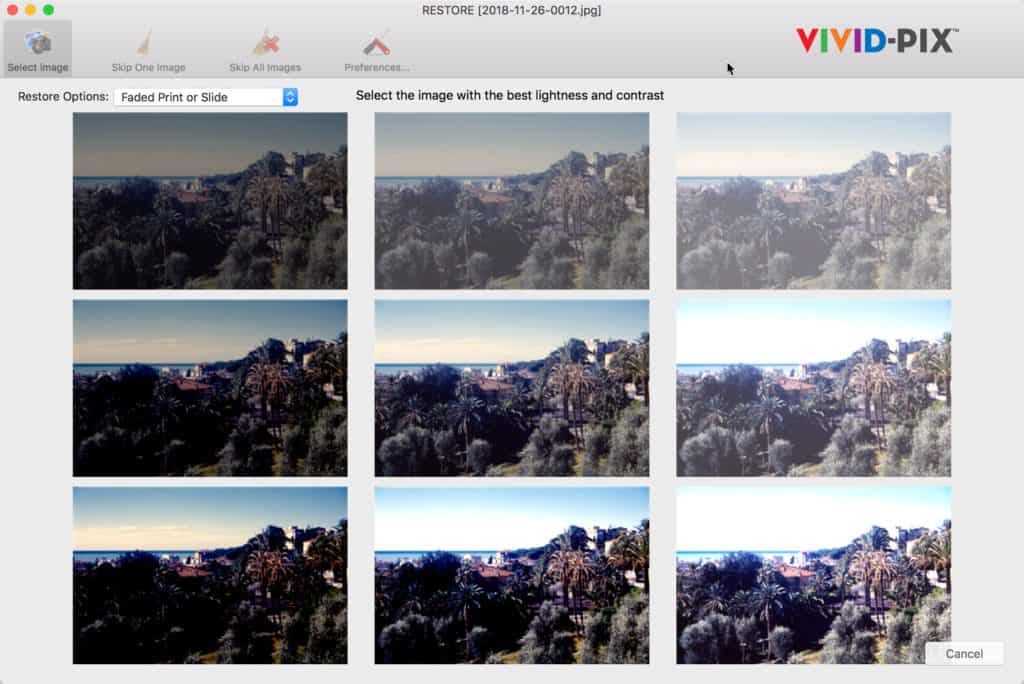
Select your favorite version out of 9 different photos.
Step #4 – Make Finer Adjustments
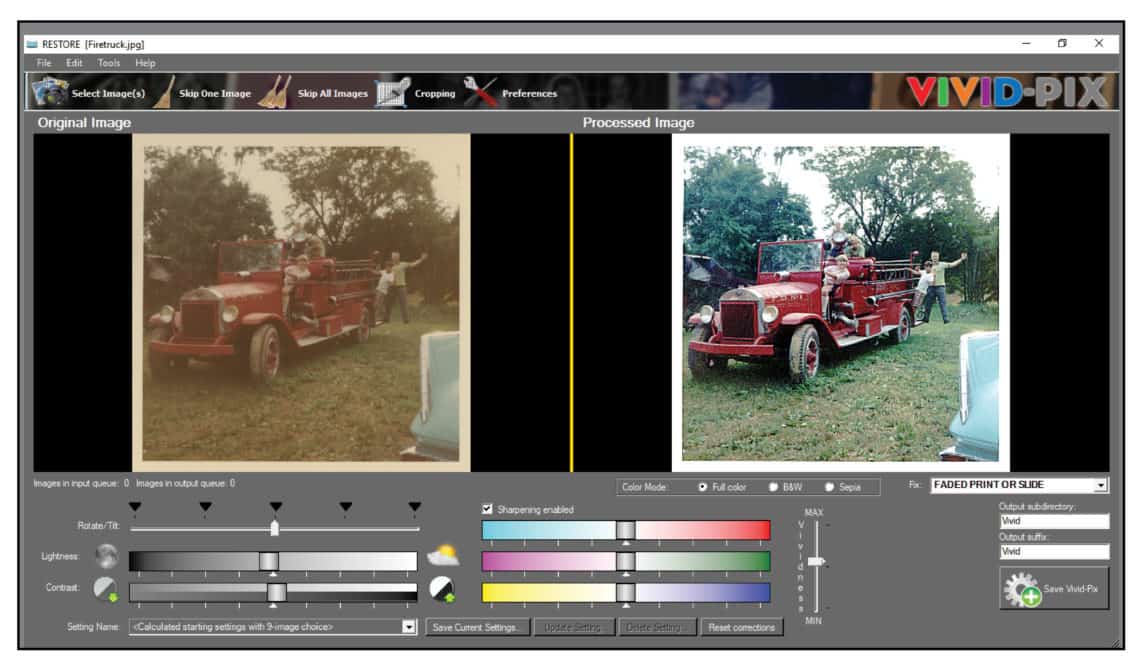
Once you’ve picked the photo that looks good to you, you’ll be shown the next screen. On it, the original photo is shown on the left and the newer edited version on the right. Here you can make finer adjustments, like tilting or rotating the photo, fixing brightness & contrast, changing the color temperature, and so on. Play around with these settings until you’re happy with the result.
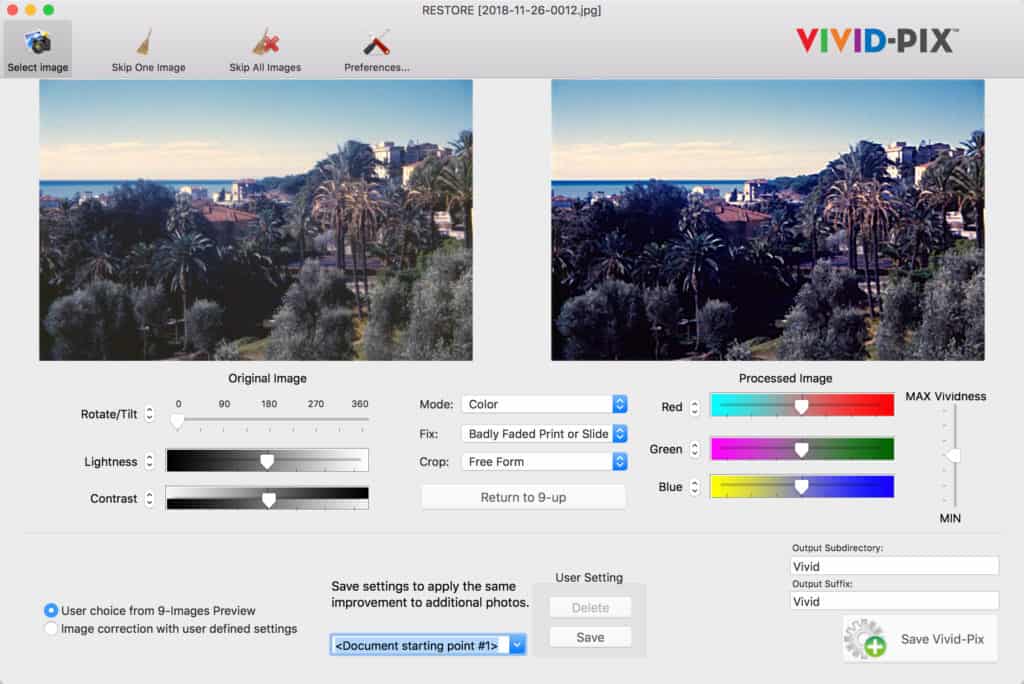
Fine-tune your image by playing around with the settings.
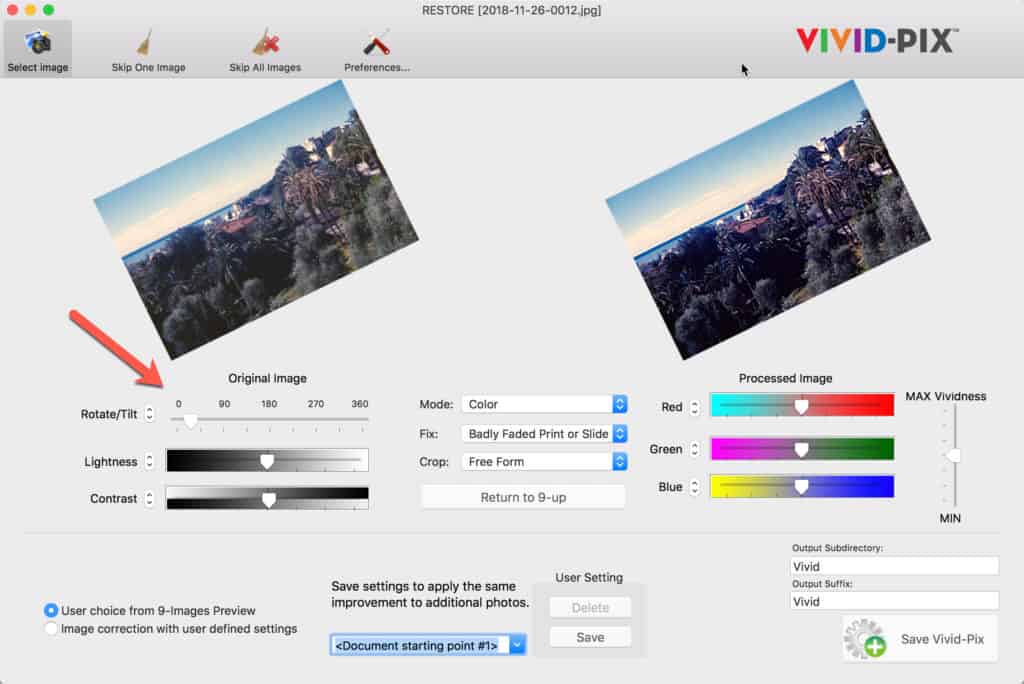
You can rotate and tilt your image if it needs straightening.
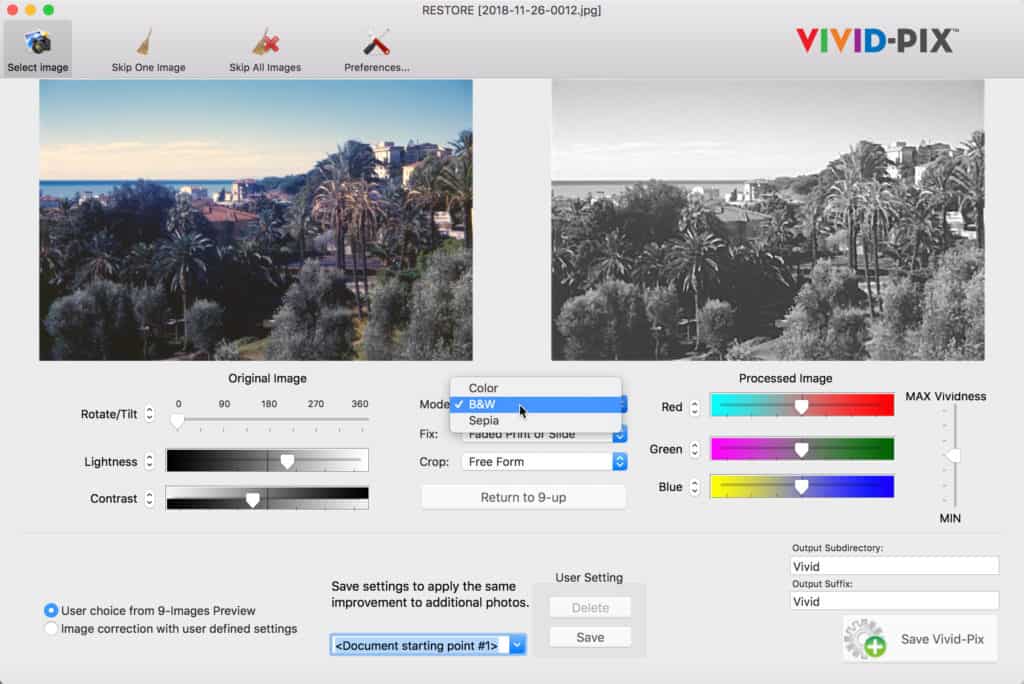
Three different presets lets you pick between color, B&W, and Sepia tones.
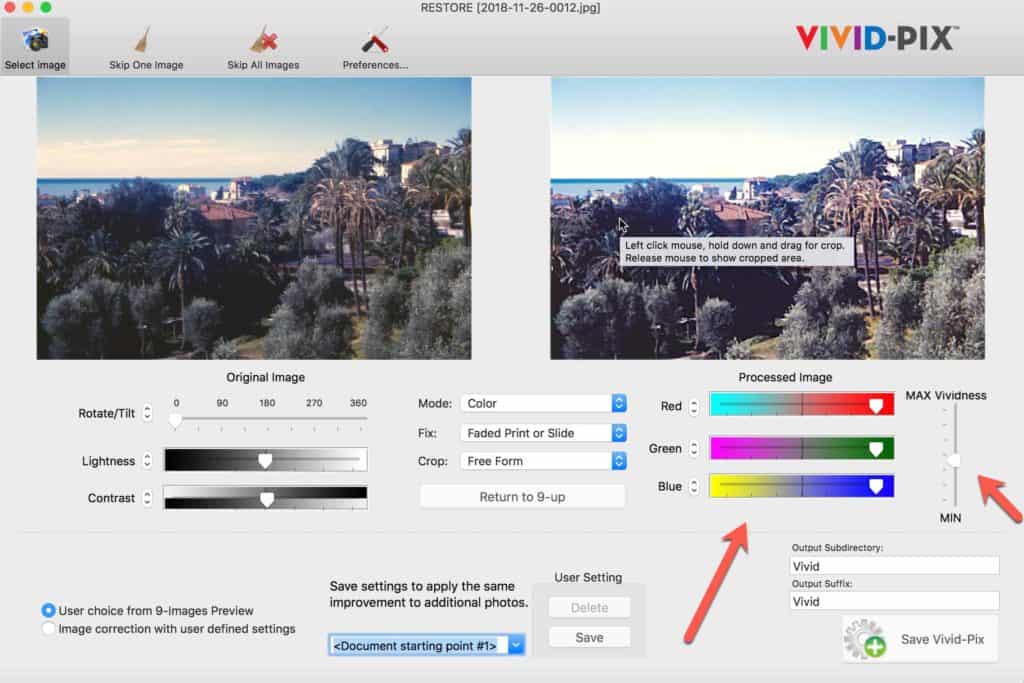
Fix the color temperature and vividness of your photo by adjusting the RGB settings.
Step #5 – Save Your Image
When your edited photo looks good, just hit save and give it a name, and you’re done! Easy, right? By default, you can save full size JPGs, but in the preferences, you can adjust that option to include TIFFs, so no need to convert those quality files unless you want to. In the preferences, you can also adjust the System Imaging Parameters to suit your needs.
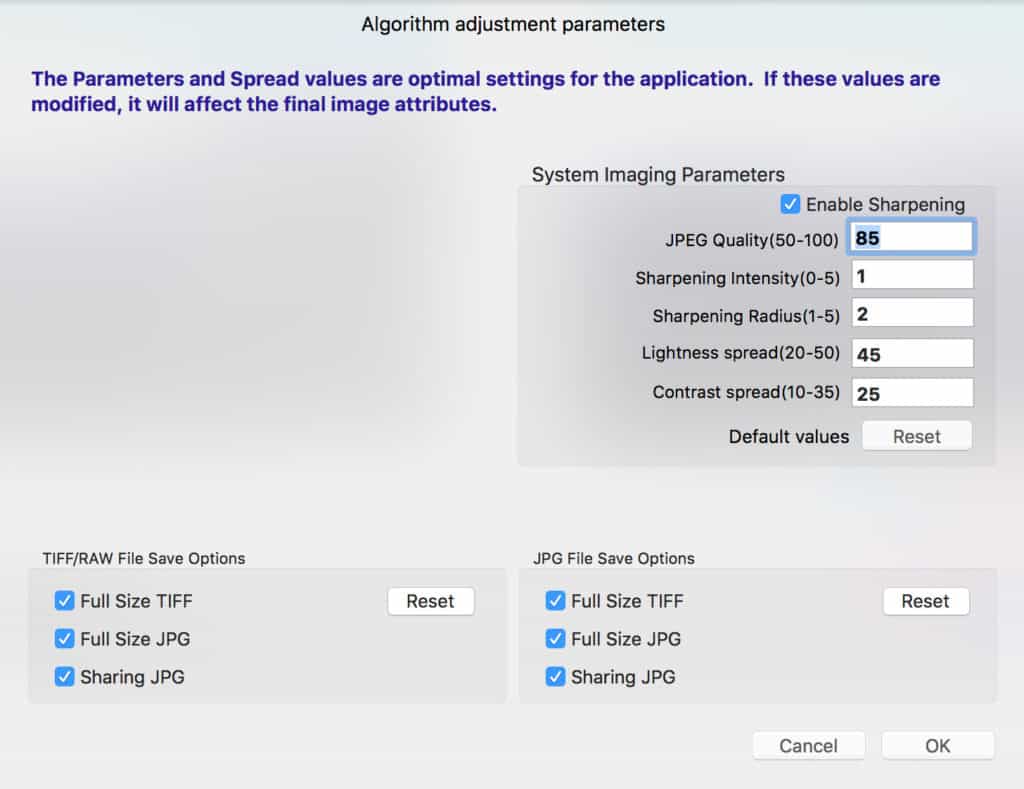
Need to save a TIFF? Enable that option in the software preferences.
Like Your Result? Create Your Own Preset!
One of the best way to works on a larger photo collection is by batching, meaning adjusting more than one image at a time. Vivid-Pix Restore makes this easy by letting you save your latest adjustment into a preset. A preset means that you can save and load a pre-defined adjustment template and apply it over and over again to different images. This is a huge time-saver, and a great way to pause and pick up where you left off. Using a preset will help your edited collection look consistent because you will be adjusting the images the same way.
You can create your own preset by adjusting a photo, naming the preset and clicking save in the User Settings box at the bottom of the screen. To apply that preset to a new image, select Image Correction from User Defined Settings in favor of the 9-Images Preview, which is the default.

Create your own preset in the User Settings.
Intrigued Yet? Grab a Free Trial!
Vivid-Pix offers everyone a free trial of their software, and it’s good for editing up to 10 photos. #ithinkthatsverygenerous. So what have you got to lose? Download and try out the software today, and let us know how you did! If you get stuck somewhere along the way, Vivid-Pix also has a bunch of great video tutorials for you to watch. Feel free to also comment below or email us and we’ll be sure to help you out!
What say you, readers? Have you had success with Restore? Let us know in the comments below!
Featured Photo Courtesy of Vivid-Pix

